Desert Online General Trading LLC
Dubai, United Arab Emirates
Desert Online General Trading LLC
Dubai, United Arab Emirates


🌦️ Own the Weather: Real-Time Data, Real-World Impact
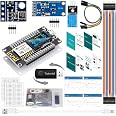
The ESP8266 Weather Station Kit combines advanced sensors (DHT-11, BMP-180, BH1750) with a crisp 0.96'' OLED display and NodeMCU ESP8266 board to deliver precise, real-time environmental data. Designed for IoT enthusiasts and beginners alike, it pulls live weather forecasts online and uploads local sensor readings to ThingSpeak, enabling seamless remote monitoring and smart home integration. Compact, USB-powered, and easy to assemble, this kit transforms your space into a cutting-edge weather hub.


| Standing screen display size | 0.96 Inches |
| Brand | ideaspark |
| Series | Precision |
| Item model number | 8541612567 |
| Operating System | Windows |
| Item Weight | 3.52 ounces |
| Product Dimensions | 5.7 x 3.34 x 1.37 inches |
| Item Dimensions LxWxH | 5.7 x 3.34 x 1.37 inches |
| Color | Weather Station Kits |
| Processor Brand | VIA |
| Power Source | Battery Powered |
| Manufacturer | Generic |
| ASIN | B07GPBBY7F |
| Is Discontinued By Manufacturer | No |
| Date First Available | August 21, 2018 |
R**A
Buena estación meteorológica
Muy buen circuito me llegó muy rápido y con el código aprendí a programar mejor. Fue fácil de construir
S**N
Read other reviews - varying models received
Read the other reviews as there seem to be varying models from this page as the product goes in and out of stock. My model matched the documentation for all of the proper pin outs and setting up the code with the chipsets.Needs on your end to get this working properly:You do need to solder. For my kit this was two sensors.You do need to set up an account (free) on ThingSpeak to have the data logging of all the sensors (the "Weather Instrument").You do need to set up an account (free) on OpenWeatherMap to display local (or wherever you set the area) weather (the "Weather Station").You will need WiFi to connect the device to the internet, if you want to log directly to a service or pull weather information for whatever area you want to display.All in all, I got the kit up and running properly in less than 3 hours, so not bad! A note for ThingSpeak is that the free accounts can log every 15 seconds, where the source provided is set for every 120 seconds. You can change the given to the below:uploadTime > 15000Also, the weather station needs to have location and time, so you'll need to look up on OpenWeatherMap the area and pull the number of what that is, and set your time zone properly.TZ for UTC (negatives should work)OPEN_WEATHER_MAP_LOCATION_ID for the place you are and can be found on the web page when you look it up on that website.
I**.
Very simple, basic weather forecast display
This kit isn't so much a weather station as it is a weather display. While it does come with some sensors, it doesn't actually display any of them. The sensors are pushed to a cloud interface where they can be viewed and used, but the weather is actually pulled from an online forecasting service, and displayed on the little display.The function is OK, there is some extended setup, in a pretty poorly written manual. This project was taken from other, higher quality, online project sites, re-made, and every corner cut possible. The bread board it comes with isn't the one shown, but 2 mini ones to equal a normal half board, the whole things is kind of just for show. It's a neat idea, but has no real function besides displaying the time and forecast on the little screen.
C**
Don’t waste your time!
Directions and steps to follow are vague, was able to program it but did not show any weather data. Tried programming it for the sensors and it got stuck on hard resetting via rts pins and now will not power up. And can not be recognized by pc
J**R
not bad little kit...
All in all, not bad. ESP8266 boards can sometimes be a pain to flash..but after several goes.. all the code landed there. I had to update a library after compile failed, but this was noted in the manual. I followed insttructions and fixedOne thing that needs to be changed. No more forecasting is available without paid API key from OpenWeather. The current conditions are available for free and are read into the canned program, but ideally the script needs to be updated to remove that completely and better leverage the current daily conditions. I see in the github log, WU API was deprecated a while back in favor of OpenWeather. WU dropped this not the vendor. I am guessing that when this code was updated OW had more capabilities. Now it does not. Took a bit of reading to find why the forecast on the unit's screen was completely wrong.I would have thought the sensor data would show up on the OLED out of the box, but it appears to not be the case.You will need a little soldering to put the header pins on the boards, but easy enough.If you do not have everything properly attached the program will continuously reconnect to WiFi. Make sure the OLED board is setup first so you can see what is going on. I had a bad connection on the pressure sensor which caused it 'reboot' looking for it. Once found, it completes startup and runs fine, even if you lose a connection after the fact. So if you see Connecting...and it start to show data on OLED.. and the connects again.. there is a sensor that is not found. You can use Serial Log in Arduino IDE to monitor live and it will tell you what is not quite right. Kudos to team for putting text out on issues..Now to alter the OLED bits to get data to it since forecast is not available.
R**R
Real nice kit. Excellent documentation for the price.
Real nice kit. Good documentation; very good for the price. Lots of thought went into the product. Lots of example code. Documentation had lots of images and links to everything needed. Not fool-proof, but that's to be expected with an arduino-y kit. I had a breadboard with a couple shorted pins internally, and that stumped me for a little while. I figured it out and got it working exactly as advertised. Now, I have been customizing it for my purposes.
C**Y
Absolutely awesome project
I bought this for my kids with the intention of just giving it to them and letting them play around but I actually took it for myself and I had a lot more fun messing around with it putting it together and getting everything to work the way that I wanted to so that way I could use it as another payload system for my rocket That I would send up into the atmosphere and let it collect atmospheric data for me
A**.
Important to use old Arduino Libraries
Kit works great but must use older arduino libraries.I attached images of my platformio.ini, directory structure, and what other libraries I had to use to get it working.Once the kit is fully up and running you'll notice that the screen shows OpenWeather data and ThinkSpeak shows the actual sensor data.
Trustpilot
3 weeks ago
1 week ago