Some deliveries may take a little longer than usual due to regional shipping conditions.

DOWNLOAD THE APP


Customer Services
Copyright © 2025 Desertcart Holdings Limited
DOWNLOAD THE APP


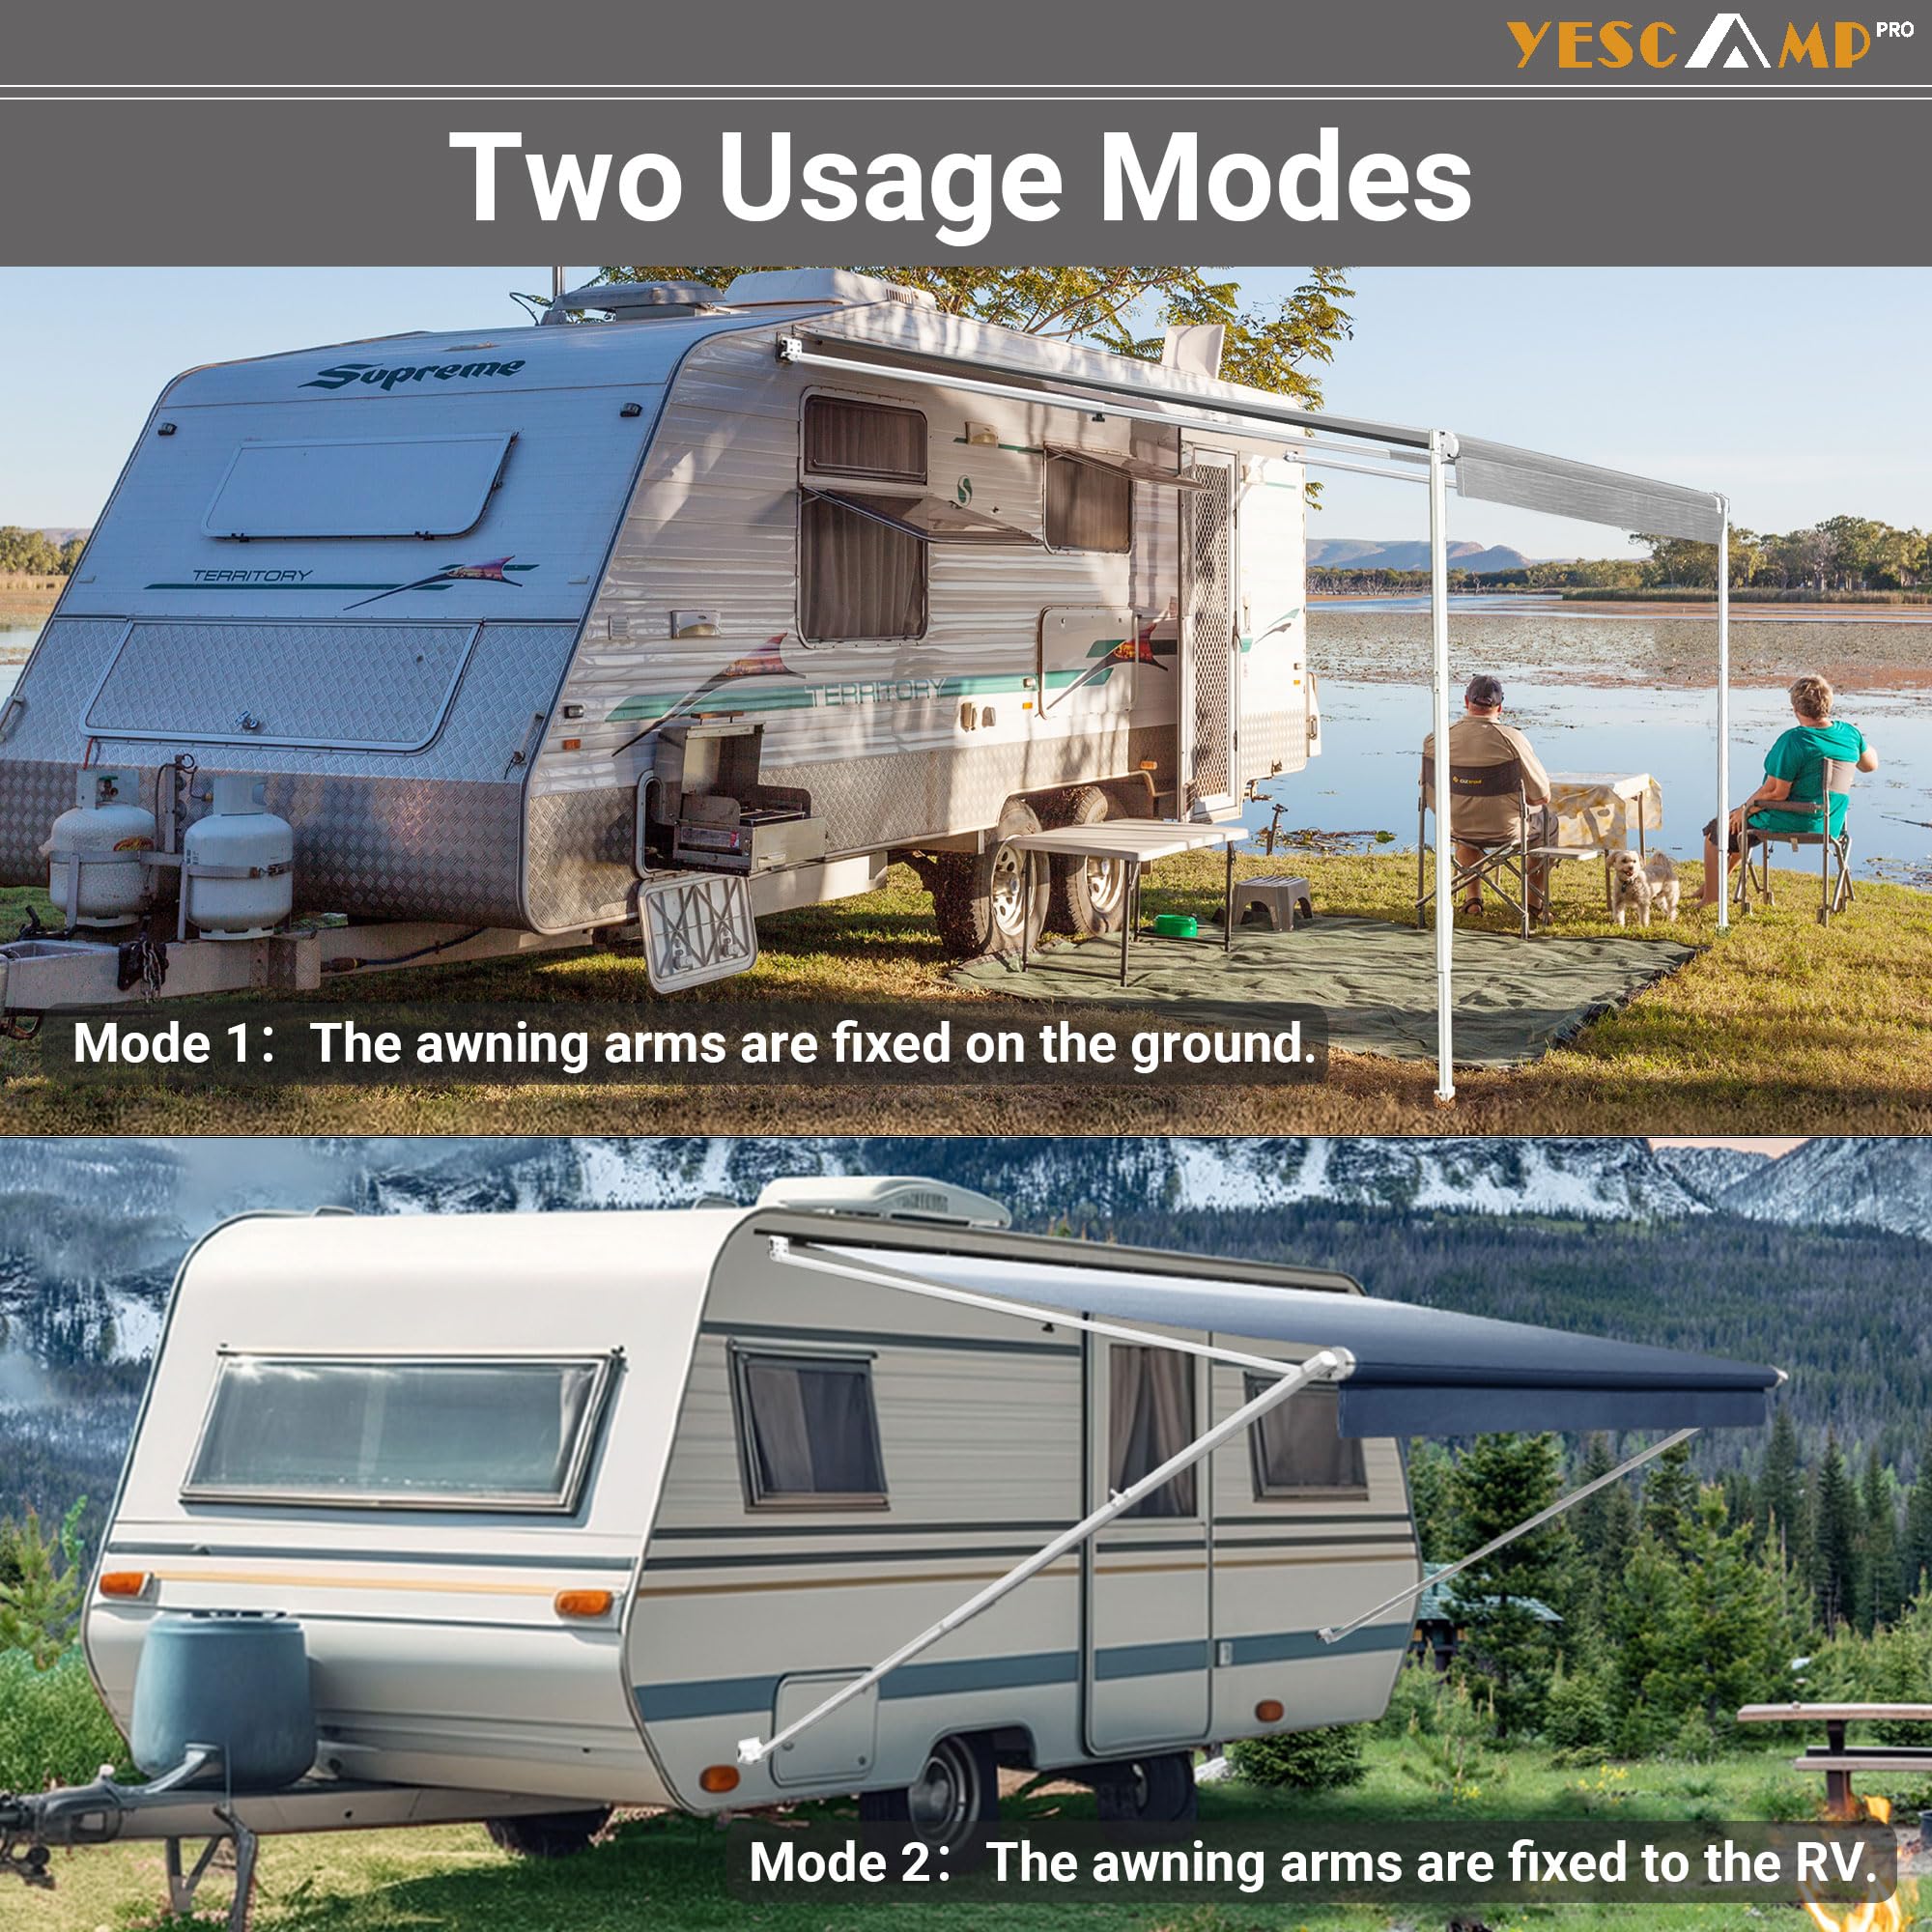

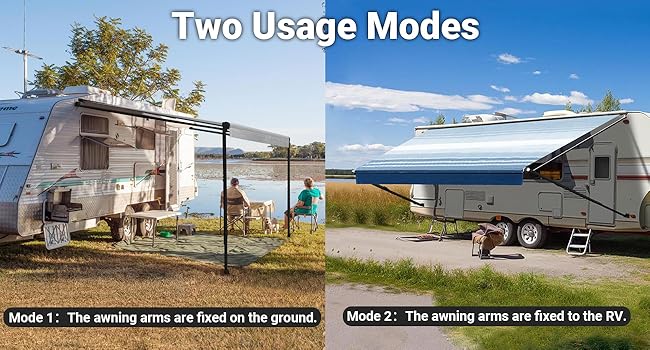
🌟 Upgrade your RV lifestyle with shade that works as hard as you do!
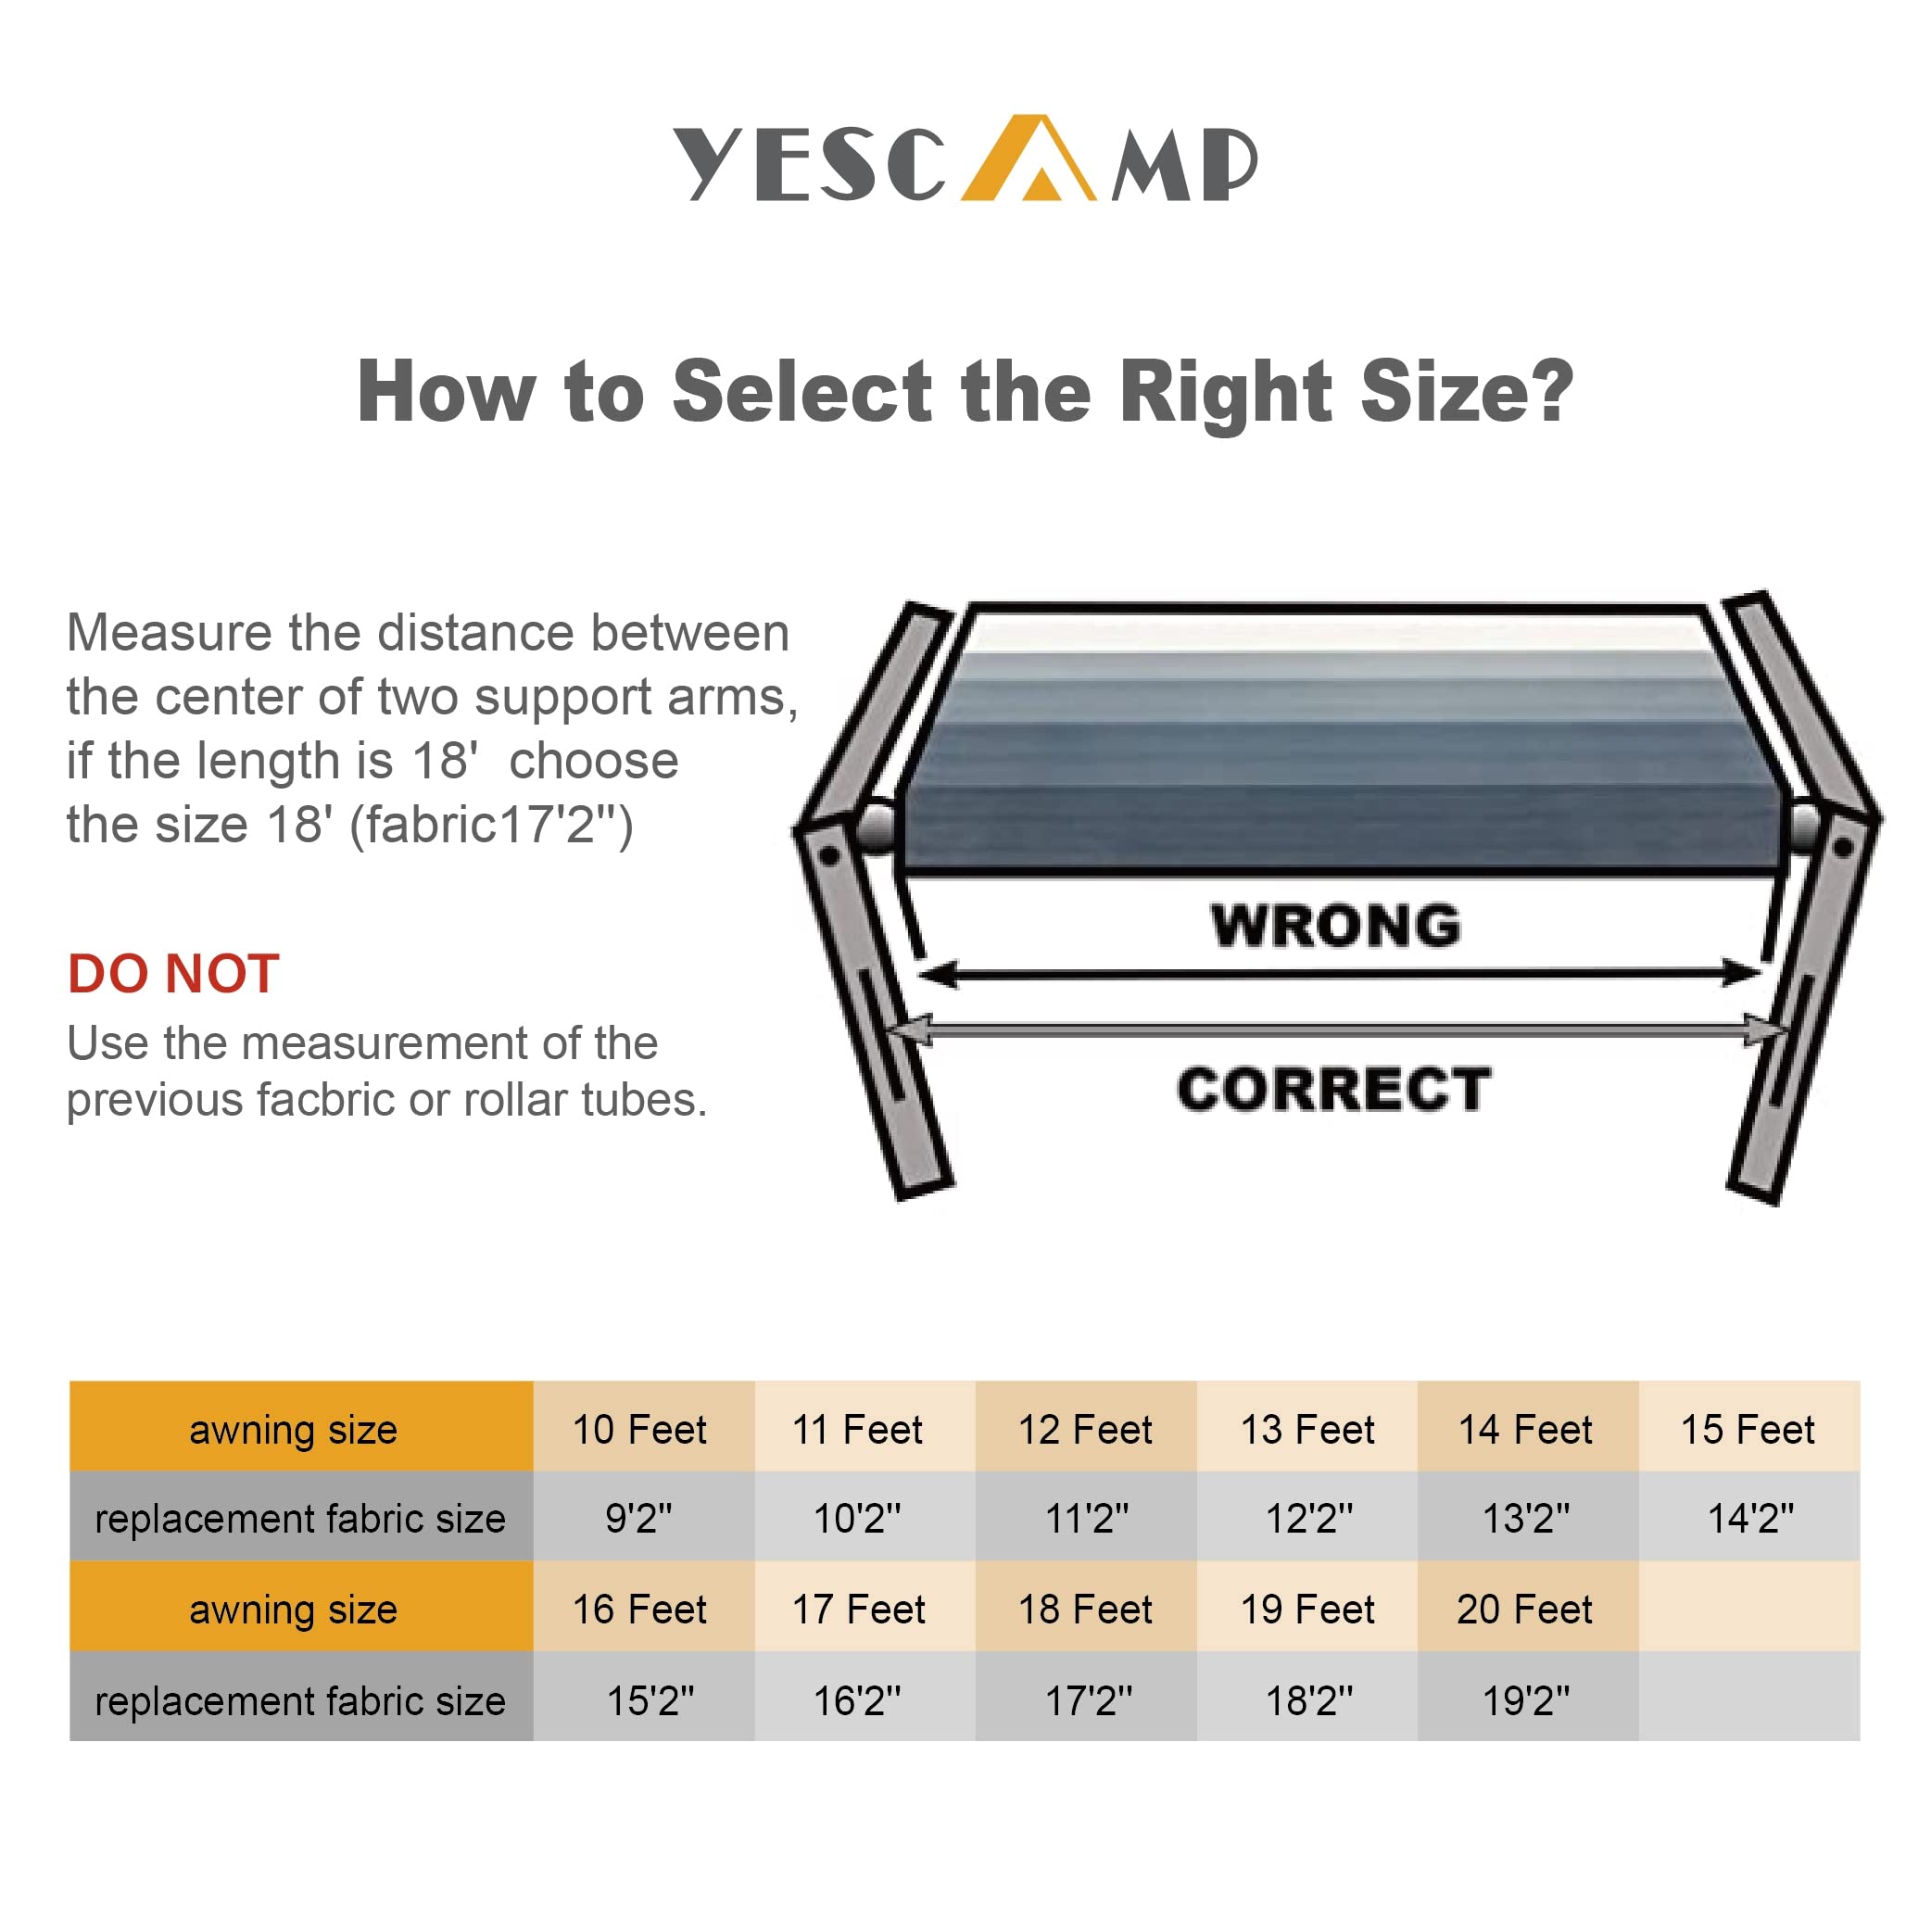
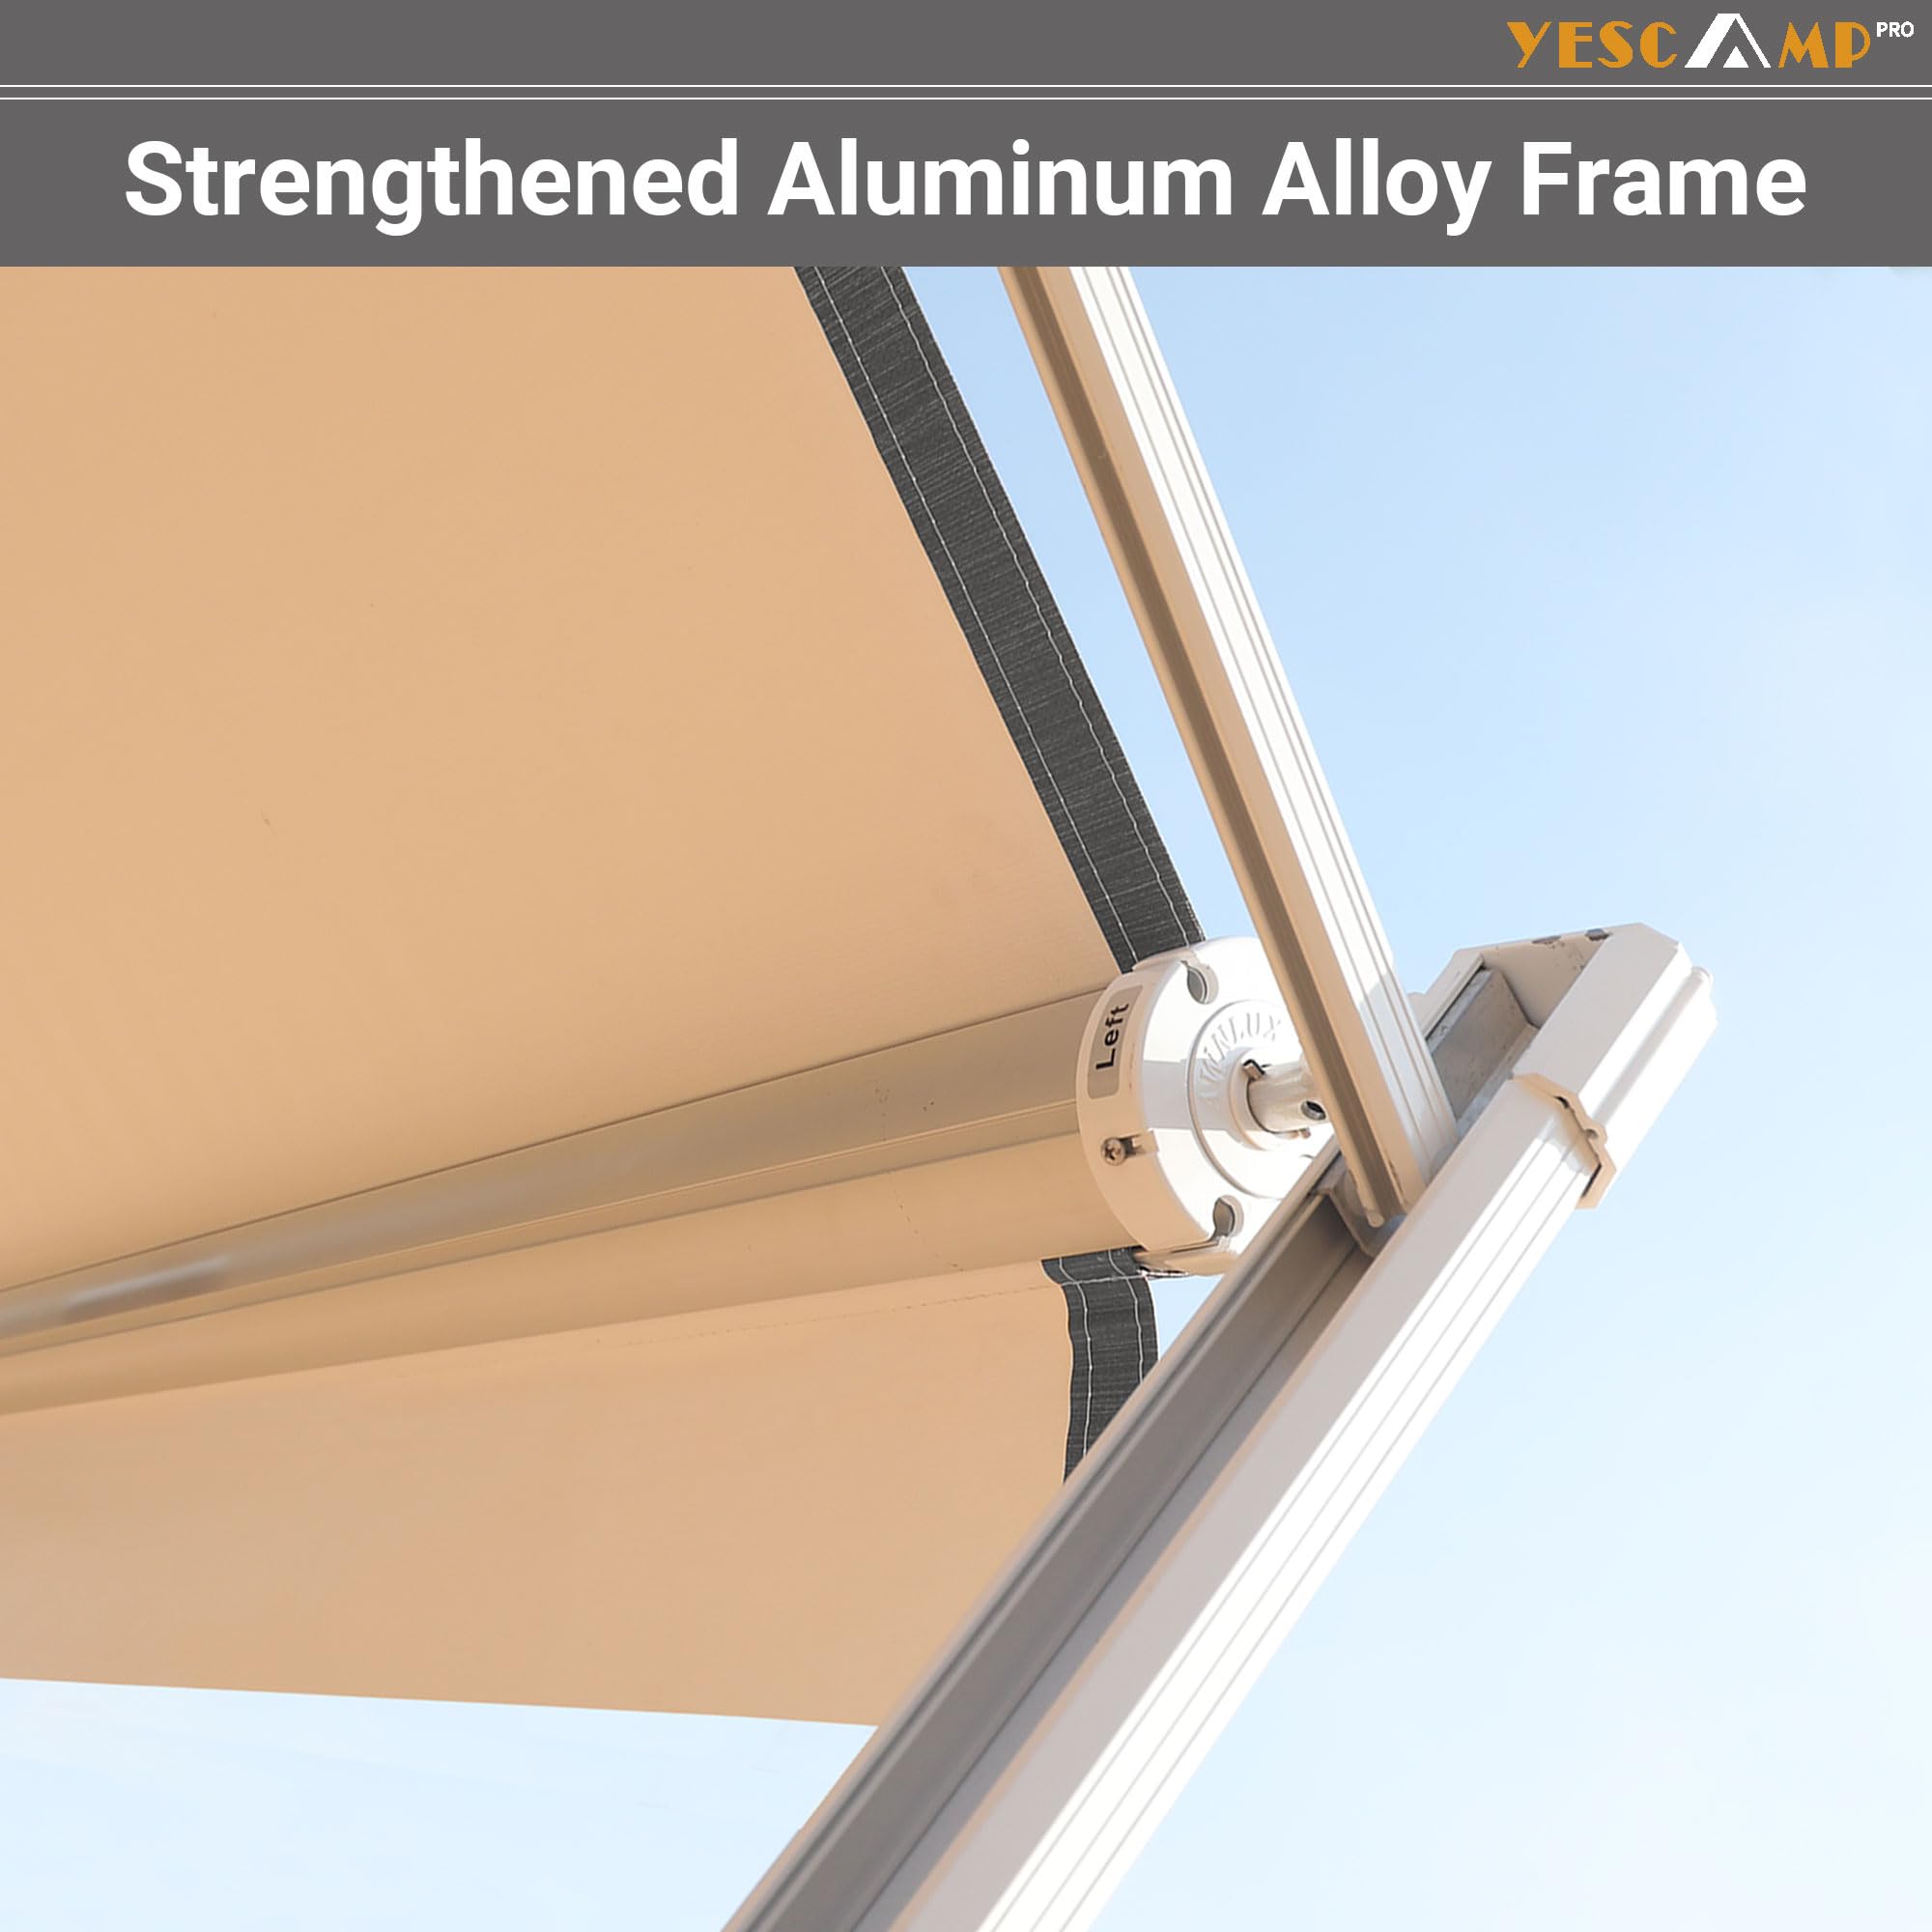
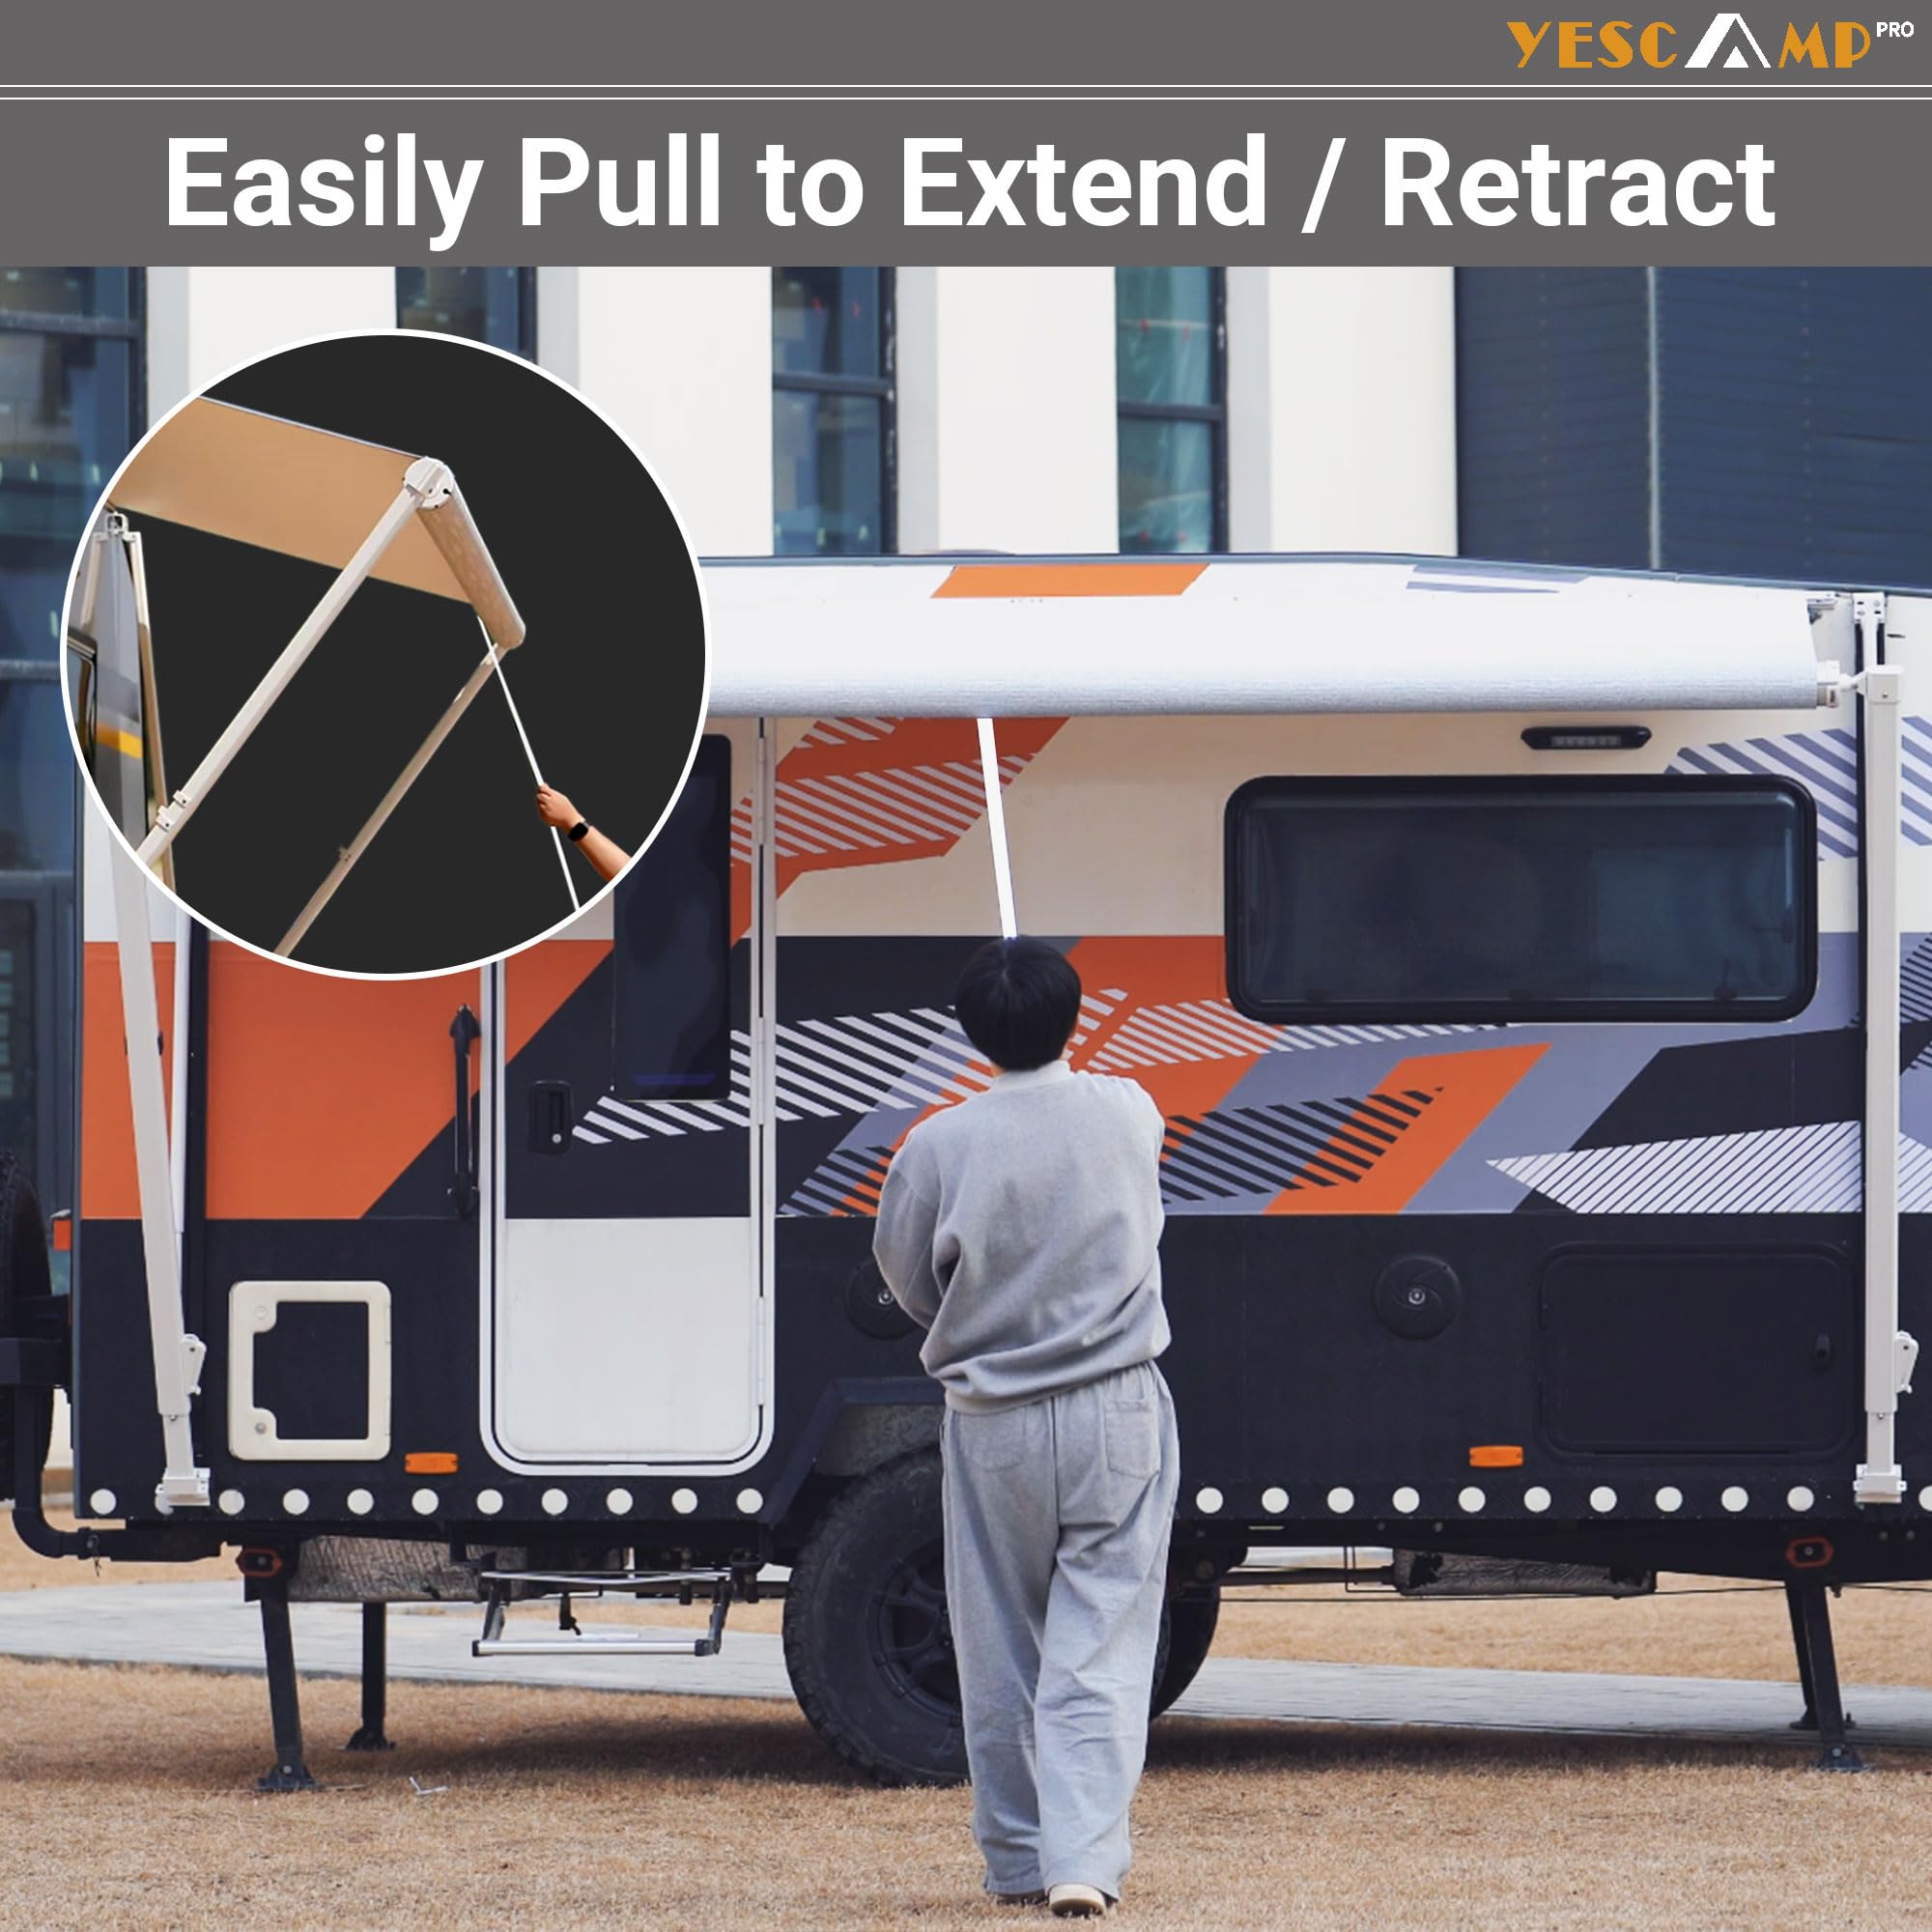
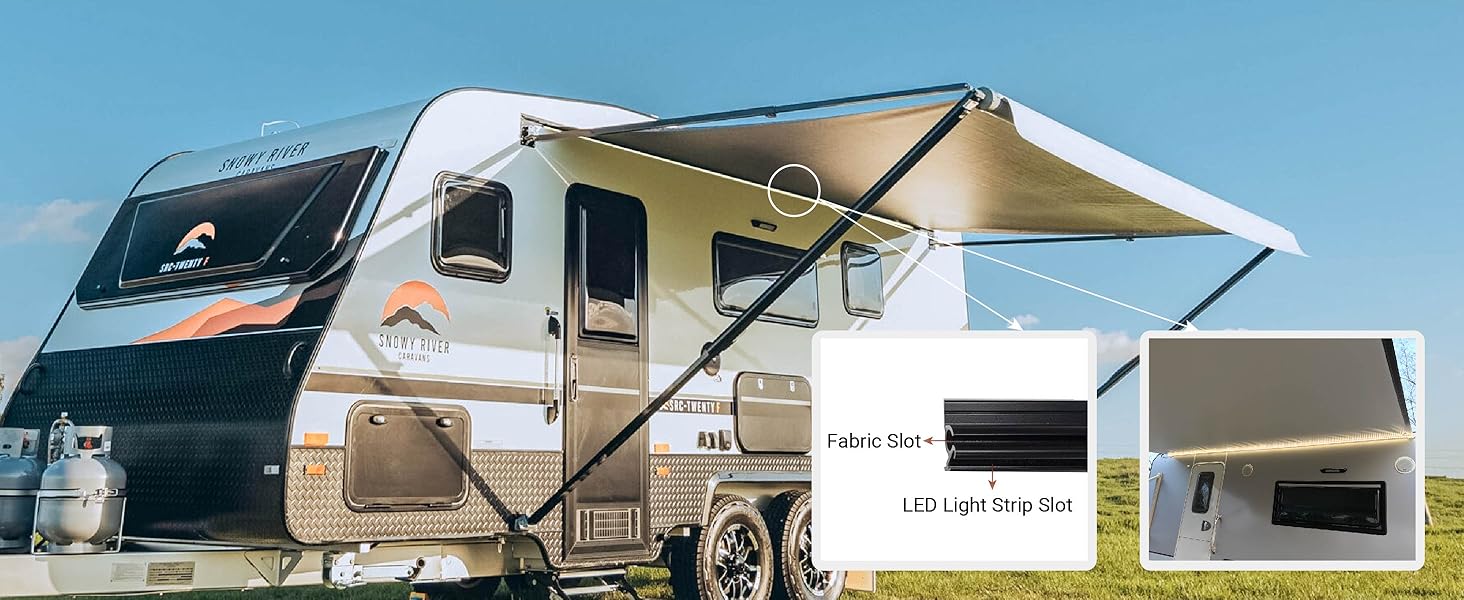
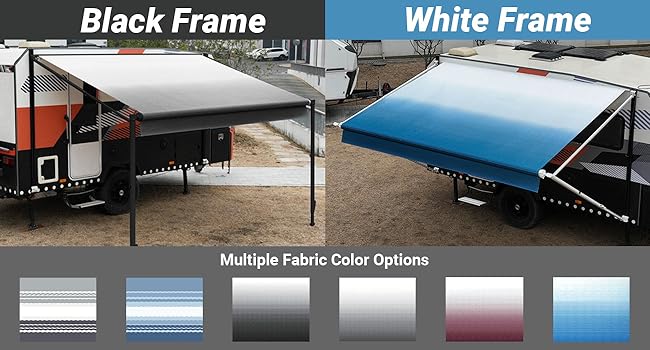
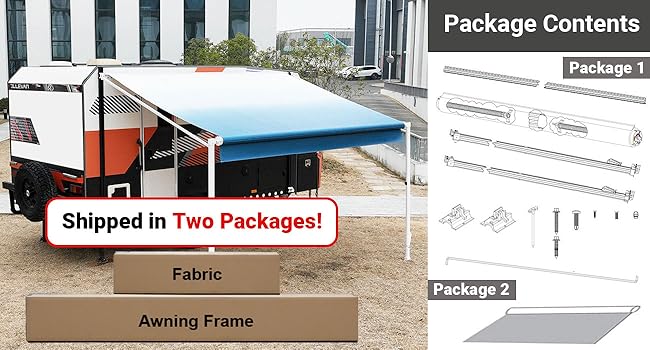
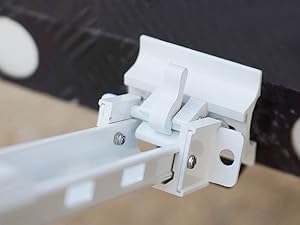
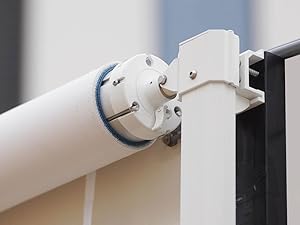
The YESCAMP Manual RV Awning is a 17-foot retractable awning featuring durable 16oz waterproof vinyl fabric and a sturdy aluminum frame. Designed for easy manual operation without electricity, it includes a slot for customizable LED strips and comes as a complete installation kit. Available in multiple sizes and colors, it offers a perfect blend of functionality, style, and durability for RVs, trailers, and motorhomes.


| ASIN | B0FGJ3Y6WN |
| Assembly Required | Yes |
| Best Sellers Rank | #189,882 in Automotive ( See Top 100 in Automotive ) #55 in RV Awnings |
| Brand | YESCAMP |
| Color | White Frame-Blue Fade |
| Customer Reviews | 4.6 4.6 out of 5 stars (65) |
| Date First Available | July 3, 2025 |
| Item model number | 5600 |
| Manufacturer | YESCAMP |
| Manufacturer Part Number | 5600-W-2004-17' |
| Material | Aluminum |
| Model | Manual Retractable RV Awning Full Set (17Feet,White Frame-Blue Fade) |
| Product Dimensions | 12.4"D x 70.9"W x 9.4"H |
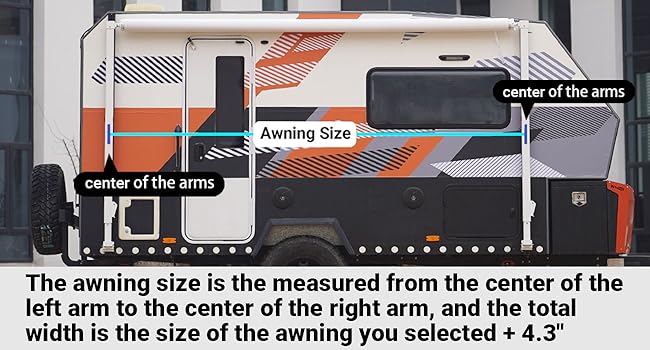
| Size | 17Ft (16'2" Fabric) |
J**E
Great Fit, Excellent Quality
I had a camper trailer repair guy install this for me. He had two guys on it, and it took them about an hour to put it on our vintage trailer. The repair guy said he was impressed with the quality of the parts and the ease of the assembly. The awning fit perfectly for my trailer, and we ended up loving the quality and color of the awning. It provides excellent shade and I feel like it will last a long, long time. I would buy again.
R**S
Perfect replacement for worn out 11' Dometic awning
We are EXTREMELY pleased with this awning assembly. We purchased the 11' version (measured from center-to-center on the arms) to replace a 13-year old Dometic brand of the same size. The old awning fabric had deteriorated and the spring/ratchet system was broken, so the entire unit needed replacement. We removed the old awning assembly without incident. My wife and I worked on preparing the new one over the course of a week. It took about eight hours total to get the fabric attached to the roller and rolled up, and the brackets and rail channel mounted to the camper. I was pleasantly surprised to find that all mating parts were clearly marked throughout. We measured to ensure the brackets were in a perfectly square/plumb pattern, although we had to adjust them a little after. I found a laser measure useful for this, taping a cardboard target on one end and using the laser to get my placements exact. This required an overcast day so I could see the laser dot. I recruited a strong friend to help me carry the fabric/roller assembly (heavy!) up two ladders, put into place, and connect it the rail channel and to the arms. This part needs 2 strong people. The instructions were thorough and clear throughout (although the illustrations are tiny) and offered two methods to get the fabric into the top rail. We chose the method of setting the fabric/roller on the camper roof temporarily, tucking the fabric's top sleeve into the rail channel, and pushing the poly cord into one end to expand the sleeve into the rail. Once the fabric roller was connected, we experimented opening/closing a few times and adjusted the bracket locations (there are slots in the brackets for this) until it operated smoothly and then tightened everything down. Any remaining screw holes from the old assembly were filled with silicone sealant. Some tips: 1. Get a metric tape measure. The critical dimensions in the instructions are given in metric. 2. When inserting the polycords (there are three), sharpen the end before inserting, so it doesn't catch on anything on the way through. 3. Unfold your new fabric as soon as it arrives and lay it out flat to get the wrinkles out. We used our garage floor for this. Also stretch out your polycords in the sun and work them by hand to get them as straight as possible. This new awning works flawlessly, and gives the camper a new appearance again.
A**R
It's work
The roller comes in 3 pieces u have screw it together we figured out to tighten outside one then play with the closer ones to get in a straight line then we definitely struggled to get tarp put in groove but we had someone who knew what to do but it was a struggle pushing cord thru the other cords were also a struggle but nice awning
E**.
Nice awning.
Easy to install but having one or two people to help is a plus.
C**D
Great product and service at affordable price!
The awning is fantastic!! Very easy to install. They also have the best customer service I have had the pleasure of interacting with. I ordered the 12ft and somehow received a 20ft fabric instead of the 12ft. the issue was resolved and 2 days later the correct fabric was delivered. Kudos to you YESCAMP for outstanding service!!!
R**B
Works great!
Works great! Put on our camper and used multiple times now. Easy to assemble and mount. Just my Husband and I completed the job on our camper. If you do a lot of DIY projects, it’s fairly easy. Remember to fill all your holes, existing and new! Only hiccup was the tube had three grooves and one was labeled wrong. Just take your time and you can figure it out!
A**L
Fit Class C RV
Installed on 24 Class C RV. Little tricky to thread the awning to the roller definitely a two person install search on YouTube for a couple of videos to finally install. Took about an hour and a half.
P**A
Yescamp Awning
We finally got our awning put up and the color blue is great. It is very durable with wind we had. we are very happy that we bought a Yescamp awning it is worth the price
Trustpilot
2 months ago
1 month ago