
DOWNLOAD THE APP


Customer Services
Copyright © 2025 Desertcart Holdings Limited
DOWNLOAD THE APP


🎮 Level Up Your Switch Style with Extreme DIY Flair!
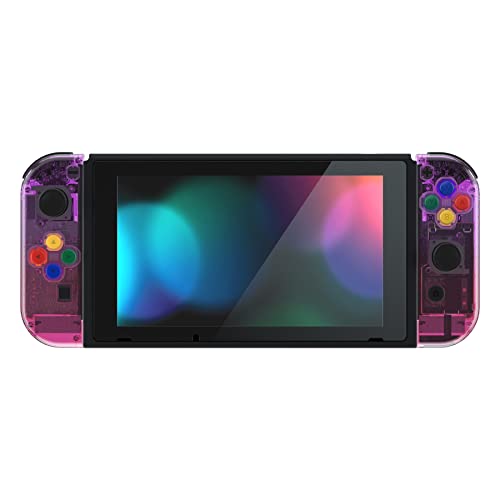
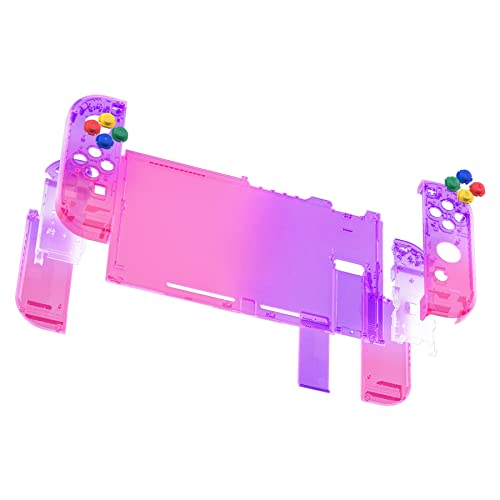
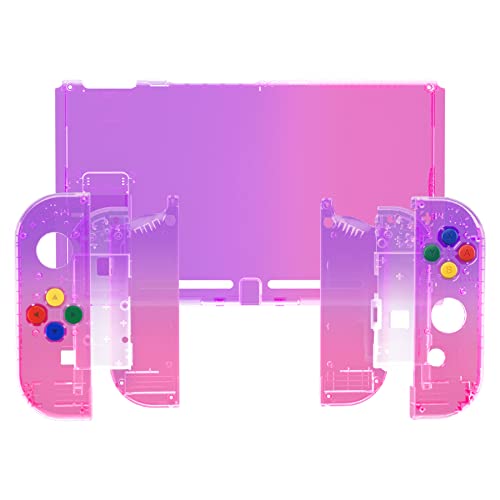
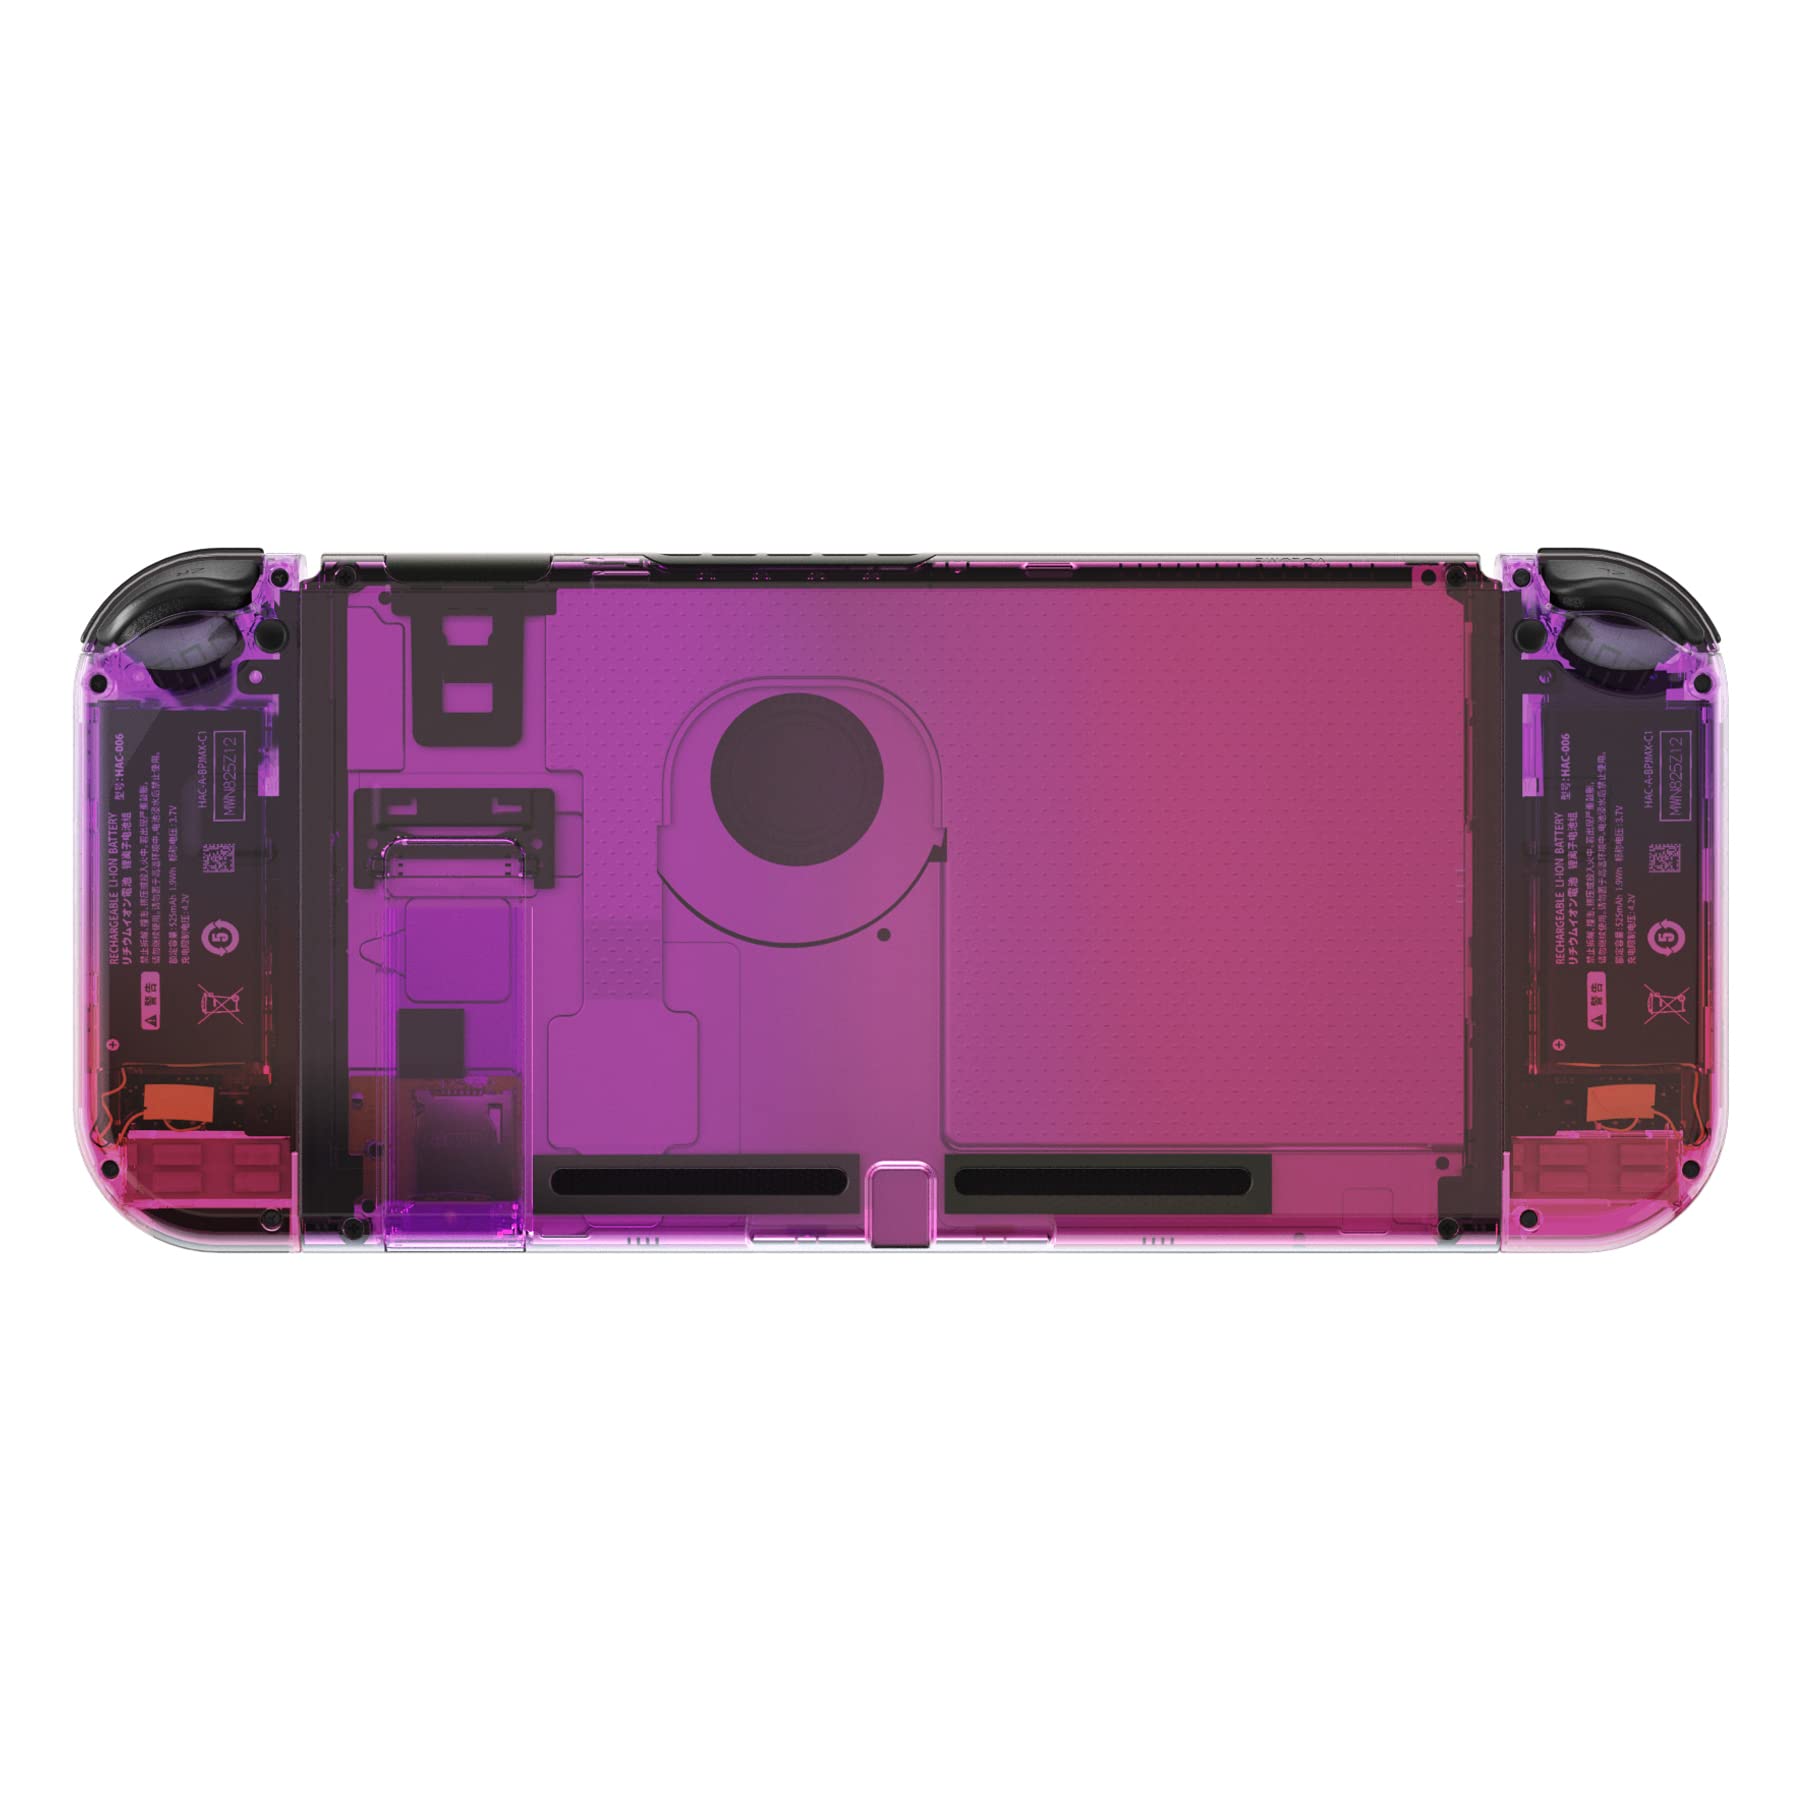
The eXtremeRate Back Plate is a premium replacement housing kit for Nintendo Switch consoles and Joycons, featuring a vibrant clear atomic purple rose red ABS shell and colorful buttons. Designed for DIY enthusiasts with moderate electronic skills, it includes all necessary tools and parts (excluding electronics) for a full console makeover. Precision cut for perfect fit and durability, this kit transforms your Switch’s look while requiring careful installation supported by detailed video tutorials.


| ASIN | B09LHPWHNS |
| Batteries Included | No |
| Batteries Required | No |
| Best Sellers Rank | #10,676 in Video Games ( See Top 100 in Video Games ) #84 in Nintendo Switch Faceplates - Protectors & Skins |
| Brand | eXtremeRate |
| Customer Reviews | 4.5 4.5 out of 5 stars (3,252) |
| Date First Available | 19 November 2021 |
| Hardware Platform | nintendo_switch |
| Includes Rechargeable Battery | No |
| Item Dimensions LxWxH | 18 x 10 x 1.5 Centimeters |
| Item Weight | 50 g |
| Item model number | QM510 |
| Manufacturer | Extremerate |
| Material | Acrylonitrile Butadiene Styrene (ABS) |
| Model | QM510 |
| Product Dimensions | 18 x 10 x 1.5 cm; 50 g |
A**8
Cover ben fatta e materiali discreti approssimativamente pari agli originali, nessun difetto di verniciatura. Prestare bene attenzione ai dettagli dell'annuncio che a differenza di quanto esibito nella prima foto di presentazione, il kit non comprende la cover anteriore... da prendere separatamente (scelta discutibile). Il montaggio richiede pazienza, manualità e per i meno pratici c'è un ottima video guida passo passo su youtube. Non presente la molla per lo stand posteriore.... altro neo.
S**E
The installation is not easy, but I believe the producer tried their best. The shell is super soft and in great quality.
F**F
Dès l’ouverture la texture de la coque est super agréable et les détails du dessin sont beaux et net. L’esthétique est vraiment au rendez-vous Pour ce qui est du montage, tout est fourni, outils, grand nombre de vis de rechange, boutons de rechange pour manettes Après un premier achat plus que concluant j’ai naturellement équipé mes petits frères qui sont plus que content. J’écris peu de commentaires mais je tenais cette fois à saluer la qualité de ce produit
A**E
Sieht gut aus, hält auch ganz gut, aber der Einbau ist ein wenig schwierig, dennoch lohnt es sich für die Optik. Ich hatte am Ende das Gefühl, dass sich meine Switch wertiger anfühlt als davor, da die Komponenten gut passen.
L**A
An amazing and decently easy way to customize the Switch. This product includes some tools and nice screwdrivers, amongst them the one you'll need to unscrew the proprietary Nintendo Y screws. It's very nice that you don't have to buy anything else and everything comes in one package. First things first, you need to take some time aside before you attempt to do this project. I was doing it pretty slowly and did not time myself, but it did for sure take me more than 1 hour. I decided to change the case since I was going to be replacing my joysticks with the GuliKit ones and was going to open the console anyway. On their website, you'll find video instructions on how to perform the shell swap. The instructions were super clear and showed every single step perfectly! You will not have to mess around with the screen at all, it's all very simple steps. There are some complicated moments where you have to disconnect some ribbon cables carefully, but besides that everything else is pretty smooth. The plastic of the case feels very smooth to the touch and the buttons are okay too. I have not used it that much yet so I can't say if it scratches easily; mine has not scratches yet so I'll assume it's good. I have decided to keep the original OLED backplate because I like the kickstand more, and it looks good with the design anyway. Good weekend project, nice project, clear instructions, great custom look! 10/10
Trustpilot
1 month ago
2 months ago