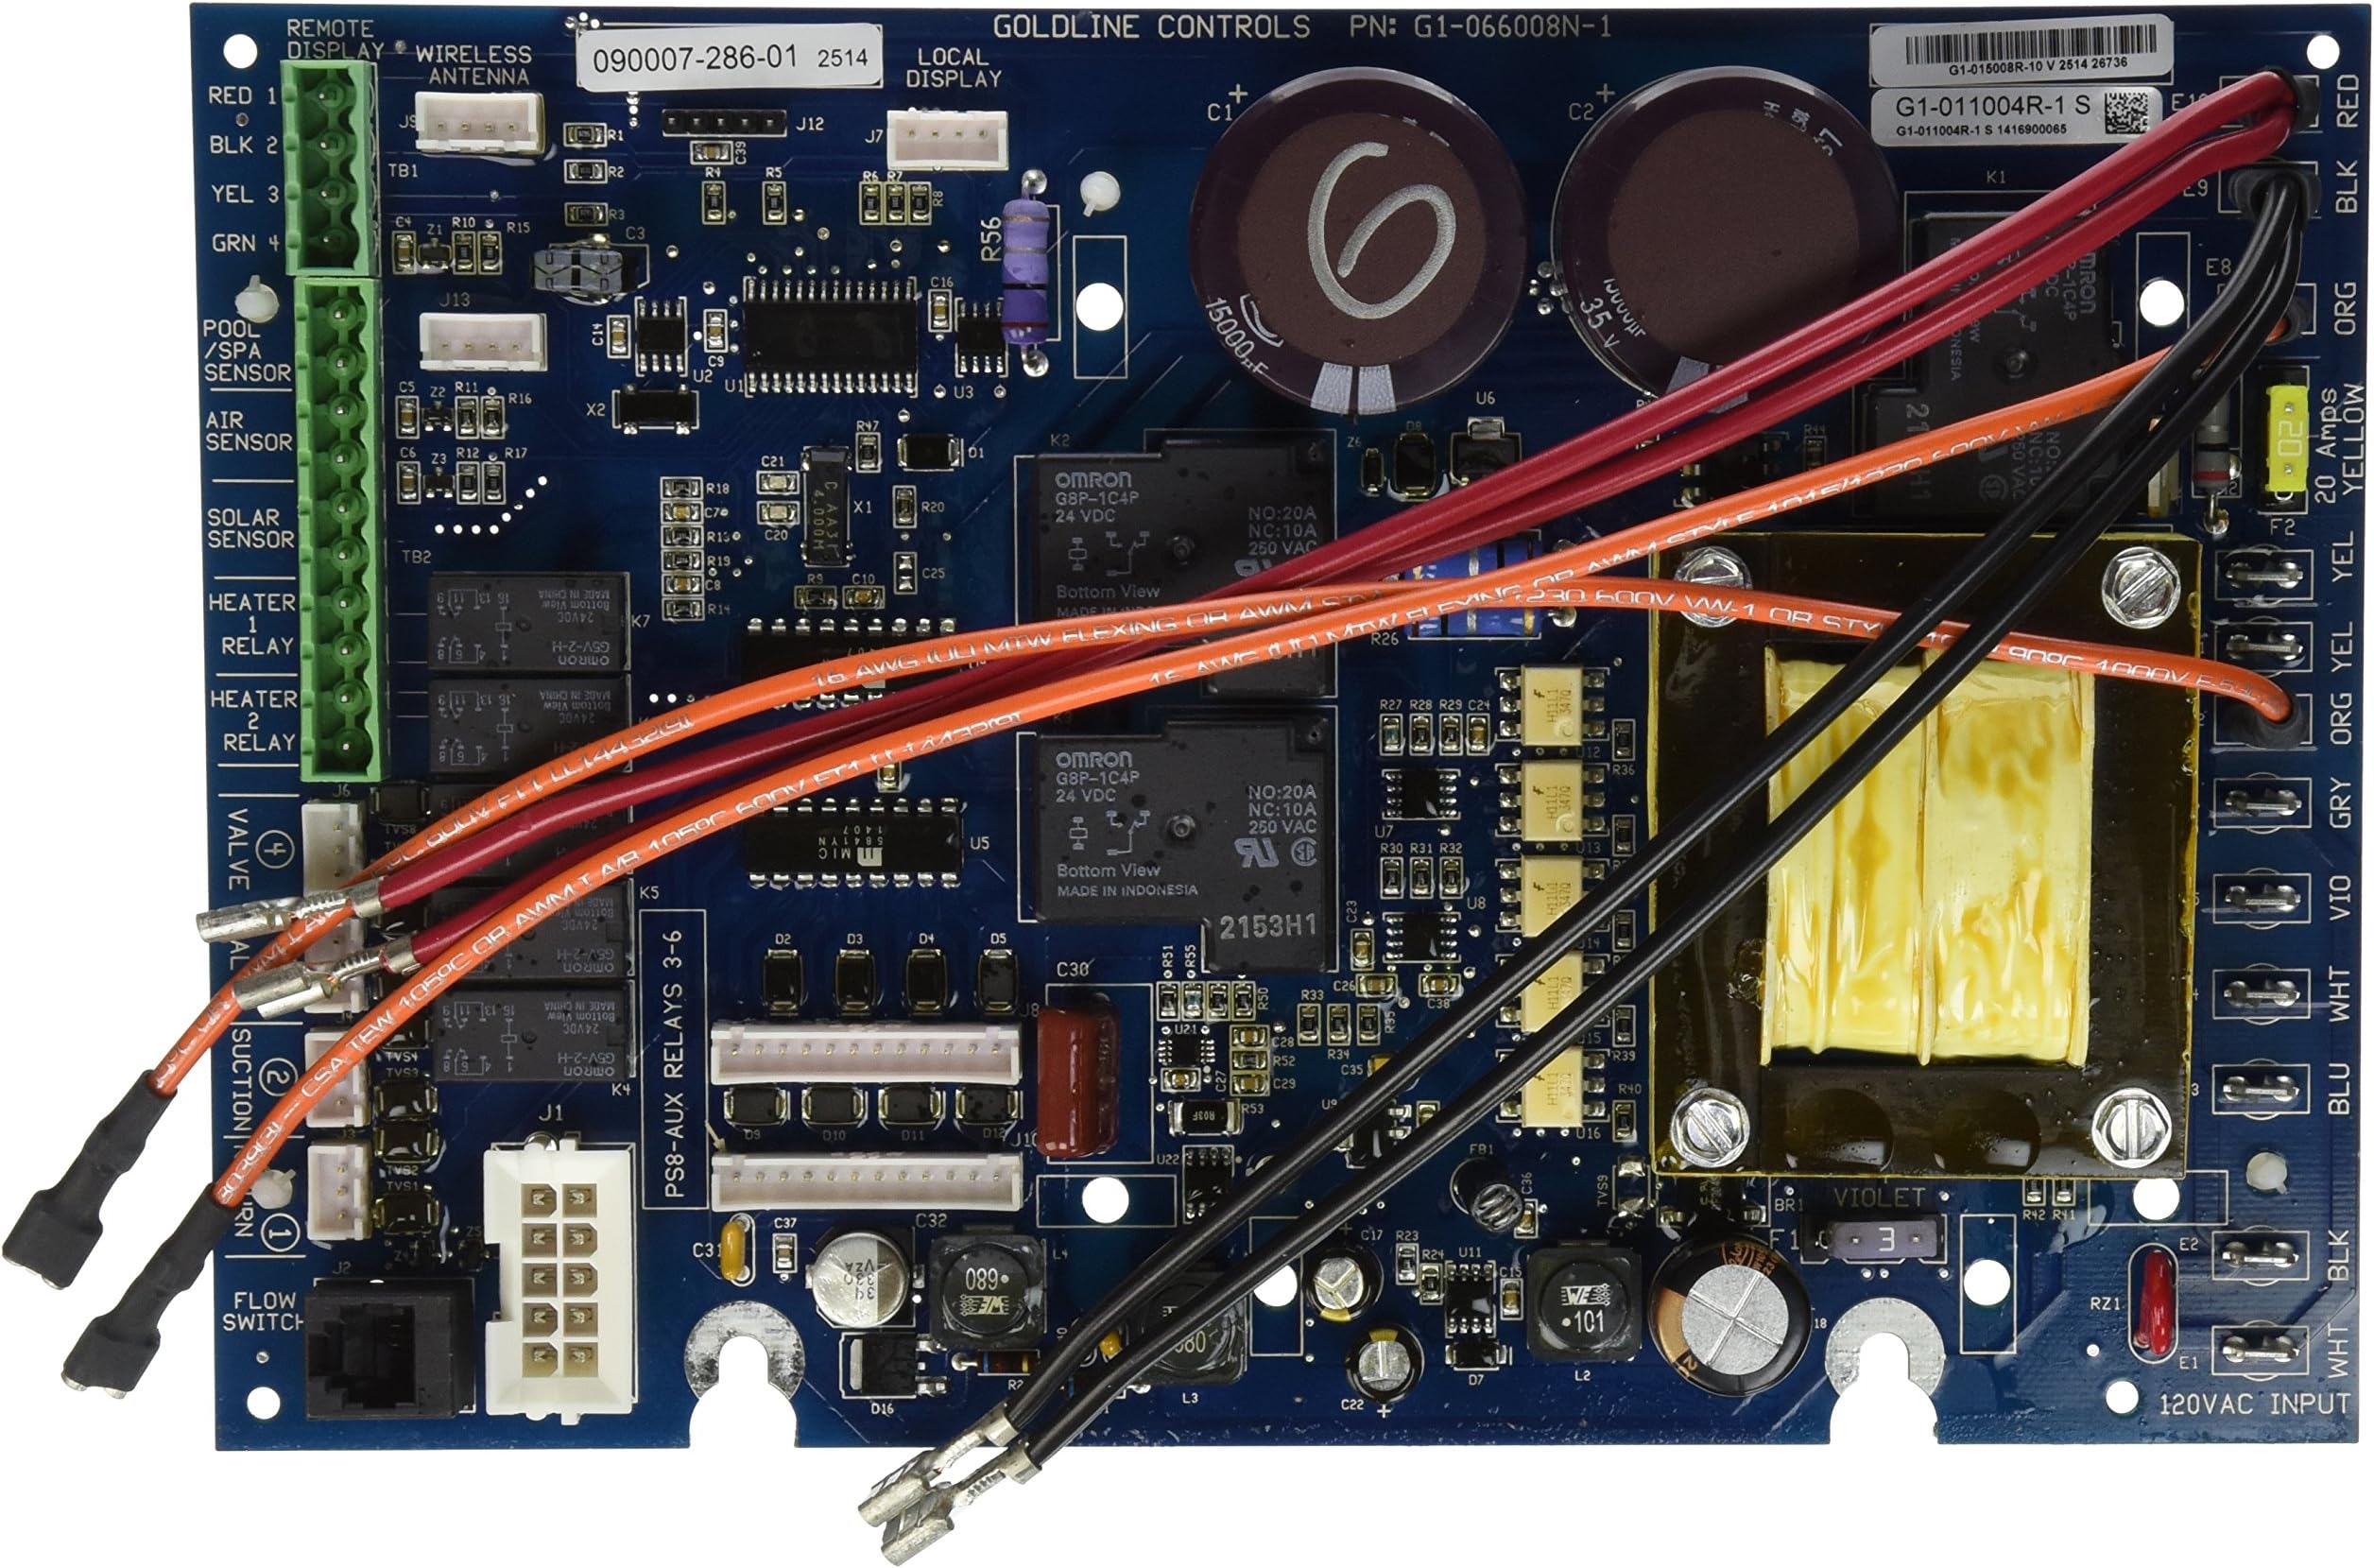
Hayward GLX-PCB-MAIN Replacement Main PCB Printed Circuit Board for Hayward Goldline AquaLogic and AquaPlus Automation Systems
Product ID: 2682726
⚡Direct OEM Hayward compatibility
📶Supports wired remote automation
🔧DIY-friendly plug & play install
Buy anything from 5,000+ international stores. One checkout price. No surprise fees. Join 2M+ shoppers on Desertcart.
Desertcart purchases this item on your behalf and handles shipping, customs, and support to Kyrgyzstan.
⚡ Upgrade your pool’s brain — DIY smart, save big, swim easy!
The Hayward GLX-PCB-MAIN is a precision replacement main printed circuit board designed exclusively for Hayward Goldline AquaLogic and AquaPlus pool automation systems. It supports multiple models including wired remote controls, features clear color-coded wiring for straightforward DIY installation, and revives your pool’s automation functionality at a fraction of dealer repair costs. Trusted by hundreds with a 4.5-star rating, this PCB ensures your pool system runs like new, eliminating common errors and boosting reliability.


| ASIN | B0030E95PO |
| Best Sellers Rank | #219,901 in Patio, Lawn & Garden ( See Top 100 in Patio, Lawn & Garden ) #4,594 in Pool & Spa Replacement Parts |
| Customer Reviews | 4.5 4.5 out of 5 stars (407) |
| Is Discontinued By Manufacturer | No |
| Item Weight | 4 ounces |
| Item model number | GLX-PCB-MAIN |
| Manufacturer | Hayward |
| Product Dimensions | 5 x 8 x 9 inches |
J**R
Great product! Easy to install! Everything is working great!
Yup, I got the dreaded "No Cell Power" message about 6 weeks ago. Googled it and found that this was a common error. I did everything the DIY sites suggested. I soldered the defective part about a dozen times. But nothing seemed to work. I read that to get everything fixed would cost about $800. Then I stumbled upon the Amazon site selling a replacement board for about half that. I figured I would try it though I was worried that I wouldn't be able to replace the defective board myself (I'm not exactly a handy guy). Got the replacement in about a week and it only took me about an hour to install! Realize, I was VERY slow and deliberate in what I was doing. I wanted to make sure everything was right so I was crazy careful. The instructions were relatively clear. All you need to be is very careful that you hook everything up the exact same way. Take pictures of the old board/wiring beforehand to use as a guide. I'm not usually a DIYer, but this was a breeze! Only two things were difficult: 1) some of the wire connections were very tight and hard to get to (especially if you have fat fingers like me!). So make sure you have a needle-nose set of pliers. 2) I had forgotten how to unlock the configuration menu. But one call to the help line and I was able to get everything set (you need to press both "arrow" buttons at the same time). It's been about 10 days now and everything is working perfectly! Pool looks great and I was able to save a bunch of money. By the way, after replacing the old defective board, I looked at the relay switch in question. It was TOTALLY fried! No amount of re-soldering was going to make a difference. So if you re-solder it and that doesn't solve the problem right away, replace the board. And don't worry, if I can do it by myself, ANYONE can! Thanks Amazon for a great product and super-fast delivery
A**L
Works perfectly!
My Hayward Goldline Aqua Plus system stopped working properly. This circuit board solved the problem. It was very easy to install. All the wires are color coded and the connections on the circuit board are labeled with what color goes to each connection. You just match the color wire to the connection calling for that color. That's it! It works perfectly. The system performs just like new. Great product.
T**S
Main PCB board for pool controller
Installed in my pool controller panel, all controls work great. Simple installation
M**N
Straight-Forward Installation.
Not wishing to have my pool company replace my 3rd board in 8 years (at a cost of $600-800) with a new 4th board, I decided to try doing it myself. Turned out well but there are a few things you need to know before you start: 1) Spend fifteen or twenty minutes viewing and recording the settings for the various parameters -- Configuration, Settings, Timers -- on the old board. The new board has none of them and won't until you re-program it. 2) Record where the external connections plug into the old board. A camera works OK for the left and center sections of the old board. The 12 spaded connections at the right edge of the board are easy to handle and can be transferred one at a time from the old board to the new board. My only difficulty was in understanding how the board was attached to the frame and why just loosening the two screws at the bottom of the board wasn't enough to free the board. Turns out the 6 plastic stand-off's on the back of the board have circular grooves that fit into keyhole slots in the frame and they're what hold the board in place. The two hex-head screws at the bottom of the board are there simply to hold the board in place. To remove the board, loosen the two hex-head screws but DON'T remove them. Then gently slide the board up until the plastic anchors come free of the keyhole slots and then tilt the board out and away from the frame. Simple when you know how. Also, the four long plastic stand-off's (that hold the display unit) attach to the board with a plastic spring clip at the rear of board. To remove them, squeeze the spring clip with a pair of pliers -- needle-nose works well and is also good for removing the spade connectors -- while *gently* pulling the stand-off away from the front of the board. I wasn't too gentle at first and had to glue two of them in place on the new board. Live and learn. I can't say how long this board will last as I only installed it two days ago, however I'm no worse off than if I had the pool company do it -- and I saved over half the cost by doing it myself.
J**C
Lasted less than 6 months
I thought this was the answer to all of my issues. After soldering the original mother board 6 times, I decided to get this replacement. It was super easy to install, however, it never talked to the remote controls. When I called Hayward customer support, they told me to call a dealer. I called three, no one knew how to help me. So I relinquished to the fact that I was not going to be able use my remotes. Then, about a month ago, I got a communication error 2. Looked up on the Hayward website what to do, followed along the flow chart and ended up at call Hayward customer support. Guess what? They told me to go to a dealer. Now I have no salt system, no timer, no support and I went to 2 dealers and nobody knew what to do to help me. One guy even sat on hold with Hayward himself and got nowhere. So, after not having a timer, we were starting our relatively new two stage pump from the pump itself. Then that went down. So long story short, my "savings" of $1000 is now costing me more because I am ditching the entire Hayward system. I will be replacing the salt cell, the pump and the automation with a company that still has customer service.
Y**S
The price was $400. Cheaper than the pool store for the same product. It was fairly easy to install, take pictures of the old one before you replace it. My chlorinator was not functioning due to a burned relay, it fixed the problem. Very satisfied, I installed it about 3 weeks ago.
D**.
Easy to install but take videos and images of all cables and CONFIGURATION settings. You will need to configure the base settings. Unit works flawlessly now for two weeks. I tinkered for three years with the previous panel with the soldering technique every season and replacing the T-Cell.
S**H
Easy to install and worked right away.
D**K
Nothing to dislike. It was plug and play and solved my 'No Cell Power' error from the previous board, which was a known defect.
A**R
works great easy to install.
Trustpilot
3 days ago
1 month ago