We remain fully operational. Our teams are working around the clock to ensure your deliveries continue safely.

DOWNLOAD THE APP


Customer Services
Copyright © 2025 Desertcart Holdings Limited
DOWNLOAD THE APP

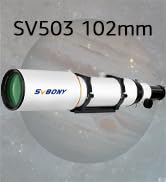
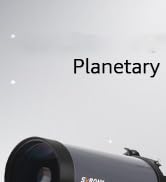
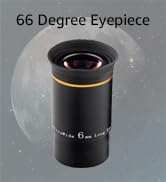
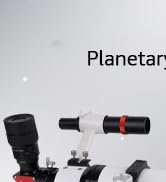
🔭 Align like a pro, see like a visionary!
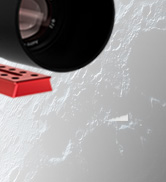
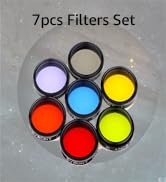
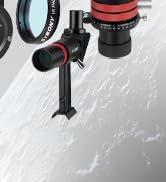
The SVBONY Red Laser Collimator is a precision tool designed for quick and accurate alignment of Newtonian and SCT reflector telescopes. Featuring a triple cemented lens for laser stability, 7 adjustable brightness levels, and compatibility with both 1.25" and 2" focusers via a removable adapter, it offers a durable metal body and user-friendly collimation screws. This collimator simplifies the alignment process, delivering clearer telescope images with less effort.


| ASIN | B00LX34ZH2 |
| Best Sellers Rank | #69,026 in Electronics ( See Top 100 in Electronics ) #38 in Telescope Photo Adapters |
| Item model number | FUSF9123A |
| Manufacturer | SVBONY |
| Product Dimensions | 21.5 x 9 x 6 cm; 224 g |
H**N
Disappointing!!
It’s unfortunate that this laser collimation has 2 problems: 1. The laser beam is not collimated, it traces a circle when I rotate it. 2. The diameter of the collimation is slightly smaller than the diameter of the telescope focuser, this size mismatch is enough for the laser collimator to fit slightly differently each time you attach it to the focuser therefore it provides different results each time. Sure you can spend time and fix these defects by collimating and calibrating the laser beam using the screws on the sides and put a layer of tape on the collimator neck to make it fit snugly in the focuser, but when I buy a tool I expect it to perform and function properly right out of the box. I don’t expect to spend additional time and effort to fix the tool to be usable.
T**L
Got mine few days ago, couldn't be more happy with the quality and easy of use. Highly recommend
R**I
Good product, but Its not accurately calliberated out of the box, don't get me wrong, its just off by very small degree. Most of the time you can get away with that small degree of caliberation error. Highly recommended if you are using it for purely visual.
P**H
Good range of brightness levels. Came reasonably collimated (adjustable). Works great with the Barlowed laser technique. Really easy and effective! Brightness: quite dim on the lowest setting to quite bright by the 4th or 5th. Collimation/alignment of the laser itself. I setup a fixture using Legos (great suggestion I read online), placed it on a granite countertop (tape the fixture to the countertop so it won’t move), and targeted the wall 6 meters away. The diameter of the circle traced on the wall as I rotated the laser on the fixture was 2 cm. Not bad but not perfect. This alignment (right out of the box) was +- 0.2% (equivalently +- 0.1 degree). For my 1200mm focal length scope, the targeting of the center of the primary would be +- 2mm; as reflected back onto the target on the laser (2x focal length): +- 4mm. (It could be adjusted better than that if I wanted to, but see below.) While googling to see if that alignment would be sufficient, I came across the Barlowed laser method. I tried it, and it works GREAT! I was very happy. Super easy and convenient! (Assuming your telescope collimation is pretty close, secondary ok, and you just need to fine-tune the primary, which is typically the case with a frequently-used and unabused Newtonian....) 1. Put the laser in a 2x Barlow. 2. Put the Barlow in your focuser. 3. Turn on the laser, using a fairly bright setting. 4. Observe the shadow of the primary mirror’s center marker “donut” in the target area of the laser. 5. If the donut is already centered on the target, you’re done. Mine was about 1/4” off. 6. Loosen the lock screws on the primary. 7. Adjust the primary, turning one screw at a time to see where the donut shadow moves on the target. (You can see the target while at the primary end, so you don’t have to move back and forth between the primary end and the focuser like you would with a Cheshire or collimator cap.) 7. When the donut shadow is centered on the target, tighten the lock screws, and you’re done. Quick and easy. Love the Barlowed laser method. Note: unlike with the direct laser method, the Barlowed laser method is insensitive to small laser collimation and positioning errors. So this works even with the laser alignment a little off.
C**S
Es excelente para colimar mi telescopio con mejor precisión.
A**R
When you get yours you’ll need to collimate it first, check online for videos of how to collimate a laser collimator. Once that’s done the process is fairly simple and quick. It’s also easy to do a quick re check before using your scope. Edit: I can’t believe some of the negative comments. I would think everyone would know that you have to collimate a collimator. Collimating this one is as easy as any other. There are 3 holes on the collimator, all are filled with a gel from the factory. Removing the gel is the hardest part, not actually hard unless you have no hands. Once gel is removed, there are 3 small alen screws that need to be fiddled with to collimate, 'align,' it. This process is a bit finicky but quite simple, videos online show how to do it. For someone to say this is no good cuz they have no idea that it needs collimating or that they don’t know how to do it is ridiculous! I have no affiliation with any company that sells this product, I’m also new to the world of astronomy. If I can figure this out I would think anyone could.
Trustpilot
5 days ago
1 month ago