Description
🚀 Upgrade your iMac’s heart—speed, space, and style in one sleek bundle!
- MASSIVE 1 TB STORAGE - Store your entire creative library and more without compromise
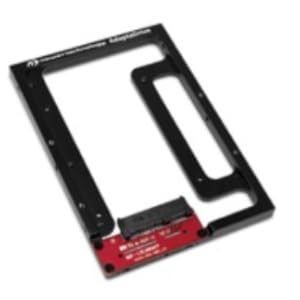
- ALL IN ONE UPGRADE KIT - Includes drive bracket, thermal sensor cable, tools & adhesive for seamless installation
- TAILORED FOR YOUR I MAC - Perfectly compatible with 2012-2015 27" iMac models—no guesswork needed
- CONFIDENCE WITH SUPPORT - Backed by free DIY videos, expert help, and a 3-year limited warranty
- BLAZING FAST PERFORMANCE - Up to 532MB/s sequential read speeds for lightning-quick data access
The OWC SSD Upgrade Bundle offers a 1TB 6G SATA SSD with up to 532MB/s read and 467MB/s write speeds, designed specifically for 2012-2015 27" iMacs. This comprehensive kit includes all necessary hardware—drive converter bracket, digital thermal sensor cable, installation tools, and adhesive tape—enabling a professional-grade DIY upgrade without software hacks. Supported by expert tutorials and a 3-year warranty, it’s the ultimate solution to boost your iMac’s performance and storage capacity.