๐ฌ Transform your space into a sleek, ultra-HD home theater haven!
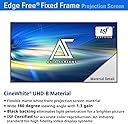
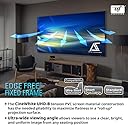
The Akia Screens 100 Inch Edge Free Fixed Frame Projector Screen offers a premium 16:9 viewing area with a sleek, borderless design. Featuring an ISF-certified CineWhite UHD-B 1.3 gain surface, it supports 8K, 4K Ultra HD, and Active 3D with a wide 180ยฐ viewing angle for vibrant, consistent visuals. Designed for indoor use, it includes easy-to-install hardware and a lightweight aluminum frame, backed by a 1-year warranty and lifetime US-based supportโideal for millennial professionals seeking a stylish, high-performance home theater upgrade.


| ASIN | B07NW38MZ5 |
| Brand | AKIA SCREENS |
| Brand Name | AKIA SCREENS |
| Colour | CineWhite UHD-B |
| Customer Reviews | 3.9 out of 5 stars 187 Reviews |
| Display Dimensions | 61.3 x 109 inches |
| Enclosure Material | Aluminium |
| Global Trade Identification Number | 00851906008054 |
| Item Dimensions W x H | 2.79W x 1.58H Meters |
| Item Weight Unit of Measure | 20 Kilograms |
| Manufacturer | Akia screens |
| Manufacturer Part Number | AK-NB100H |
| Material | Aluminium |
| Mounting Type | Inside Mount |
| Number of Items | 1 |
| Number of Packs | 1 |
| Operation Mode | Manual |
| Product Dimensions | 2.79W x 1.58H Meters |
| Screen Dimensions | 61.3 x 109 inches |
| Screen Finish Type | Matte |
| Screen Size Unit of Measure | 125 Inches |
| Screen Surface Description | Matte |
| UPC | 851906008511 851906008054 |
| Unit Count | 1 Count |
| Viewing Angle | 180 Degrees |
M**A
Great Screen. Take your time, and you will get a perfectly flat quality screen
I am very pleased with the final result of the 125-inch fixed frame series AKIA screen. I was able to fully assemble the screen alone. I originally was concerned that the screen material would not stretch over the frame, and was certain that I was sent the wrong size screen. I contacted customer support by phone and was given encouragement that convinced me to continue. I reviewed several videos on assembly of these type of screens that use springs and slowly but surely was able to complete the process. My setup may be different than most. I basically did a ceiling mount (Actually floated from L brackets), so the frame is about 8 inches from my wall. This was needed as I had 2 windows behind my wall that would limit the size of the screen. Previously I had a 82 inch custom build projection screen that fit between the 2 windows on the wall. I always wanted to go much bigger on the screen but originally felt that would not be possible. Here is what I finally did: I added 6 L-brackets to the top of my wall. Four of the brackets would be to support the screen using the supplied Wall Brackets. (The directions tell you to use 2 of the brackets for the top and 2 of the brackets for the bottom. I changed this and placed all 4 of the wall brackets on the top. I purchased a large curtain rod from Amazon that was adjustable from 120 to 170 inches. This Rod was simply supported on the top of the 6 L-Brackets. I also purchased 8 Theater Grade Extreme 100% Blackout Grommet Curtain Panels, 52โ x 95โ. 6 of the panels were black and for the ends, I used 2 red panels. This took care of blacking out the background from the 2 windows, and I was now able to have full light control in the room. I was able to make 4 custom metal bracket adapters that I painted flat black, which allowed me to mount the screen to the L-Bracket and wall mounting brackets to float the screen. Wire or other mounting options would have worked here as well. The screen had a tendency to angle in toward the wall slightly. For this reason, I placed 2 additional L-Brackets at the bottom of the screen hitting the Frame so that the screen was now perfectly vertical. The curtain panels completely hide all brackets and the screen has a nice floating look. I am considering adding 2 4x4 blocks cut to size from floor to the bottom of the screen to relieve any pressure on the bottom of the screen. In all honesty, I am not sure this is even needed as the frame this screen is supported on is very heavy duty, and I doubt any sagging would occur over time. Overall, I am very happy with how this has turned out and I believe the screen is of exceptional quality and a very good product. The only issues I had are as follows: Tension Rods: Horizontal rods, were fine with proper overlap. The 2 Vertical rods were too short. The rod length just matched the length of the outside holes of the fabric. This result on one of the sides tearing through the mounting hole. I ended up having to purchase 2 brass rods of the same diameter to get some overlap for the springs to attach to the frame. While nowhere in the manual is this mentioned, I found it much easier to mount the screens with the spring oriented in a certain direction. One end of the spring seems to make a perfect half circle (Better for tension rod), and the other end, is less angled, and that end seems to more easily mount to the metal frame. Also, I found that in many cases it was easier to first start the spring by attaching it to the frame, and then pull it over through the tension rod hole. The supplied Allen wrench was not of the greatest quality. It was starting to strip as I was tightening the screws. I switched to a much higher quality Allen wrench I had, which greatly improved my ability to tighten down all screws without slippage or striping. Overall, I am very pleased with the result. It is a bit of work, and my fingers are still a bit numb from stretching the springs into position, but the supplied tool does get the job done.
D**H
Some important advice for assembling this screen
I have no complaints about the screen after I was able to get it assembled. It provides a nice smooth surface and I like the narrow black satin frame. I have an Epson 5050 projector and it looks fantastic with this screen. BUT....I did have an issue that required me to redo the screen assembly which was frustrating and time consuming. If your screen comes with a supplied screwdriver that has what I would describe as short rubber hairs all around the handle.... THROW IT AWAY and use a different screwdriver. The problem is that this screwdriver SHEDS a bunch of those rubber hairs and if they fall off while you are assembling the screen they can lodge between the face of the frame and the back of the screen. And you won't likely notice this until you finish assembly and hang the screen, only to notice a bunch of very visible protrusions all around the screen edge (as happened in my situation). The only way to remove these is to disassemble the screen from the frame and locate and remove each of those little rubber hairs. WHAT A PAIN. Kudos to Akia for supplying assembly tools in the first place, too bad the supplied screwdriver turned out to be a dud. Perhaps they have fixed this problem and are now included a better screwdriver. Here are three suggestions that will help you with assembly: 1. Toss the supplied screwdriver and use your own (as per details above) 2. Use very fine grit sandpaper (220 grit) to sand down the joints of the aluminum frame where they meet in the middle of the face. The aluminum frame ends were very sharp with burrs left on the metal. If it wasn't for close inspection I am certain my screen material would have ripped upon stretching to fit. Use some 220 grit sandpaper to knock the edges down and make them mostly smooth. 3. Perform step 7 of the instructions BEFORE step 6. Step 6 of the instructions has you hooking all the tension springs in place but then step 7 has you add rubber caps to the tension rods. THIS IS WRONG. Step 7 should come first- if you don't have those rubber caps on the tension rods when you have hooked all the springs, the sharp edges of the tension rods can tear the screen, as was the case in my situation. Additionally, attempting to put the rubber caps on the tension rods after the springs are in place is impossible, especially if the rods were too short (again, as was my case).
M**V
Love this screen
Pros: Image quality. Wow. Nothing even close to projecting against the wall. Colors are brighter and allow for a nice, colorful and clear image. Very thin "bezels" which provides with a great looking quality screen. Came with extra screws and tools to get the screen set. Cons: Installation. While it is not that difficult, there are certain steps that are just shown on the video and on the instructions but require to pay attention to make sure it allows for a smooth surface on the screen side. Some screws were really low quality (specifically, the one to hang the screen to the wall). I skipped them and used some of mine. Other thoughts: Here are a few tips to installing this screen: 1) Make sure you have plenty of space and 2 people available to put it together. I did it by myself and it felt harder than it should have been. 2) Check you have all the parts. They give you extra screws, but sometimes, things do not fully match properly, so make sure you have everything beforehand. 3) when putting it together, make sure you center the material for the screen on the frame. Otherwise, you may run into small folding issues on the corners. Since you may have the screen side looking down, you may not see it until you are doing setting it up, and then finding out the imperfections. Here is where the "2 people" can help. As long as both people are doing the opposites springs, you will be fine. 4) Skip the mounting screws. Horrible and were stripped very quickly. I used my own. Once I was done with the installation, I loved it. Get it.
D**H
Great Looking Screen at a good price!
The screen looks fantastic and highly recommend it. The thin edge profile is really striking and give your home theater a modern look compared to the thick frame screens. Really recommend you buy this over the other thick boarder screens. Packaging was very well and secure and it keeps all the parts dent and scratch free. Quality of each part is very well as well. I have a 111 inch wide wall space and it would fit a 120 inch standard screen with 3 inch boarders. I did not want to loose the picture size with wide boarders. I chose AKIA 125 which still fits well on my wall with a more clean and modern looks as well as larger viewing area. A great buy. Instructions are well and was able to assembly it fine. There is one thing that you should pay attention to (not mentioned in the instructions) which I did not realized and ended up taking more time for assembly. The plastic wire/pipe that you slide into the screen fabric to attach springs to the frame needs to be centered so it leave one inch clearance on each side of the edge of the frame. I did not do that and this prevented me from putting the velvet black boarder around the screen.
G**N
It's okay, quality concerns
I really wanted to love this screen but every day I wrestled through problems I deducted a star. I think the screen is okay, but not nearly the quality of the previous screen I owned. The previous screen was too small for the room I was putting it in so I decided to upgrade. I liked the five extra inches the edge free design earned you over the large frame 120 inch models, but in the end I wish I had bought the other screen. The other one would have run me another 15% and would have been 120 inches vs 125, but has thousands of positive reviews so my gamble my bad. Here is my assessment: Pros: 1. It does look good when you finally get it assembled and hung on the wall. 2. The mounting system is better than the previous one I had. It has two points that hang it from the top and hold well. Not a four point system. 3. Customer Support is responsive. 4. The screen fits tight over the frame, no wrinkles. Cons: 1. The instructions are dismal. This would be easy to put together if the instructions contained more detail. There were specific parts required for assembly that the instructions didn't even list, intuition basically clued me in on their use. 2. Extra parts. I hate it when I have extra parts, maybe a spare but not a whole handful. It makes me feel like I screwed up putting it together. I get that they probably send the same parts bag with all different sizes of screens but at least put that in the instructions. Couple extra parts with bad instructions and you will be filled with self-doubt in your assembled product. For reference, I didn't use the washers, I don't know why they send them. 3. Blemishes. I had some blemishes on the screen that support told me to remove with goo gone. They mostly came off but seemed like it is a common support inquiry. 4. The frame is not rigid. I'm sure it has something to do with the invisible frame design but it makes for some concerns with the final assembly and a semi-wobbly frame. As a result the bottom of the screen bows inward slightly and I can't figure out how to fix it short of putting some kind of tension strap on the back. It will probably be unnoticeable to other but I see it. 5. The low profile frame bezel droops on the bottom. The only points to connect the bezel on the frame are located on the corners, as a result the middle droops a couple inches. I contacted support and they said to use the springs to hold it back up. Once again, nothing in the instructions about this, and I had to use two chained together to make it work. Summary: All and all, I can probably live with it because I have to. In software this would be called an Alpha or Beta release, and they would have selected a small group of customers to work out the kinks, however I feel like I'm working out the kinks in production. The screen is fine, the instructions need a lot of work, as does the quality control on the connectors and tuning the frame and potential problems. If you really hate thick frames this is probably a good screen to get, otherwise I would consider other options.
Trustpilot
1 month ago
5 days ago