Desertcart purchases this item on your behalf and handles shipping, customs, and support to Kyrgyzstan.
🌟 Upgrade your RV vibe with SunWave — where durability meets style on every adventure!
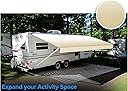
SunWave’s 16-foot premium vinyl RV awning fabric replacement offers a robust 15 oz material with 140 PSI tensile strength, UV-resistant dual-sided color coating, and flame retardant properties. Designed for easy installation with included tools, it fits major RV awning brands and ensures long-lasting protection and style for your outdoor living space.


| ASIN | B00D393XYA |
| Best Sellers Rank | #260,840 in Automotive ( See Top 100 in Automotive ) #136 in RV Awnings |
| Brand | SunWave |
| Brand Name | SunWave |
| Color | Camel Fade |
| Customer Reviews | 4.6 out of 5 stars 4,551 Reviews |
| Fabric Type | Vinyl |
| Item Dimensions D x W x H | 34"D x 10"W x 6"H |
| Item Type Name | RV Awning |
| Item Weight | 15 ounces |
| Manufacturer | SunWave |
| Manufacturer Part Number | RW-12345 |
| Material | Vinyl |
| Material Type | Vinyl |
| Minimum Clearance | 94 inches |
| Model Number | RW-parent |
| Number of Items | 1 |
| Operation Mode | Manual |
| Pattern | Fade |
| Product Dimensions | 34"D x 10"W x 6"H |
| Projection Distance | 94 inches |
| Size | 16’ (Fabric width 15’2”) |
| Style Name | Modern |
| Unit Count | 1 Count |
N**2
Will buy again.
Product arrived quickly and was exactly as advertised. I work on RVs and I am much more likely to replace slightly damaged awnings in the future using this product. I thought it would be a little tricky "folding" the fabric into the roller tube based upon previous reviews but worked out a solution before I had even received the product. I used a length of wire clothes hanger with a small U bent into one end to press the awning fabric into the roller tube slot. The U-bend kept the wire from damaging the fabric. The fabric went into the roller tube slot fairly easily. Once the fabric was in the roller tube slot it was simply a matter of inserting the two supplied cords to keep it there, one from each end. Each cord had an angled cut end, this is the end that goes in first. The first inch was a little finicky, as the angled cut end wanted to catch the stitching on the awning fabric, but once past the stitching it slid right in. I worked the wrinkles out as I went along with my hands and my wire tool. Installing the awning fabric on to the roller tube was a 2-person job. I may have been able to do it myself but my wife had the misfortune to walk by and I recruited her. Removing the awning assembly was a 2-person job, reinstalling the awning assembly on the camper was a 3-person job. One person on each leg and one person on a step ladder guiding the awning into the track (flare the end of the track so it does not snag the fabric). Extend the awning support legs (manual awning) so that the roller tube is slightly above the track and the support legs are on the ground then "walk" the legs down the side of the trailer pulling the fabric along. If you are not used to messing with the torsion springs in the roller tube do yourself a favor and research YouTube. MARK THE ROLLER TUBE AND BOTH TORSION CAPS before disassembly, especially if you are working on a manual awning! Note the position of the original sewn-in poly cords on the roller tube AND the position of the torsion caps on the roller tube. If you are replacing original fabric, the sewn-in poly cord closest to the trailer corresponds to the folded-in poly cord in this product. The instructions that come with the product are very clear. If the right torsion cap is not reassembled in the original position on the roller tube ("clocked" incorrectly) the raise/lower lever may end up behind the roller tube (against the trailer) when the awning is in the stored position. You will not like this.
K**.
It came nicely rolled and coiled
Just finished installing the 18’ awning I purchased last year. It came nicely rolled and coiled, and was left in the box until now. Seems pretty well made and looks good. I watched a couple of “How to change RV Awning” videos on YouTube and was able to it install myself with some help from a couple of friends for the reassembly. Hopefully it will give me years of service! Installation Note: The awning came with a pre-sewn in cord for the roller valance anchor and for the RV anchor, however the roller main anchor cord comes separate, and as 2 pieces, so you can feed it in from each end. You have to slide the valance anchor in the track all the way, then fold the awning material into the second anchor channel, then tread the cord in from the end to secure the material in the channel. It’s a tight fit until you figure out a solution. I highly recommend purchasing the “Awning Fabric Installation Tool from SunWave”. I was able to do it using a window screen installation roller, but I think the Awning Fabric Installation tool maybe be a little wider and have more depth to it, which would have been much nicer than the screen roller. Basically, you run the roller down the channel forcing the material into the groove, then feed the cord through. It help to use some silicone spay lube, and occasionally roll down the length of the cord and the channel as you go, it made it much easier for me! Other than that, the new fabric went on well, and fits perfectly.
S**9
great awning for half the price of competitors
I installed this on a 2007 damon outlaw toy hauler. the width was perfect for my setup, as I have a 20 foot awning hardware width. quality seems to be great so far. the material seems to be a bit thinner than the laminated stuff that was on there, but it seems well made. one thing i will not that cost me some time is that the valance on this awning is the part with the rod pre-installed in it. the main part of the awning has to be attached sliding a plastic rod in between the material and awning body. I made the mistake of thinking the rod was installed in the main attachment point and realized i had no length of valance, so i had to start over.
R**R
B+
This awning was significantly less expensive than some of the others available. I read reviews and had my expectations set accordingly. I pulled the trigger, and it arrived in a couple days. I have a 19' solera awning on my 30' travel trailer. My orginal awning had 3 or 4 inches of space at either end between the edge of the awning and the end cap. The new awning goes right to the cap. I'm not complaining, but I wasn't expecting it to be that much wider than the original. The material is thinner than the original and the seams and finished drip edge are not quite as nice, but it is sufficient. I looked at a few install videos on youtube and read the included instructions. I removed the old awning myself and recruited my wife to help me attach it to the roller. I then had my wife and kids help hold it while I feed it onto the trailer. It took about two hours to replace, but I could probably do it again in less than an hour now that I know how to do it. I don't know if this will last as long as the original, but at this price I could afford to replace it every few years. My only concern is that the awning is actually made from two pieces sewn together. There is a seam that runs the length of the awning joining the color/fade section with a white (2') section which then attaches to your camper. I'm nervious that the seam will not hold over time, but I guess we will see. It doesn't look bad and is not all that noticable, but I didn't notice it mentioned in the listing before I purchased. Again, this is not a bad looking awning, but definitely a budget-friendly selection.
C**D
Quick and easy to install, solid strong material
Got this to replace an older deteriorating vinyl pull-out awning. Getting the old one out was harder than getting the new one in. You really do want some silicon spray for the track, and need to read up on how to install this in the bar (dealing with the springs, etc). But the videos on their site and on youtube are pretty good. You WILL need to have a friend or two help out at least on pulling the cord on the trailer run, but the rest is doable alone if need be. All in all took about 2 hours for me to install, with friends helping about 30 minutes of that time. The quality of the awning is really better than I expected. It's quite thick, multi-layer, and I had no worries about ripping it during install or usage. It was stronger than the one I was replacing by far. It does have a slight odor at first, and needs some time to stretch and air out when you first put it in. (So if you're doing this on a weekend, do it Friday, not Sunday.)
T**E
Seems good so far, installation was easier than I expected.
Fabric arrived faster than expected. Seems like it works well. Time will tell how long it will last, but the price was 1/4 what the local RV dealership wanted for replacement of my awning fabric. I didn't want to remove my whole awning assembly and mess with the torsion springs. So I drilled out the end cap on my awning, cleaned the hole up with a jewelers file, slid out the old awning, then got my daughter and a few of her college friends to help slide the new awning in place. We used 5 people to slide the awning in one on a ladder guiding the awning into the slot on the trailer, one on a ladder moving the fabic down the slot on the trailer, one on the ground guiding the awning into the slot on the roller, one guiding the fabric along the slot in the roller, and one on the far end of the roller just holding it in position. Then I put the third cord in by myself using a roller tool for screen installation to push the fabric down into the slot. We'll see how long it lasts, but for now I am very happy with the product for the price.
K**H
Nice Replacement
Awning fabric has the pattern on both sides, rather than just white on the bottom. The top foot or two has the panel welded in for solar protection. Easy to install, just watch the videos on line. This has a top bead and a bead at the valance. The lower awning bead is not sewn in, so you have to press in the fabric and then thread the bead in. I used a screen replacement tool to press the fabric into the tube slots and after spraying with a little silicone, it slide right in. Makes a good looking replacement for RV's that are a little older.
J**N
Good RV Awning Replacement - Better than paying the shop, but does require patience
I bought this because I really wanted to replace my old RV awning. Mine was in pretty terrible condition and I'm not sure why I didn't replace it sooner. The shop I went to made it like it was going to be crazy expensive to do, so I figured I'd try to do it on my own. All things considered - it's a pretty good price for the awning. They do include a instructions sheet which does help out, but I'd recommend looking up a few Youtube videos to get the idea of what you'll be doing in general. I'd also say it's a 3 person job for sure. And like other reviews, WD-40 in the channel that the awning slides in will help a ton. And a ton of patience, we spent a good chunk of the day setting this up and hit a few setback along the way (mostly due to how dirty the channel was in my instance). Once done, it looks great. It Side note: I will mention that Amazon suggests the replacement pullstrap and the fabric installation tool to go along with it. In my instance these both came in the box I got from Sunwave. Not sure if it was just me but you may not need these recommendations. But the extra fabric installation tool would come in handy for sure.
Y**K
Excellent achat
Super achat pour le prix, qualité du produit plus que parfaite. Installé rapidement. Je recommande grandement ce produit.
R**L
super
livraison super la date prévu belle toile
Trustpilot
3 weeks ago
3 weeks ago