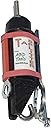


Compact TapSplitter Tool for Releasing tap Head Nuts to Repair Dripping and Stuck taps
Product ID: 49103510
🔧Compact design
⚙️4 versatile inserts
🛠️Safe operation
Desertcart purchases this item on your behalf and handles shipping, customs, and support to Kyrgyzstan.
🔩 Unlock the secret to effortless tap repairs!
The Compact TapSplitter tool by ABD Tools is designed specifically for safely releasing tap head nuts on pillar and bib taps. With a compact design for easy storage and four versatile inserts, it ensures a perfect fit for most tap sizes while preventing damage to your basins and pipes.
| Manufacturer | ABD Tools |
| Part Number | Self contained tool guaranteed to release tap head nuts on pillar and bib taps |
| Item model number | AB-TSR-002 |
| Item Package Quantity | 1 |
| Batteries included? | No |
| Batteries Required? | No |
| Item Weight | 440 g |
M**Y
As if by magic...
While waiting on loo repairs, a dripping tap went from 'slightly dripping' to 'almost a trickle'. The tap hadn't been touched since the house was built in the 1990s. After much fiddling around getting the to the tap headgear - including trying the hot tap, in case there was a really perished washer and that would give us a better size guide - we couldn't remove either tap valve. We followed all the information in our various DIY guides - using WD40, spanners, wrenches and cloths. Even with two people, the valves would not move at all, and the taps kept threatening to - which would break them. Looking online, the DIY Doctor website was the only one with a further option, which was to use the TapSplitter and has a video of it in action. I decided to give it a go, I didn't know anything about the product and was going by the 'cheaper than a plumber' school of thought. Yesterday we gave it a go. I didn't find the written instructions very clear - we actually pulled up the DIY Doctor video review again to copy instead. I made the mistake of copying it exactly and would have tightened the valve - so I need a very, very much simpler guide to use. But having got it set up correctly, I didn't expect it to be able to work. When you've had two people heaving around with wrenches, it doesn't seem possible. But we stood, turning the little spanner and watching it move. When the tap valve started turning (and the tap didn't move one iota) it was astounding, it seemed like a magic trick. We couldn't change the washer, there was so much scale and verde gris, the retaining nut on the washer was welded on. Even the local plumbing centre couldn't lever it off, so we had to replace the whole valve. This made me more impressed that the tap splitter had been up against a tough job. Normally, I'd maybe knock a star off for unclear instructions. Yet the tool being so effective for a specific job and saving the cost of a plumber in this situation plus the satisfaction of seeing a problem through, it's a five star for me on this one.
A**P
HIGHLY RECOMMEND
Amazing tool. So easy to use. Used to open and release two tap heads that had been not opened in 30 years. Had tried with large box spanner and wrench with no success other than think I was going to snap the tap or basin .Purchased this tool with a little trepidation as whether it would actually work . I needn’t had worried , follow the instruction and within a couple minutes the taps were opened re washered and working like new I would highly recommend this to anyone professional or DIY.
C**P
Fantastic !!
Ingenious tool !!! No way could I have replaced the tap valve without it Great thanks. Chris
A**L
Worth buying - but read on - it's not perfect
Used this once so far and it was a success, with no damage to tap or tool!. I did have some concerns though that the tool tap spanner might twist as pressure was applied because it was not a straight pull. The tap was a standard traditional capstan head basin tap. When the sleeve was placed over the spout, the slotted end was noticeably lower than the tap spanner end so that there was a downward force applied as well as the unscrewing pull force. Other reviewers have reported that the supplied tap spanner "twisted like a corkscrew" and I can see how that might happen as the spanner isn't made from high grade steel. I think that a little more development work is needed to be able to "guarantee" this will work every time (as the manufacturer claims.) Hence only 4 stars as I think that a very stubborn tap valve assembly might easily defeat the tool as suppled. However, I am grateful to an earlier reviewer for reporting his/her use of a standard chrome vanadium combination spanner in place of the one supplied with the kit. Not only is that spanner much stronger, it has a helpful 15 degree angle (or so) on the ring end which can be used to better align spanner and sleeve end resulting in a much straighter pull. Not used that option so far, but it is that workaround which gave me the confidence to invest my cash. Certainly the idea is good and it is worth buying the kit for the tap spout sleeve and pull bar. The fall back of using your own combination spanner makes it worthwhile to buy even if the supplied spanner fails. So go ahead and buy, but be prepared to adapt.
G**H
Does the job.
I'm a nurse not a plumber but like to try things myself before I throw money at people. I had leaky basin taps that were giving me nightmares about whether they were turned off fully or not. I had a go at the hot tap and after a full day, half a can of WD40, pulled muscles a cut and 2 callouses on my hands, I managed to remove the valve to replace it. Not so with the cold tap. Love, money nor swearing would make that thing budge. I damaged the nut head too in the process. Enter the tap splitter. It's only after a Google search I found a video demonstrating how it worked and I quickly found it on Amazon once I knew what I was looking for. The kits comes with a fitting for damaged nut heads too. Tbh, the instructions that come with it may as well have been in another language for all I knew what they were saying. However, as I'd seen the video, I more or less knew what to do. Once set up there's minimal effort to unscrew the valve, in fact I had done it without realising it. It was only because I noticed that one of the worn down sides of the nut had moved position that I tried it with my hand and it came off! Thought the job would take all day like the last time but this only took 5 minutes! It's paid for itself and I now have nice new drip free taps. Don't dither, just buy it. It does the job.
S**Y
Robust and Adaptable Tool.
Bought it to remove 1/4 turn ceramic valve on a dripping Monobloc Mixer Tap. Tap was fitted about 7 years ago and the hard water in our area had effectively welded the fittings in place. To give you an idea, had to use a gear puller to carefully remove the handles (the handle screws took some removing themselves). I managed to get the hot valve out with spanners but the cold side just would not budge- the sink is a composite type and I was concerned about cracking it. So, bought the Tapsplitter. To get it to fit on a mixer tap, I removed the spout and inserted a half inch socket on a short extension bar into the body of the mixer to effectively create a spout to place the tapsplitter over. I wrapped the socket with some rubber tape to protect the body and had to use both rubber liners that came with the kit. And once set up it worked perfectly, the valve freeing with quite a snap. Ok, so was it worth it? The tap cost originally about £150, the replacement ceramic valves £19 for the pair plus the cost of the tap splitter. Everything else I had already and now I have the splitter for when the other taps in the house start dripping. Plus it was quite satisfying in a Dad sort of way to fix rather than replace!
A**R
It works
Grate pice of kit
D**E
It failed completely ... but parts of the kit allowed a final solution
I have mixed feelings about this product. I bought it to use on two very different taps I hadn't been able to unscrew, and using this tool as supplied and following the instructions it completely failed on both - for completely different reasons. And as advised in a phone call to ABD Tools I bought a 'next day delivery' add-on ... which did not arrive the next day but the day after, and then didn't help. But in the end a solution occurred to me using just part of this product kit in conjunction with my own tools, and I did manage to undo the tap heads. For the sake of anyone else running into the trouble I did (and in case this suggests design improvements to ABD Tools): I needed to unscrew two tap heads, neither of which I'd been able to release just using an adjustable wrench as hard as I dared. One was a very old bath hot tap inside which the washer had split so the tap wasn't just dripping but actually running all the time when 'off'. The other was a modern kitchen sink hot tap of the ceramic disc type, which kept on suddenly making a screaming noise that would only stop pressing the top of the tap. At the time I thought the best solution was if there was a tool that would somehow jack a spanner out against the spout so searched - this product is the only tool I found; it pulls them together rather than apart, but that's fine, same physics theory. Bought from Amazon, it arrived and I set too very hopeful as the theory is sound. But it didn't work. With the bath tap, the biggest insert in the kit to fit over the tap head nut was 22mm; while the other inserts fit into the tapspanner easily, the 22mm didn't - it would only just start to go in only one of all the possible orientations (either way up and 24 possible rotations), and even then needed hammering in. And then it didn't quite fit over the 'nut' surfaces of the tap head; it just fit slightly over the very top of the nut surfaces, and could take a completely horizontal push, but using the kit and tightening the nut on the pull-bar, the pull on the tapspanner was at an angle and just flipped the tapspanner off. Fail 1. With the kitchen tap, the tap only had a fairly short spout that actually angled UP from the tap body. This needed a 17mm insert, which was supplied and fitted fine both in the tapspanner and over the nut. But putting the sleeve fully on the tap spout, the top of the spout sleeve actually got in the way of the very wide tap spanner, only allowing the tap spanner to just start to go over the tap head nut surface, and again on winding the nut on the pull bar the tapspanner just flipped off the nut surface of the tap head. Putting the tap spanner on first allowed it to sit over the tap head nut properly - but the great width of the tap spanner meant the spout sleeve could only go on part way, and with a short spout only going a little way into the sleeve, winding the pull-bar just bent the plastic spout sleeve. Fail 2. So, with the score zero out of two I rang ABD Tools. The gentleman certainly tried to be helpful. He had no suggestions for the kitchen tap, as the width of the very wide tap spanner was the problem. For the (more urgent as it was pouring away hot water the whole time) bath tap he suggested I come back to the Amazon store and buy the (extra) 23mm tap spanner insert, which he was sure would also work if the tap was actually, as I suspected from the very near fit of the 22mm insert and my existing 22mm spanner and the age of the tap, 7/8 imperial. He also pointed me to a video of extra instructions for when the spout sleeve is at a notable down angle, said he would include a bolt and some washers and nuts to use for that procedure at no extra charge, and if I did a next day order here at Amazon immediately (this was between 3 and 4pm) he'd get it right away, remember my name, and be able to post the parts for me to get them the next day. The parts did not come the next day but the day after. The 23mm insert fit into the tapspanner a little easier than the 22mm one did, though not as easily as the others, and it did fit over the tap head nut surfaces .. actually quite loosely, confirming my thought that the tap head nut was actually 7/8 in imperial, but it still gripped rather than slipping. As the spout sleeve, when fitted over the spout was at a slight down angle, but not anything like as much as in the video I'd been pointed at, on my first attempt I tried the regular instruction again with the pull-bar hooked round the tapspanner in the regular slot. I started winding the pull-bar nut with the small spanner supplied, the pull-bar pulled between the spout sleeve and the tapspanner, and the tap head nut ... remained stuck tight. What the pull DID do was BEND THE TAP SPANNER HANDLE down. The tap spanner supplied is just too weak an alloy; and it has such a low elastic limit it didn't just flex the tapspanner handle down, it bent it permanently down. So ... I went for the method from the video with the extra bits ABD Tools had included with the 23m insert. A long bolt goes through a hole near the end of the tapspanner, which one then fastens with a nut so the shaft of the bolt extends straight down from the tapspanner. One then puts another pair of nuts and washers further down the bolt as a place to attach the pull-bar so it is level with the spout sleeve and the pull-bar can do a level pull. I wound the pull-bar ... and the bolt shaft started to bend, and the tapspanner handle TWISTED (again, permanent deformation) so it now has the beginnings of a corkscrew profile. If a tap head nut could laugh, this one would have been ROFL. So, ABD TapSplitter nil, reluctant tap head nuts two. I used the ABD Tools website contact form to remind them of our conversation earlier in the week and tell them what had happened, and invited them to email or ring if they had any more suggestions. No phonecall, no email. Still with my bathtap running hot water down the drain 24/7 (well, cold water at night after the water heater goes off), in some despair I came back to Amazon and bought a next-day-delivery 7/8 imperial Draper combination spanner (about the only size of spanner I didn't already have). Unlike the ABD Tools 23mm insert, that DID actually come the next day, and proved the tap head nut was actually 7/8 in, but going back to brute force and ignorance and pulling as hard as I dared for fear of breaking the tap off the water pipe below (which is virtually inaccessible) I still failed to budge the tap head nut. Looking at the Draper spanner I gloomily thought that the ABD Tools TapSplitter was perfectly good theory, just let down by the weak alloy the tapspanner and inserts are made from. If only it had been made from the much stronger same chrome vanadium alloy as the Draper spanner it would probably have worked ... Lightbulb moment. I put the ABD Tapsplitter spout sleeve back on the spout, but put the Draper 7/8 Chrome Vanadium combination spanner's ringspanner end over the tap head nut. I then hooked the ABD Tapsplitter pull-bar end over the Draper combination spanner and fitted the other end as normal to the Tapsplitter spout sleeve., Of course there's no notch on the standard combination spanner shaft like there is an the tapsplitter tapspanner to hook the end of the pull-bar round ... but actually that doesn't matter. Just hook it at the closest point on the shaft to the end of the spout sleeve and it will stay there for the pull - after all you only need to pull till the tap head nut 'cracks' loose, not wind it all the way so the pull-bar would start sliding on the standard spanner shaft. And while I was hooking the pull-bar less than half way down the combination spanner shaft, it was still actually a cm further from the centre of rotation of the tap head nut than when using the very short supplied tapspanner. So I took out the slack on the pull-bar winding nut, wound with the little spanner with no perceptible bending of the chrome vanadium combo spanner ... little 'crack noise' and the tap head nut came free just like that and I could actually unscrew it the rest of the way with my fingers! Success! Then, second light bulb moment. If that worked on the bathroom tap ... I already had a 17mm combination spanner, and while the tapspliiter spout sleeve pushed right on the short spout stopped the very wide tapspanner head from going down over the tap head nut on the kitchen tap, the ring end (I think an open ended spanner might fly off on tightening) of a normal combination or ring spanner is not wide like the kit tapspanner and might fit on the tap head nut even with the Tapsplitter sleeve pushed right on the spout. Which it did. Hooked the spanner end of the kit pull-bar round the shaft of my 17mm combo spanner at the natural nearest point along the shaft to the end of the spout sleeve, took out the slack on the pull-bar, couple of winds and off came the tap head nut! Two for two! After days and days, once I got the idea of using my own spanners instead of the supplied Tapsplitter tapspanner but using the rest of the Tapsplitter kit, I got the tap heads off in about a minute each! So ... the THEORY of the kit is fine. and PARTS of the kit are fine - the spout sleeve and its rubber inserts, the pull-bar and the nuts, washers and little spanner to use with them. In the end, those parts of the kit allowed me to separate two tap head nuts I hadn't been able to do just using wrenches and spanners the normal way. The problem with the kit is the tapspanner and its inserts, and contrary to the 'Guaranteed to safely apply all the indirect force needed to undo a tap head however tight or seized' there are taps where it will fail - and on the two taps I had bought it for use with, it completely failed as provided and instructed, and for two completely different reason. (i) On a tap with a smaller size of tap head nut, the very wide tapspanner can be too wide to fit on the nut when the spout sleeve is slid right on a tap spout, and with a short spout that can completely stop the product from being able to work at all. So for some tap designs you can't use the provided tapspanner as currently designed because you can't get both tapspanner and spout sleeve enough on the tap parts at the same time. (ii) The very weak (and I presume cheap) alloy used for the tapspanner and inserts means that with REALLY stuck tap head nuts the tapspanner can't take the needed force, with the tapspanner simply bending and passing its elastic limit at a force less than that needed to release the nut. (Oh, and (iii) the manufacturing tolerances in tapspanner and inserts are not tight enough, leading to some inserts being very difficult to get into and out of the tapspanner.) But the theory of the product is sound. And it will likely work on many taps with the provided tapspanner, as long as the taps aren't certain shapes, and the tap head nut isn't stuck too tight. Just didn't work on either of mine using the full kit including the supplied tapspanner and inserts. If they changed to a tapspanner and inserts made of e.g. the same chrome vanadium alloy steel of most spanner sets, then I think the kit really would be able to apply enough force for practically any stuck tap head nut ... but that wouldn't help with the problem of tap shapes where the tapspanner is too wide, and that can't be helped if the one spanner is to be able to fit tap head nut sizes from 17mm and below to 23mm and above. Plus the kit would cost a lot more with a much stronger alloy steel tapspanner and inserts (and made to better fitting tolerances), let alone the cost of a set of tapspanners of better steel, with separate ones for each size to get over the too-wide-tap-spanner-to-get-the-spout-sleeve-far-enough-on problem. As it is ... despite irritation with myself for not seeing the in hindsight obvious solution of using my own spanners with it immediately when first attempts failed, I'm glad I bought this product as it did - or rather parts of it did - eventually let me fix the two taps (especially the constantly running hot water one). I find I don't even resent having paid for the full kit when, in the end, I had to chuck aside the for me two ways useless included tapspanner and inserts and use my own spanners for the pull-bar to work on (including having to buy the 7/8 in from Amazon - law of nature: the spanner size you really need is always the one size you don't already have!) To be honest, the tapspanner is so weak and the tolerances for the inserts so vague, I can't imagine they cost much, so a 'use with your own spanners' version of the kit (which it turns out would have done me fine) wouldn't be much cheaper. But I find I really DO resent the entirely useless extra cost of the 23 mm insert PLUS next day delivery cost, when it didn't arrive the next day, and it only allowed the demonstration that the tapspanner alloy was too malleable, and I had to then buy the Draper 7/8 in combination spanner anyway. My Advice: if you have a stuck tap head nut, this kit IS worth buying, but be prepared to switch to using a proper good quality ring or ring end of a combination spanner (open ended could fly off, I think) in place of the supplied tapspanner if the tapspanner bends or is too wide to use with the spout sleeve. And if the supplied insert sizes in the kit don't fit your tap head nut but you have the right sized ring or combination spanner already, try using the spout sleeve and pull-bar with that BEFORE ordering one of the extra inserts; it my well work - and the supplied tapspanner might fail even with the right insert as happened with me. With your own ring or combo spanner, put it on the tap head nut, the right way up (presuming you have the normal 15 degree angle on the ring head from the spanner shaft) to match whether the spout sleeve is angled down (most likely) or up (like my kitchen tap), Put the spout sleeve on with rubber inserts as necessary. Put the washers and nuts on the pull-bar. Hook the pull-bar end (with the hook shape end) over the spanner shaft. Put the shaft of the pull-bar into the slot in the spout sleeve and adjust where the pull-bar hook is on the spanner shaft until it's the shortest distance to the spout-sleeve slot and the pull-bar shaft is sitting firmly into the spout sleeve slot, then hold the hook end of the pull-bar at that point on the spanner shaft while doing up the pull-bar nut finger tight against the spout sleeve. Then, if your ring/combo spanner is long, hold it to keep the ring end flat on the tap head nut and wind the pull-bar nut with the little spanner provided. It worked for me, quickly and easily, on both taps where the kit with their tapspanner failed.
Trustpilot
2 months ago
1 week ago