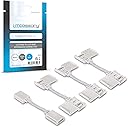
READ THIS: These ABSOLUTELY work perfectly on the newest generation light strip plus (perhaps they don't work directly connected to the controller but if you are doing the lights in series it's not really an issue since you will be cutting the free end of the first light. They do take a small bit of an art to get perfect (my first strip was a little challenging and has a touchy joint if bent to the extreme.). Here's how I used them. I carefully cut off the silicone insulation around the soldered line (removed a segment about a 1/2 inch above and below the solder). I did this with a razor blade and if you are careful it's easy since there is a good gap between the ribbon and the insulation. I then seated a new razor blade exactly in the middle of the soldered area and tapped it a few times with a hammer to get a cut started. Following that, I carefully sawed with another fresh razor blade. Razor blades seemed to work well as they don't deform the solder and make a clean cut if you are careful.--Just be careful and don't cut the ribbon or your fingers. The only other thing that might work is a razor sharp micro scissors (like a fly-tying scissors) but the hard solder will probably wreck them. It destroys the razor blades. Following the ribbon cutting, open up the end of the connector and use the tool to lift up all of the teeth. I put the cut cable in (one edge of the ribbon will fit under the edge of the connector) and press the teeth down making sure they are cleaning aligned onto each solder. I did have to adjust one or two teeth when they were a little mis aligned and could have caused a short, but that was easy.). Once aligned, I crimped the connector together (pliars did not work for me) and used my fingers to seat the tab on the side closing it. When I say crimp, I used the crimping end of a wire strippers to just firmly seat all of the teeth on the solders. Following this, I chose to cut off the wires at the end of the connector directly splice them to a cat5E cable that I ran between the different shelving areas. Using one pack of these connectors, a wire strippers, some Cat5E cable (only need 6 of the conductors) and some electrical tape, I was able to light three separate areas of cabinets located 6-7 feet apart from each other from ONE single light strip. Saved easily over a $100. These don't require soldering skills, merely a steady hand and a good set of eyes to make sure your crimping is clean. Yes, you can toast a light strip, but be smart and start with the last segment so that your practice cut doesn't toast the whole string. Take your time, don't rush, use multiple blades for each cut and you should have no issues. Honestly, it's a tiny bit time consuming, each joint maybe takes 15 minutes once you are good at things but honestly the longest time is stripping the cat5e and connector wires. Dare I say it was actually an enjoyable process to make everything work. JUST don't forget your wire color/order. I used the philips writing on the light strip as the "top" of my connector and then color coded cat5e wires from there. I did debate between these and the other cut-end to male/female extensions however they weren't available prime and limit length necessitating the purchase of the male/femal to rj45 connector. I did buy the rj45 connector to male/female although with this system those will only work with the last strand since that has the factory female end. Honestly, it is so easy to splice cat 5e cable so i don't really see a point in the rj45 connector unless you don't want to do two crimps. At that point, you have an extension set that is more expensive than this and you have to buy the rj45 connectors. Easier, sure, but worth $40? No. I would just use these and directly splice the cat5e.