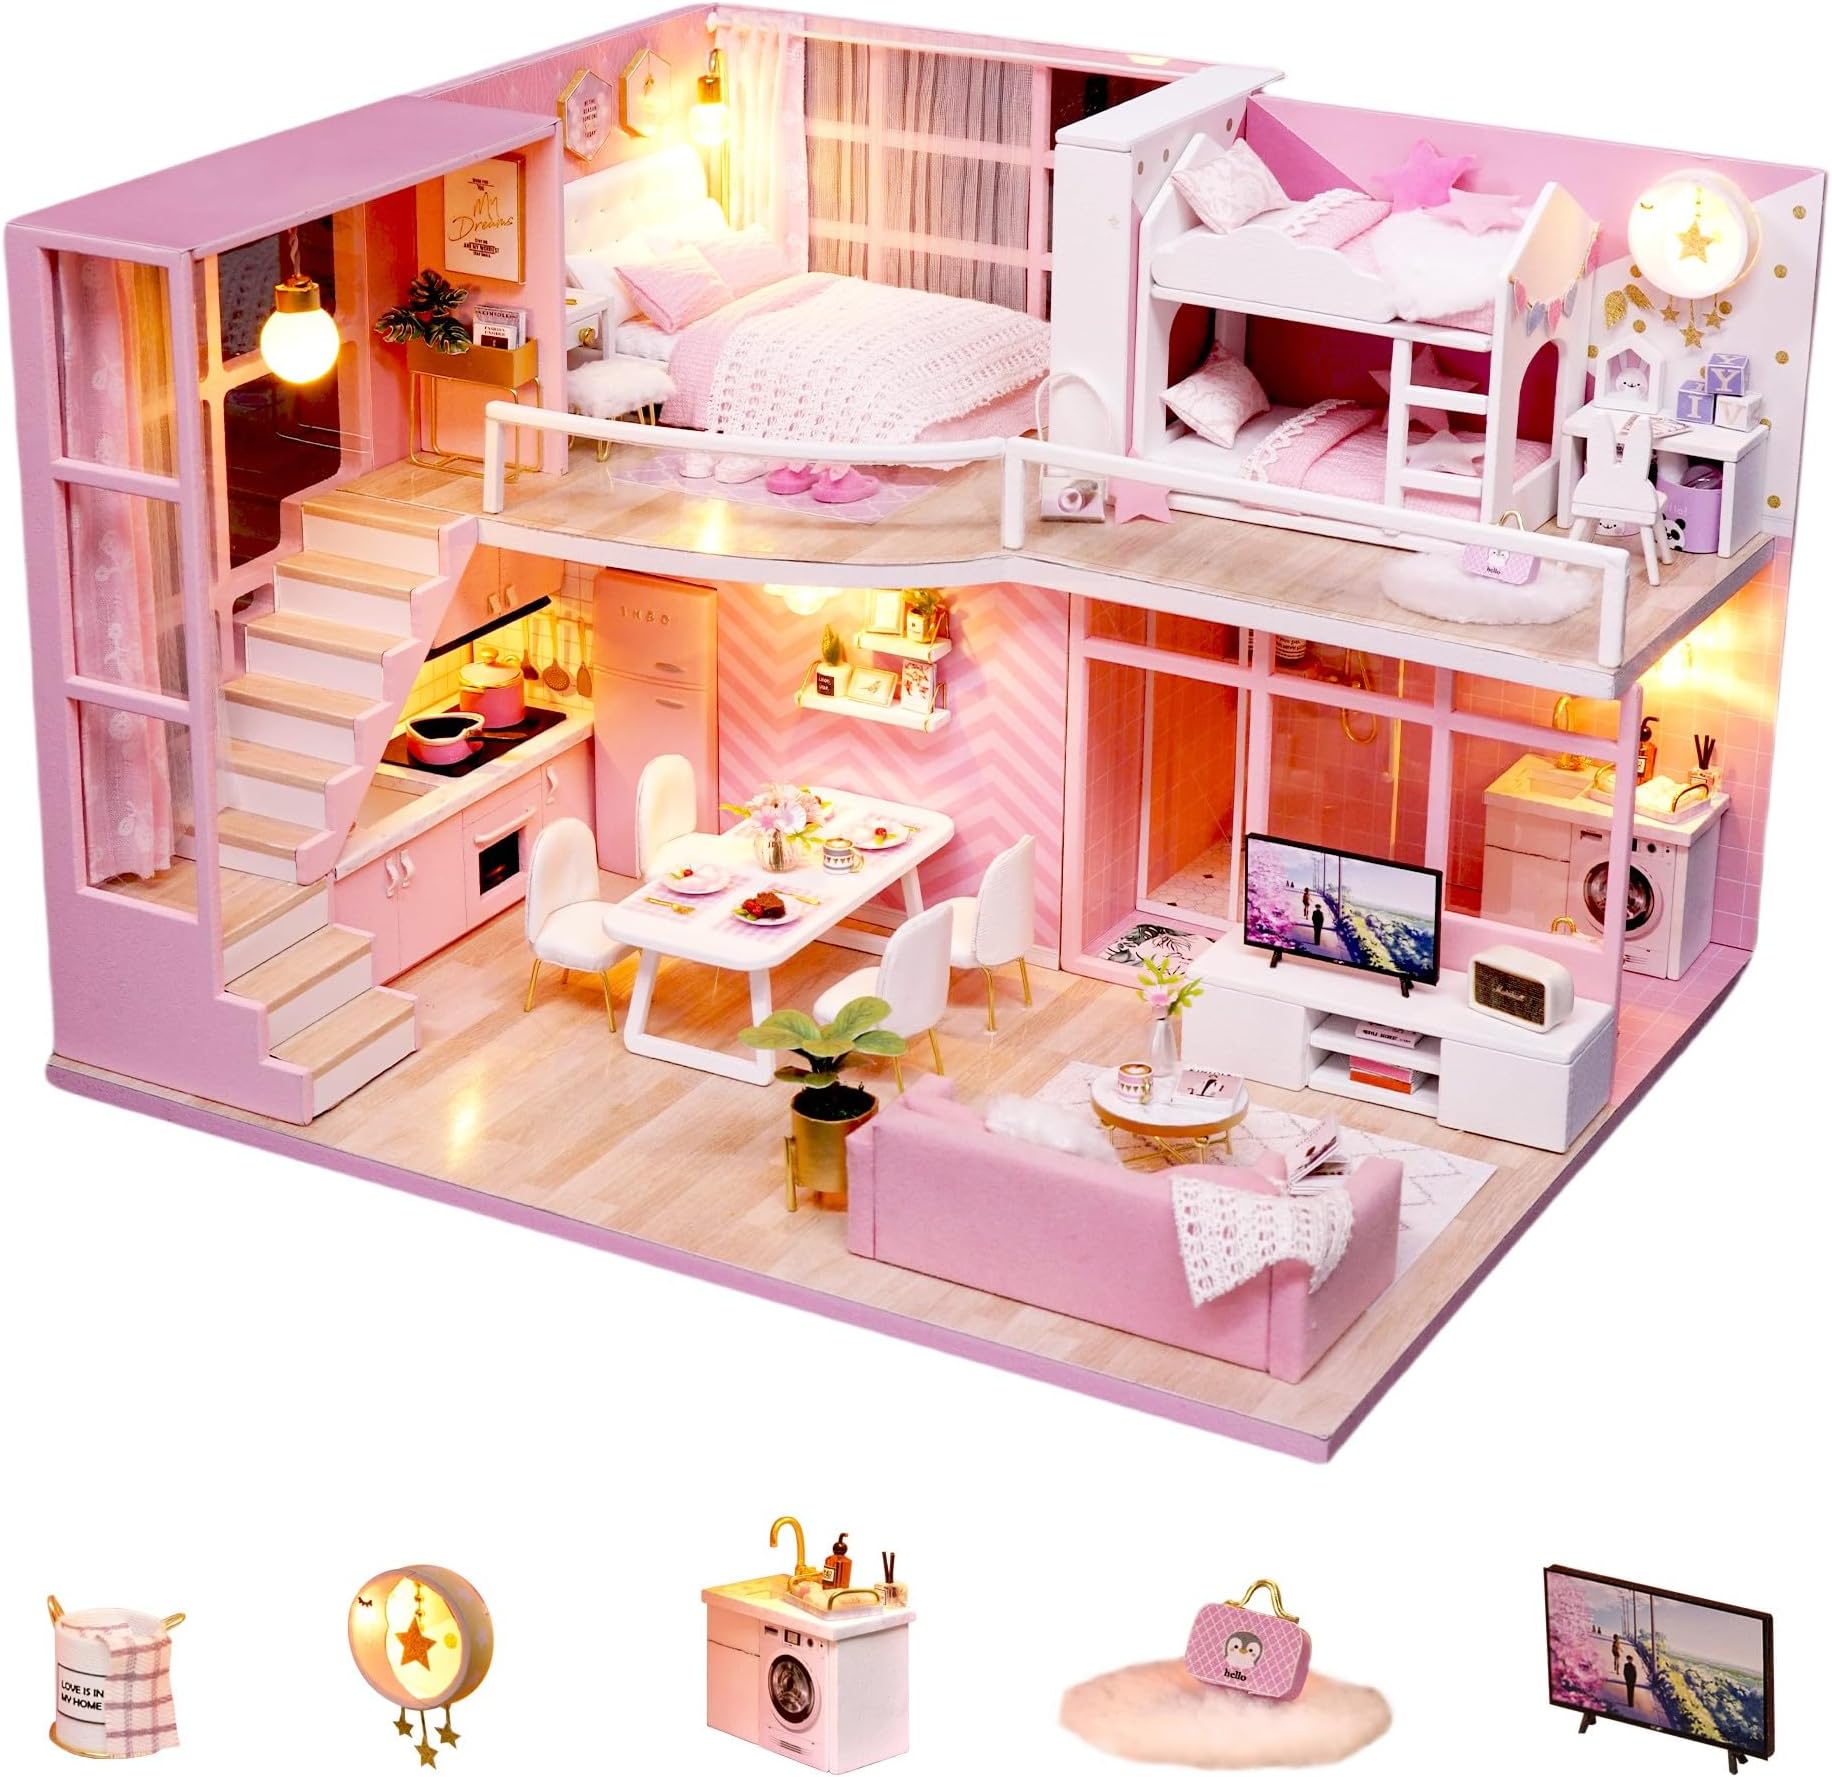
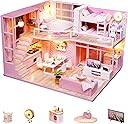


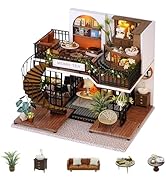
Flever Dollhouse Miniature DIY House Kit Creative Room with Loft Apartment Scene for Romantic Artwork Gift (Angel' s Dream)
Product ID: 345353780
💡LED lighting & music motion
📏1:32 scale precision
🛠️Complete toolkit included
🏡 Build your dream escape—one tiny detail at a time!
The Flever Dollhouse Miniature DIY Kit offers a detailed 1:32 scale loft apartment scene complete with LED lighting, music movement, and a protective plexiglass cover. Designed for ages 14+, this 9.6"x8.1"x6.1" kit includes pre-cut wooden pieces, fabric decorations, and a full toolkit, requiring 18-24 hours of assembly. Perfect for creative professionals seeking a mindful, hands-on project that doubles as a stunning decorative piece.


| ASIN | B08JK8RFJ4 |
| Age Range Description | Baby |
| Best Sellers Rank | 537,893 in Toys & Games ( See Top 100 in Toys & Games ) 1,024 in Dollhouses |
| Brand Name | Flever |
| Colour | Dream Angels |
| Customer Reviews | 3.9 3.9 out of 5 stars (147) |
| Included Components | English Instruction for DIY |
| Is Assembly Required | Yes |
| Item Dimensions | 24.4 x 20.6 x 15.5 centimetres |
| Item Dimensions L x W x H | 24.4L x 20.6W x 15.5H centimetres |
| Item Type Name | Dollhouse |
| Item Weight | 998 g |
| Manufacturer | Flever |
| Manufacturer Part Number | Flever-L-026 |
| Material Type | Wood Paper Plastic Metal |
| Maximum Age Recommendation | 960.00 |
| Minimum Age Recommendation | 14.00 |
| Model Number | Flever-L-026 |
| Size | 6.1*8.1*9.6 inches |
| Style | English |
| Theme | Christmas, Movie |
N**Y
I absolutely love it! It’s so beautiful. Very detailed and needs dedicated work, but totally worth it.
R**D
I make a lot of DIY miniature kits, and Flever is one of my favorite brands. A friend of mine was going through a hard time in RL (super nasty mess), so I made this kit for her as her pink escape place - she loves pink. She adored it. It was fun to build with a lot of adorable details (check out the bunny ear slippers with the pom pom noses). The only thing I did not care for was I could not see you got into the bathroom! All of the components were of very high quality with clear assembly instructions. Flever houses are not introductory level usually, but this one was not that difficult. Sometimes I use double sided tape to stick pieces together rather than glue. In the case of this model, I can see it led to some final gaps in the close-ups. The gaps are not due to any fault of Flever's in their part cutting, I just typically lightly sand the edges of parts and touch up the part with a matching acrylic or ink marker. If I don't get it absolutely flat, I get gaps, so my fault - not Flever's. Speaking of double sided tape, I have found it to be the best thing to put the plexiglass pieces together. It eliminates the chance of glue smear on the glass which is almost impossible to remove. You can get 25m roles of 1.5mm double sided tape on up. I also use it on the back of my paper patters that go on fabric. This ensures the pattern does not slip around and I am able to neatly cut out my part (I recommend one of the fingertip Xacto knives -loops around your index finger, once you use one you will never go back). My glues of choice tend to be: Aleene's Tacky/Turbo Tacky for paper, Gorilla Super Glue for tiny metal to metal parts (the underside of the white hex living room table for example), Beacon and B-700 for everything else.
L**E
Je suis en train de fabriquer ma 5 ième…super produit, bien fait …j’adore!👍🏻👍🏻👍🏻
D**G
I was looking into cute bedroom miniature sets and noticed that most of the listings had low reviews claiming that the instructions were unclear and the crafting process too meticulate but I'm just gonna say that all you need to build this set is time, patience, and some prior experience with building miniature props and sets. I have only done 1 complicated miniature food stand (with a lot of tiny bits and pieces) in the past so I did know what I was walking into when buying TRANQUIL LOFT, which is on a much higher scale. I was scared of reviews reporting missing and broken parts in their kits but luckily mine came with everything included. I did get Tranquil Loft though so I cannot speak for the quality of other sets. I think I did receive a faulty music box winder part so I am unable to actually make the music box wind but you know the music box is completely optional I never touch them. The booklet instructions are totally clear and in plain English along with a visual guide. If there is a prop or step you really do not understand just search up the name of your model on Youtube, there are plenty of videos showing the assembly process however I couldn't find any videos that showed the final electric wiring process. I can see how it's inconvenient for people who realize that they will need to get their own additional materials and tools to make this kit. I had to buy Silicone glue with a narrow applicator but I happened to already have other tools on hand like craft glue, wire cutters, thread snips, craft knife. One thing I do have a problem with is that the wiring instructions require you to trim the power wire but with the copper inside exposed and I'm not sure how they expected people to do that with regular scissors?? I fortunately had access to a wire stripper that easily takes out the casing so I can't imagine doing the very important LED power line assembling without it. Double tape was very helpful for sticking paper and wood together. Also used iron on tape and fray check for the fabric pieces. Use an iron for all those 0.5 cm folds. I had a heat gun and heat tube shrink for the exposed connected wires which was just a personal preference, I'm sure the provided electrical tape is fine. A personal tip I have is to save all the tiniest props for last so you don't accidentally lose or damage them in the chaotic assembly process. You are also not obligated to make every single tiny prop included in this kit. There are some I am definitely skipping since I have my own Re-ment and other kinds of 1:12 pieces. Be creative with this miniature set and do whatever makes you comfortable. Sometimes your furniture or walls will not exactly align a perfect 90 degree angle so be careful about that especially when you are using hard to remove glue like silicone glue.
L**Y
glue not included, Ive bought three different types of glue and they didnt work, speciafically for building the little furtniture. Instructions are not very clear. There is guessing inolved and done it incorrectly. I dont understand why some parts already come in color and others you have to glue color paper for example both sets of stairs and it does look very cheese, these parts should be colored wood. fabric amount is limited so there is no room for errors so be very careful. Extra fabric should be included to avoid running out of materials. Some bitty pieces can easily be lost, they should include extra pieces.
Trustpilot
1 day ago
4 days ago