Desertcart purchases this item on your behalf and handles shipping, customs, and support to Kyrgyzstan.
🌑 Own the Dark, Own Your Space
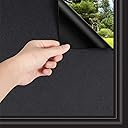
WochiTV Total Blackout Window Film offers 100% light blocking with a non-adhesive electrostatic cling that ensures privacy without residue. Its energy-saving insulation and 99% UV protection make it ideal for home or office use, while explosion-proof and moisture-resistant features enhance safety and durability. Easy to install and reusable, this film transforms any window into a private, darkened sanctuary.


| ASIN | B08F26VBBQ |
| Best Sellers Rank | #254,310 in Home & Kitchen ( See Top 100 in Home & Kitchen ) #301 in Window Films |
| Brand | WochiTV |
| Brand Name | WochiTV |
| Color | Black |
| Customer Reviews | 4.1 out of 5 stars 5,355 Reviews |
| Installation Type | Static Cling |
| Item Dimensions L x W | 157.48"L x 35.4"W |
| Item Type Name | One Way Mirror Window Film |
| Item Weight | 2 pounds |
| Manufacturer | WochiTV |
| Manufacturer Part Number | 1 |
| Material | Environmental PVC |
| Material Type | Environmental PVC |
| Model Number | One Way Mirror Window Film |
| Number of Items | 1 |
| Product Dimensions | 157.48"L x 35.4"W |
| Size | 35.4 Inch x 13.1 Feet |
| Ultraviolet Light Protection | UV Protection |
| Unit Count | 1 Count |
A**N
like putting on a giant screen protector
i bought this tint for the sliding glass doors in my bedroom to keep the afternoon sun from turning it into a sauna. like most during this heat wave, my ac seems to have been running nonstop in order to keep the house at a bearable temperature for my 13 year old dog. like most, i am flinching at the mere thought of my electricity bill. also like some, i don’t have a whole lot of loose change to spend on anything besides food and gasoline. i chose this item because the quantity and discount offered seemed to be the most economical. please note, the pictures are taken at 2:30 in the afternoon with no inside lights on. we have almost achieve cave status without blackout curtains. let’s dive into application, shall we. i did this solo because i wanted to see if it could be done. i’m sure, like most things, if you had multiple sets of hands, it would go a lot faster. one side of my sliding glass door took about an hour or so. handmaids tale was playing so i’m using that as a guesstimate. i didn’t have the energy to procure a squeegee so i used a plastic ruler instead. the ruler allowed for the same type of edge as a credit card or small hard card would but with more surface area. there were a few mishaps with fur getting between the sheet and the window surface but if you’re quick enough, you might be able to fish it out. i matched up the factory cut side as well as i could with the corner and left side and used some painters tape to hold the sheet in place up top while i started peeling the tint from the backing. spraying your widow down with the soapy water mix will allow for manipulation during the initial placement. there will be A LOT of bubbles so be patient working them out. i used an arcing motion to gather bubbles together and press them towards the edges. that technique seemed to work best. it’s very much like putting a screen protector on your phone. you’re going to get pissed at least once. i chose to leave the backing on and pulling it down one section at a time to attempt to keep animal hair finding it’s way between. that worked for the most part, although, my cat did decide to hang out right next to the window the entire time so there’s that. as i mentioned before, don’t have a bunch of money to spare on “be prepared to screw up on the first attempt” so i was determined to keep the mistakes to a “i can live with that” level. all of that being said, if you aren’t a “do it yourself with the help of 8 youtube videos before you break down and call for help” person, then you might need additional hands. if you’re determined, cheap, with a ragtag set of skills like me, this could work for you. good luck to you all and stay cool my friends.
H**P
So happy!
After reading some of the review I was a little worried it wouldn’t lay down well or I wouldn’t be able to peel it apart. I’m so glad I bought some and tried it anyways! I’m a 27yr old girl and I was able to cut and tint each glass pane for our sunroom with ease (please look closely how many panes I had to do - this was no small project! Haha) It feels so nice,cozy, and private in there now. The product is thick and good quality. The instructions that came with it weren’t the best they say to peel it apart twice but you only do that once. All I did was watch a simple YouTube video once and was able to get it done with just a razor blade(exacto knife would be better) and a credit card wrapped in a wet paper towel. No it will not look like a perfect mirror because it is not a glass mirror but it looks really nice and really upgrades the look of our house from the outside. No it is not going to “stick” down necessarily because it is not an adhesive but as long as you don’t bend the product it lays down just as good as the sticky kind. I’m also glad that it won’t damage the glass in any way. One pain I messed up accidentally and was able to peel it off and redo it easily which I really love.
P**J
Provides Excellent Daytime Privacy
I got the silver in 5 rolls. I noticed on 2 of the rolls, they had an indentation, almost like a small cut but still usable. Easy to install once you get the hang of it. You need: TO CLEAN WINDOWS: - Windex - Scotch-Brite Non-Scratch Scrub Sponges - Shower Squeegee - Scraper with Double Edged Blade (optional) TO INSTALL - FOSHIO 1PCS Green Squeegee Scraper Shower - Spray bottle - Johnson's baby shampoo (JBS) - cutter - Metallic Ruler (optional) Make sure you clean the window properly. To wet the window and the tint, mix water and JBS. Just a very small amount of JBS where you would have very minimal bubbling. Too much will make it slippery and will be harder to install. I think one of the reason why some complain that they can't remove the bubbles is because of using the wrong tool and technique. Get a squeegee with a handle (see my recommendation) because with it, you get more leverage to squeeze out the moisture when installing. You should also wet the film from outside when using the squeegee because it helps the tool slide better. The tint material is thick. You can put a lot of pressure on the squeegee to squeeze the moisture out which is good if this is DIY project. Once installed, you might see some very small bubbles (like a dot) here and there. After a few days, they disappear. From a far, the tint looks great. If you inspect very closely and at a certain angle, you would see some sort of a streak or pattern on the tint (see pix on what you can see from the other side, some distortion). So it is not like a mirror finish. I would rate the quality 3 out 5. I guess at this price point, I can't complain. I gave it a 4 rating overall. 20200711 Video Added: Using squeegee to remove water between tint and glass. One I’m using I highly recommend.
J**R
Total blackness
So worth buying totally blackened my room
S**Y
Works, but a pain to install
I've installed window film on three rooms so far in my home. I have to say that this product is one of the worse products I've had the displeasure of installing. The instructions are bare but there are youtube videos online and it's fairly obvious what you have to do. However, there's no clear marking on which side is the window side and which side is the room side, Minor annoyance 1. There's a transparent cover that covers the window side of the film that's easy to take off. However, the cover on the other side is almost impossible to take off and makes the entire process of putting the film on the window a challenge in itself, Major annoyance 1. Finally when you're ready to put the film on the window and have sprayed the film and window with your soapy water. You'll put the film on the window and it will need to be adjusted. However and maybe a positive to this film, it sticks to the window and will not adjust easily. So you'll have to constantly take it off and reapply it until you're squared or you've given up and decide to cut off excess, Minor annoyance 2. So once you've attached the film and adjusted it to your liking, you'll squeegee the film to remove air bubbles and water. Easy enough, than you'll remove the back cover which doesn't want to come off and you'll waste your time since it will inevitably peel the film off the window once again, Major annoyance 2. Once that is off, it's time to trim the film to the window frame. NEVER have I ran into a film that will not cut like this film. I've done three rooms with this one being my 3rd. I've used a different product for my other two rooms and this film is by far the worse to cut through. Every cut either drags the blade leaving pocks and bumps in the film or it goes through and leaves cracks in the film. I couldn't even explain why that happens. So what is left is a badly trimmed film that has gashes and bumps around the side of the window frame. This is by far the most egregious annoyance and why this product cannot be more than 3 stars to me. The only positive thing I can say about this product is that it works stupendously and provides the privacy and shade that is written on the product page. I can feel the difference from before and after I've installed this product. tl;dr - This product works great, but is one of the worse films to install.
J**C
Hopeful purchase lead to Disappointment!
Silver color 17.5x 6.5 size. I purchased 5 rolls I installed as directed on package. Clean windows, measured correctly, installed and placed on correct side. I installed (2) rolls on my bedroom windows and within an hour, the tint plastic PEELED OFF nicking and making dents in it making it UNUSABLE. Frustrating! I waited some time before attempting it again this way, I can give my accurate review and will know if it is a “Me” problem or “Them” problem. This time, it was on my living room window. Again, I installed as instructed on package. My installation was 2 days ago now & began peeling AGAIN. Within this time, I monitored it RE-APPLYING water & smoothing it out hoping I won’t totally lose it all as my first 2 rolls. Well, yesterday I was out for about 4 hours & NOT TO MY SURPRISE, my floor was covered in creased tint!! Yet again, UNUSABLE!! I gave this product the benefit of the doubt & countless effort, but my answer is locked in.. I’m DISSATISFIED and DO NOT recommend. I wasted all (5) rolls and money. I can say for the very (short) time up, the tint did block people from looking in during DAYTIME. However, this tint will not block out anyone from seeing in at night and will not have privacy. The idea of it is nice, but what is the point if this product does not stay installed & also speeds up the peeling process once the sun hits it?? Isn’t it promoted as heat-blocking? Currently: Looking for a dependable solution for window privacy/heat blocking. All windows are as they were before purchase: exposed and see-through. $50 completely wasted down the drain.
B**Y
Enough for entire sliding glass door
Ordered the blue tint for our sliding glass doors. There is enough to cover both sides with an inch or two excess on all sides. Installation was tricky and is best done with 2 persons. The hardest part was cutting to dimensions as you need a large flat surface and the protective plastic film on the reflective side is thick and wants to re-roll. (Ruler markings on the protective plastic side would have been helpful). The reflective side goes on the glass. We had to spray the glass with water, place the film in position while pulling off the protective film all at the same time. (Be liberal with the water). Use a wet squeegee or rag for bubbles. (Don't sweat the tiny bubbles!) The film can be removed anytime with no damage to the glass. The film adheres well, even at the corners. The blue tint has a cooling effect indoors. The reflective side provides privacy, protection against indirect radiant energy, and reduces glare. We love this product and the effort to install it was worth it.
L**R
Great Material, Great Thickness & Easy to apply - seems to work as UV Blocker
By far, the easiest Window Tint Film I have worked with. Great quality material. The material is thick enough, not thin & flimsy, it won't stick to itself when you peel the film which will cause unnecessary "crease" on the film or worse make it completely un-useable. Another main thing is it is easy to apply. Just make sure you spray the window & the film with enough water (for easy alignment), then squeeze out the bubble, & let it dry. If you don't spray the film (just the window - I tried both method)I found that it sticks better, but a tad bit harder to align. The result is the same, just a little faster than wetting both surface. Overall, totally satisfied with the product material & Quality, but as for function - uv blocker & cooler room, I'll update my review after a few days. But, So far so good - room seems cooler.
R**E
It works as advertized
The product works without any adhesive, which is fantastic, cleaning the surface well will help and most importantly: since it comes rolled up, you first need to do some "unrolling" to flatten then sheen, otherwise the sheet will bed away from the glass and end up falling due to gravity. In my case 99% of the sheet adhered to the glass perfectly, and for the flaring edges I aplied a small tape to secure them
A**N
Very good quality
It takes some practice to apply to the windows especially large ones but totally doable. We have add it to all our west facing windows to reduce the afternoon glare. It stays in place securely and does a very good job keeping the strong light out while letting us look outside. Like other similar products, it turns into a mirror in the night so you can not see outside but people outside can see you. Priced in line with similar products.
J**P
It does the job - but you will have bubbles on your windows
So it has definitely kept the morning sun out of 1 room, but it looks pretty lousy with bubbles - I think these are unavoidable. Its easy to fit once you cut it. Instructions are fairly idiot proof .
T**Y
Top notch daytime privacy film but instructions could be better.
Got this to stop a very nosey neighbour from looking into my bedroom whilst I take a nap during the day. Very effective and look great from the outside. Instructions are scarce and it takes patience. Some tips. 1. Don’t worry too much about the size to cut. Just make sure the film is larger that the window you are going to fit it onto. It’s very easy to trim any excess film after it’s fitted to the window. 2. Use a table to measure and cut. Trying to do this on a floor will attract a lot of dust particles etc. 3. Make sure the window is very clean before applying the film. 4. Maybe use distilled water to moisten the window rather than tap water if you live in a limescale area. Also don’t use a sponge to apply the water, use a spray bottle for even water distribution. 5. Use a squeegee to squeeze out the water after fitting but wrap the squeegees rubber blade in a soft cloth to stop the squeegee rubber blade from scratching the surface of the film. 6. Yes, if you make a mistake it can be removed and reapplied. 7. After about a week, the film becomes more clear and less cloudy on the windows giving a nice look from inside also. I’m now looking for other places to use this film. Just love the way it looks on my windows.
D**E
Reflective Tint / Film
Found this easy to apply but keeping it free from airborne particles before getting it on difficult no matter how careful one is...
Trustpilot
4 days ago
2 weeks ago