We remain fully operational. Our teams are working around the clock to ensure your deliveries continue safely.

DOWNLOAD THE APP


Customer Services
Copyright © 2025 Desertcart Holdings Limited
DOWNLOAD THE APP

❄️ Recharge like a pro, stay cool like a boss!
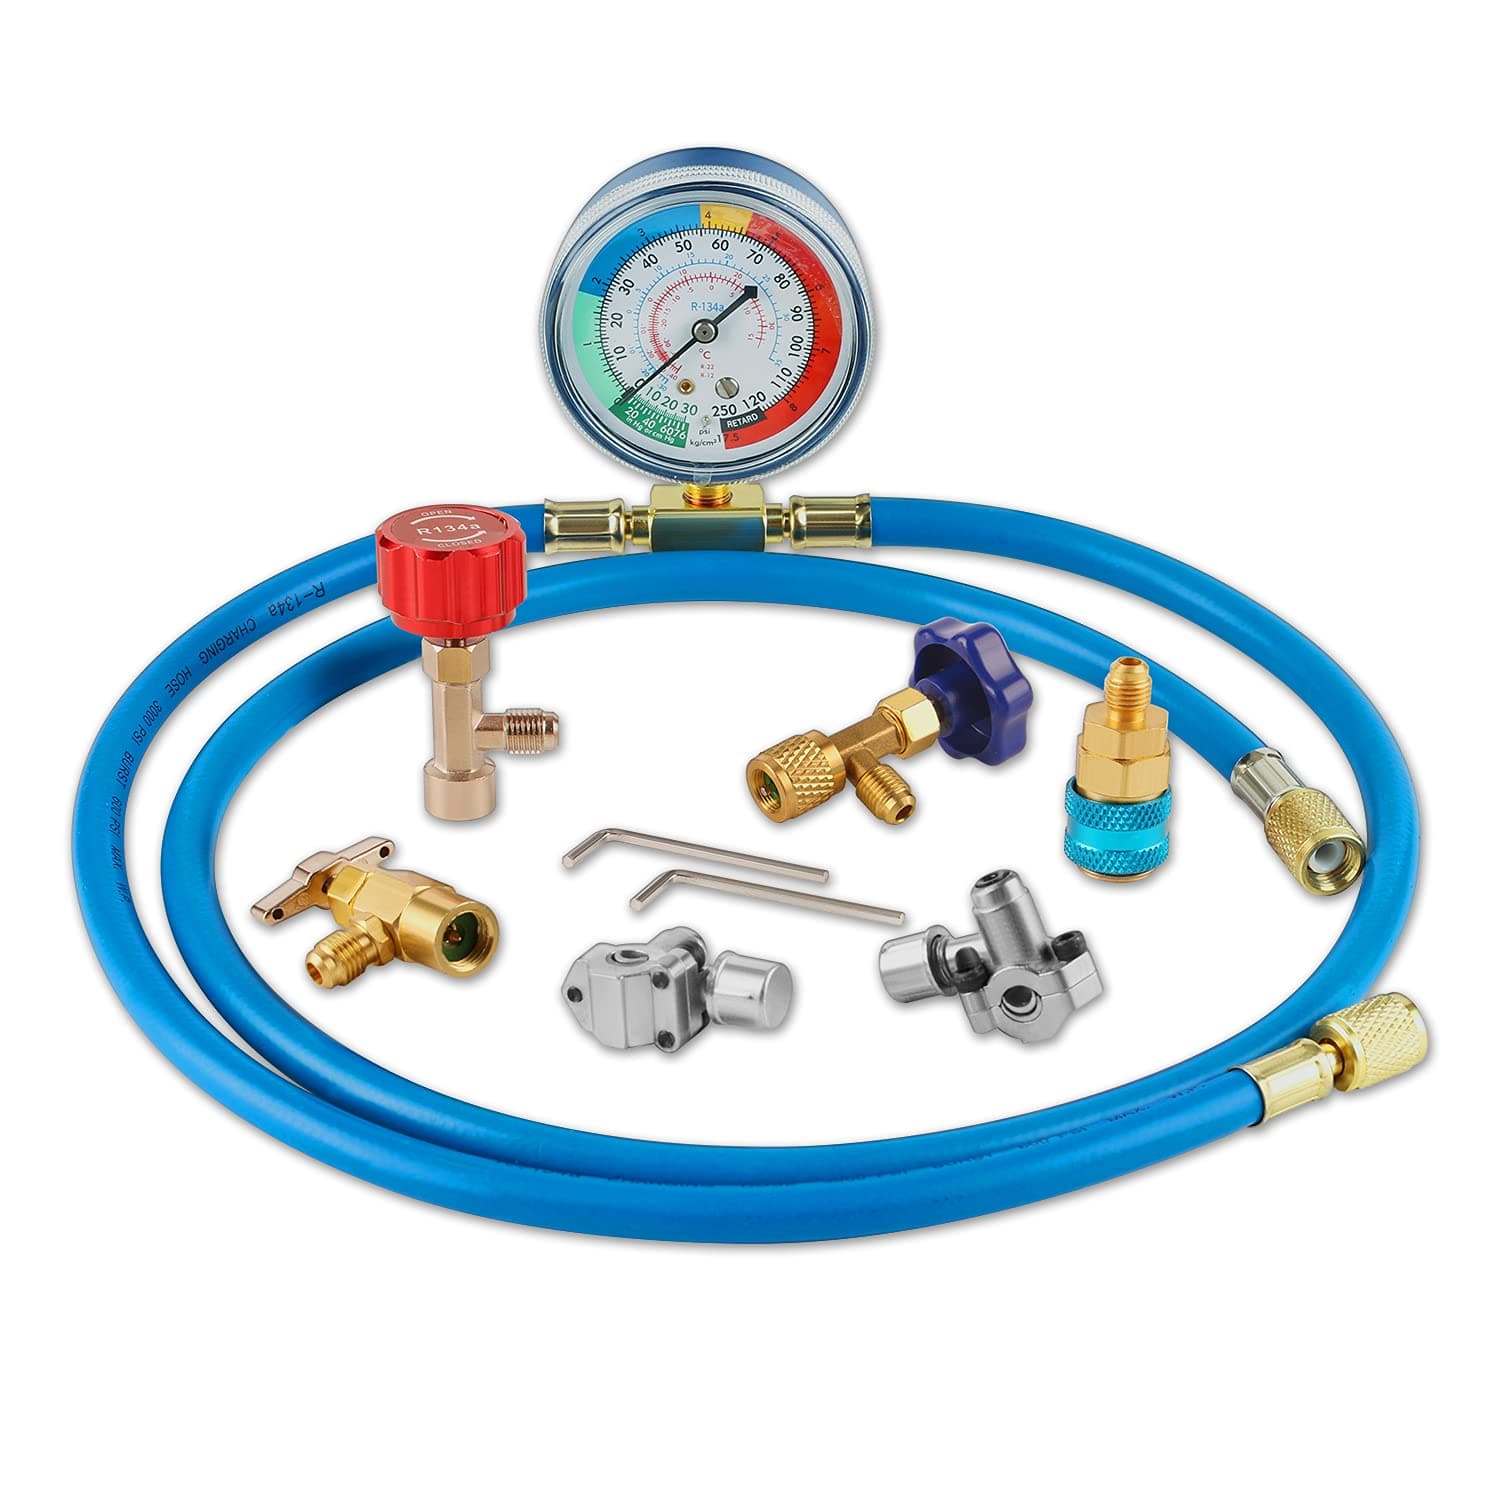
The Lichamp A/C R134A Recharge Kit is a professional-grade automotive refrigerant toolset featuring a 250 psi rated gauge, dual piercing and self-sealing can taps, and a heavy-duty hose with 3000 psi burst pressure. Designed for R-12, R-22, and R-134a systems, it offers versatile hose fittings and a complete package for efficient, leak-free A/C maintenance. Trusted by thousands, it delivers reliable performance and ease of use for both vehicle and refrigerator Freon recharging.


| ASIN | B08B43ZBTW |
| Best Sellers Rank | #29,163 in Automotive ( See Top 100 in Automotive ) #71 in Air Conditioning Line Repair Tools |
| Brand Name | Lichamp |
| Customer Reviews | 4.4 4.4 out of 5 stars (1,477) |
| Item Dimensions | 5.28 x 7.09 x 1.97 inches |
| Item Weight | 1.45 Pounds |
| Manufacturer | Lichamp |
| Material Type | Brass |
| UPC | 791533865418 |
S**.
Good quality gauge and valve kit
At basically $30 I was skeptical about the quality of this kit with a gauge included. I bought it so I could add Freon to my refrigerator. This kit worked great with no issues. All the valves were top notch, threads were good and easy to use. It even had two piercing valves which I only needed one. Adding Freon fixed my issue and I loved how easy this kit made the job. Everything that was needed was included but the Freon. Next I am going to use it on my truck and top off that AC system! I can't vouch for how accurate the gauge was to a calibration standard but the values it had on the dial fell right into the area a refrigerator should be so again it worked for me.
M**G
2003 Ford Ranger - Happiness is a sweaty accumulator
Last charged it up two years ago and it was finally blowing hot again - and my old recharge gun no longer worked. Ordered this system yesterday. Instructions were included but lacking in a couple of details - like which side goes to the can and which side goes to the low-pressure port on the vehicle. I went back and forth a couple times but finally it seemed to work best when - with the gauge facing you topside up, the can connects to the right and the port on the left. Next problem was the self-sealing cans like to stay sealed - even when supposedly open. I found it necessary to back off the valve a couple turns, and it would actually only allow coolant to flow in a range of about half of one turn in the right spot. To confirm flow, I would slightly loosen the threaded connector attached to the low-pressure-port quick-connector. I'd turn the valve all the way in, and then slowly back it out until coolant flowed out the other end - and then I would quickly tighten the low-pressure-port connector. Kind of a PITA to do by yourself but that proved a reliable technique for every can. My last problem was the system was so low the compressor clutch wouldn't engage. Took me about 45 minutes of holding the can up high, shaking it and slowly gravity feeding coolant into the accumulator until enough leaked in to make it past the low pressure switch and activate the compressor clutch. Of course it would run one second, pressure would crater, it would disengage, and I'd go back to drip feeding. Over time, the compressor would engage more frequently and run longer, until I finally tickled the blue zone and it started sucking in refrigerant in earnest. Soon the accumulator started sweating and we were getting ice cold air in the cab. Time will tell how long this lasts. That system was EMPTY. Probably have multiple shrunken/cracked seals. Fortunately it appears the evaporator is right on the firewall at the top of the engine bay and easy to reach. Grateful for that. Long story short - kit worked just find and I would recommend to others. Thank you for coming to my TED talk.
E**.
Instructions would be helpful!
Reading the negative reviews, many were about the lack of instructions which I agree with. (Aside from any 'broken parts' issues, then RETURN IT!) Youtube videos can be hit and miss on the subject. This is only for units that are RUNNING low and need a trim, not FLAT empty! If empty you need a vacuum pump first, fix the leak, etc. The kit worked well for me. I attached the piercing valve to the "SERVICE LINE", the CRIMPED OFF charging line from the factory on the compressor as it was in an easier location to work with. I had to use the extra SHIM on the BACK HALF of the valve to fit it correctly! The suction line is the LARGER one on the compressor and if it's in a better spot, you might not need the shim. Test fit the BACK SIDE of the valve to see if it's needed! Shine up the line with steel wool or whatever first, then BACK the piercing valve all the way open and tighten it down pointed in a easy direction to access. Then run the pierce in to the line. (hopefully no leaks!) Leave closed and pull the cap. Connect the LONG end of the hose to the new valve LOOSELY. Select the correct valve from the kit for your recharge can and connect it up to the kit tight. Crack open the valve on the can and VENT ALL THE AIR out of the hose and then tighten the hose on the new valve. With the can valve CLOSED, open the piercing valve and get a gauge reading on your machine. Mine was pulling vacuum! It should have been 0 or maybe 1 PSI. (Yours may be different) SLOWLY add new freon a little at a time. Too much is as bad as not enough and could blow a high pressure line or ruin the compressor! Give it plenty of time to adjust and observe the temperature drop. I stopped when the freezer hit 5 degrees F and it ended up at ZERO!! Can't ask for more. Close the piercing valve, disconnect the kit and cap the valve tight. Then later enjoy a cold beverage...
T**R
It worked!
My ~2004 Whirlpool side-by-side fridge wasn't keeping things frozen any more, and the ice maker had stopped working. Service call was quoted at $120 just to show up, plus at least $100 if they recharge it, and more if there's another problem. Using this took me a couple of hours total, including reading and watching some tutorials, but totally worthwhile. It does seem to be somewhat risky, as you could make your unit non-functional or even destroy the compressor if you screw it up too badly. But with some care and understanding, it's definitely do-able by any reasonably handy person. I got a small can of R-134a from a local auto parts shop, and I ended up adding about half the can in very small batches over two days to ensure that I wasn't over-charging. I would add some, and it would have to run for a while to bring the low-side pressure back down around zero. About a month on, the fridge and freezer are working perfectly.
G**Y
wording on dial face hard to read
J**J
One valve came broken, the rest ok
Trustpilot
2 weeks ago
1 month ago