Desertcart purchases this item on your behalf and handles shipping, customs, and support to Kyrgyzstan.
💅 Elevate your nail game with pro tools that make every mani a masterpiece!
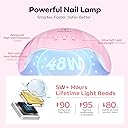
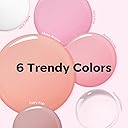
The Modelones Poly Nail Gel Kit offers a professional-grade nail extension experience with 6 versatile gel colors, a powerful 48W UV/LED lamp featuring multiple timer settings, and a comprehensive 92-piece set including base/top coats, dual forms, 3D nail charms, and all essential tools. Designed for both beginners and pros, it delivers long-lasting, glossy nails that can last over two weeks, making it the ultimate all-in-one manicure solution for stylish, durable nail art at home.

| ASIN | B0874KYWPN |
| Best Sellers Rank | #41,913 in Beauty & Personal Care ( See Top 100 in Beauty & Personal Care ) #79 in Nail Studio Sets |
| Brand | modelones |
| Brand Name | modelones |
| Color | A1-Daily |
| Customer Reviews | 4.2 out of 5 stars 14,041 Reviews |
| Finish Type | Glossy |
| Included Components | Base Coat, Nail Lamp, Top Coat |
| Item Form | gel |
| Item Highlight | Poly Extension Gel with 3D Nail Charms Builder Slip Solution Complete Toe Manicure Supplies Tools for Starter |
| Item Weight | 14.2 g |
| Manufacturer | Modelones |
| Manufacturer Part Number | MO-Y2B-CY0007 |
| Material | gel |
| Model Number | MZ-0248 |
| Number of Items | 92 |
| Set Name | 92 Piece Nail Art & Care Set |
| Unit Count | 1 Count |
T**E
Great for beginners!
I read all the reviews and was initially concerned with some of the negative ones. Primarily the issues with the curing light and someone stating that there weren't instructions. I was pleased to see that there were instructions and when read fully, they explained how everything worked. Someone also stated that the gel was still tacky after curing, but the instructions state that it will be a bit tacky so when it was, I wasn't concerned. Once the top coat was on and cured, there wasn't any tacky-ness. My 14 year old daughter and I had a fun girl's night playing with this set. We aren't professionals and we've never worked with gel nails like this so we are true beginners. When the instructions are followed, the process was very easy even with a few mess ups. Because I was concerned with the light, we did 2 light cycles on the top and 1 on the underside which worked wonderfully. By no means do our nails look professionally done, but they look good and with more practice, I'm sure they will look better each time. The one negative is that they are kind of sheer colors when you make them thin but still beautiful. My daughter did the darker purple and sparkle-y black and I did this darker blue-green and sparkle-y purple. Overall, for the price and the mother/ daughter time it was a great purchase!
H**2
Very pleased!
I am very impressed! I have been visiting nail salons and having acrylic sets done for almost 10 years. On and off I would try glue on nails and this nail hack and that nail hack and nothing ever worked like real acrylics. So I thought I would give the poly gel a shot, why not? If it works I’ve found a cheaper alternative to $40-$50 every other week for acrylics. I’m not sure how long the poly gel will last but man does it seem sturdy! The kit came with all the necessary tools, there is one tool in particular that I absolutely love. I’m not sure how I’ve been living all this time with out the little pronged black tool, it’s awesome! The gel wasn’t that obnoxious smell wise, I did my nails in an open room though. It took me quite a while between prepping my nails and figuring out how everything worked. But towards the end I figured it out and picked up the pace some. The poly gel was easy enough to work with, it spread nicely with the solution. There is a pinkish nude color, I think it’s number 015, that is stunning. I love that color! Over all my first experience with the set was a good one. I really hope these last some time and can become an alternative to acrylics. My first set is a little wonky, especially my pinkies where I didn’t use a large enough mold but I’m sure I’ll get better as I go.
S**N
Great set, but missing a few essentials and tips
Not gonna lie, it took me a long time to do my sisters nails. The results were good on the first try. I mainly had more problems with the shaping of the nails, but that will get better the more I use the kit. Overall, I would say I had an easier time with the kit because I bought extra items after reading other reviews. I bought an electric nail filer which saves A LOT of time. I also bought these clear nail clips for poly gel because sometimes the molds don’t stay flat closer to the cuticle area. If they aren’t flat when you cure them, they end up with air bubbles. I was missing and would recommend buying a nail clipper for acrylic nails to help shorten the nails to desired length faster. I would also recommend buying a metal cuticle pusher and cuticle trimmer that looks like scissors because the ones that’s provided sucks, especially if you aren’t planning on soaking your hands prior to help soften the cuticles. Some heads up? Buy the electric nail filer, nail clips for poly gel, metal cuticle pusher and cuticle trimmer. Also, watch a video or two on this kit on YouTube before you try it. I’m impatient so I watched two YouTube videos on 2x speed. In the instructions, they tell you to prep your nail by pushing down and trimming your cuticles. They also tell you to sand your nail a bit (which I did with the electric file and sanding thing provided) and wipe with alcohol before you apply the base coat. These are essential steps I feel like people who complain about the nails not lasting long enough or them popping off miss. The nail prep helps the poly gel to stay on longer! Other than that, the slip solution is really easy to work with. Don’t put too much and don’t put too little. When you squeeze the poly gel out of the tube, just be careful when applying it on the nail mold and you should be fine. I’ve also seen people apply the poly gel straight to their nails, put the mold on top and then smooth it out after with the slip solution. If you’re doing your own nails, I suggest even adding the poly gel to all the correct sizes you’re going to use for your nails beforehand so you just have to worry about the placement and touch ups on the sides after. Another tip? Make sure you cure the nails for long enough! I would go double the time the set recommends. Lastly, the nail molds are a bit pliable so don’t worry about bending a little to get them off after you cure a nail. If you go long with the nail length, I would say each poly gel tube provided gives you like 2 full manicures. I ended up shaving off a lo with the nail filer because I put too much poly gel. Sorry for the long review, just wanted to be helpful so others won’t have the same issues I did. Good luck with the kit :) definitely happy with my purchase and will be buying more poly gel in the future! Update: Second picture is my second attempt with the kit doing my own nails. Even harder than doing someone else’s nails in my opinion, but practice makes perfect so don’t give up! Definitely will be worth it when you become faster and think about how much you would be spending at the nail salon.
C**R
Good for beginners, easy/quick to learn
*image with flash is after a few days *image with no flash is with a different brand of nail polish on top *video is to show the process of buffing (don’t panic if they’re ugly!!) This product was ultimately easy to use as a first timer. I have literally never done this before, and I’m pretty pleased with the results. I will definitely not be going back to a salon for my $60 mani when I can just get good at this! A few tips that MIGHT be helpful - gen rule of thumb, lightly buff the top of your nails for the base coat to grip (instructions don’t really specify) - the slip solution is pretty oily and can make it hard to tell what you’re doing, I would use alcohol instead (which is what I did) - the base coat seemed to never fully dry and was pretty tacky, I think that’s the purpose so that’s fine just move on (I gave up after 5 min of light) - these are STRONG, don’t fret about making them too thin - don’t worry about working quickly, the poly gel is actually very forgiving while still wet - clean up as much as you can while it’s still wet UNLESS you have an electric nail drill (I ended up ordering one for the edges and behind the nail to make a nice dip shape on the ones I didn’t shape well) - if you followed the instructions for base coat and drying under the light, don’t hesitate with pulling the form off (nail won’t go anywhere, not sure if anyone else had that worry) 10/10!
T**B
Negative’s and Positive’s
Okay so first time writing a review but here we go, ill start with negatives then positives. NEGATIVE’S TO THIS KIT first: when i opened the package it looked like a glitter bomb exploded, one of the little glitter holders must have opened and it was... everywhere. Second: the brush i got was horrible. The hairs on the brush fell off every time i used it untill there was like 2-3 strands left. I recommend getting another brush with this kit. Third: the polygel tubes are super super small, extend your pointer finger... thats how big they are. Fourth: colors are not what they say, nude is not nude. I used nude in the picture above, its more of a light pink? Shouldnt really matter though bc you can paint over them with polish. POSITIVE’S First: super easy to work with, the poly gel with the slip solution is amazing. Not to sticky, not to hard. Second: the UV light is more than I expected, suuuuuper high quality and worked like a charm Third: files are super good, barley had to file anything bc the polygel and lamp was so good Fourth: top coat is the best ive ever used, suuuuper shiny and smooth ! I gave 3 stars, in the middle, due to negative and positive’s.. take with it what you’d like!
B**W
polygel is a game changer
I'm obsessed with polygel! I prefer short nails and used gel at the salon for the longest time but gel didn't offer much strength. Then I was talked into doing dip but those would chip immediately because I am pretty careless with my hands?? I would go to the nail salon, spend 150 after tip each time for mani/pedi and STILL not be happy so I decided to teach myself polygel! I get better each time and I've saved so much money! The polygel is a bit transparent so I use a burgandy gel polish over the polygel for the rich color. My biggest tip would be to apply the polygel with a very acetone wet brush onto your nail (kinda like acrylic?) THEN use the form to shape the nail and zap with the light to harden the polygel just a bit. Lightly buff just to get it more smooth then let the top coat do the rest of the work to level out the surface!! I see most people use the nail form to put the polygel on then squish it onto the nail but every time I do that it leaks into my cutical area and it's a pain to get off and if you put the uv light on it then your stuck with it on your cuticle until it grows out!!
B**I
So glad I made this purchase!!!!
They aren’t perfect but I think they look so good for this being my first ever experience with polygel. The kit comes with everything but a drill. I was nervous about the lamp because every video I watched about starter kits like this one, they always suggest getting a bigger lamp. I had no problems curing the gels with this lamp tho. I cure the tops for one min then I flip my hand over and cure the underside of my nails for one min and that did the job for me. There are so many colors to choose from too! It also comes with a clear gel. I was surprised and super happy about that lol The tubes are small but you get enough and you don’t need to use a whole lot anyways so they will last a little while. Especially since theres so many different colors to choose from! I love that they include little stars and gemstones and other things to decorate. They also include the glue for them gems as well! I also like that they include in the instructions how to remove the polygel. Heads-up… You will need a drill to file down the polygel quite a bit, then soak them off. As far as the application goes, it’s a bit tricky at first with the dual forms. The trick is to not use too much gel. I also had trouble with the underside flooding. I think not using too much polygel can help with that too. The point is that there is definitely a learning curve lol it took me about 2 hours but I know the more I do it and get the hang of it and master my technique, the faster it will be. I’ve only had the gel on for a day but so far they seem pretty sturdy. No chipping or lifting yet lol if I can get at least a week out of this set, my expectations will be far beyond exceeded. I thoroughly enjoyed doing my nails with this kit. I LOVEEEE MY NAILSSS!!!! 10/10 would highly highly recommend.
M**T
Great Starter Kit for Newbies, but you'll need some extra Supplies
I got this kit because I wanted to start trying to do my own nails at home and since I am an artist I wanted something that would be more substantial then just regular polish or gel because my nails go through a lot during my day to day, and paying to do my nails every week or so because I broke a nail, or it chipped off was starting to add up and made me not want to have my nails done anymore. I didn't know much about polygel, except videos I saw on instagram lol, but out of all the quick videos and at home nail building videos I saw this seemed like the most straight forward and looked like it would be better and last longer than just adding tips with nails glue. When it arrived I was SO excited, the presentation of the product was very nice and you do get a lot with this kit. I did take the advice of some of these reviews and bought a drill, a nail clipper, and some nail clips, which were very much needed. The kit itself was pretty easy to use, I was intimidated at first, and my first set was pretty messy and I ended up taking them off (the moment I was very glad I had the drill because soaking it off was not working well for me) I will say it is a messy for a beginner. I got better as it went on but the gel is sticky and well attach to things so be careful with it. Like most gels it has the potenital to burn some when you put it in the UV device, I know that doesn't happen for everyone but it did once or twice to me. Like I said, I did have to buy some additional tools and I owe them to why my second set looked good. An electric nail drill and clippers are needed in my opinion. While maybe not 100% necessary I think especially for beginners it helps to not only save time to from filing, it adds A LOT more precision then you can get from the emory board. I also needed the other clippers because my regular nail clippers just couldn't cut the polygel. One other thing is the dual forms might not fit perfectly to your nail, for me I actually would pick one a little smaller, so then I could us the drill to sand it flesh with my nail and that helped me get a more even look! The pictures above show my second attempt. My nails before hand, with the built up nail, and then my final finished nails. I am so happy with them and it has been about a week now and they are going strong, no chips even. Overall I am very happy with it, just think there are a few supplemental items that would help! Drill I got: https://www.amazon.com/gp/product/B01H05EDK0/ref=ppx_yo_dt_b_asin_title_o05_s00?ie=UTF8&psc=1 Clippers I got: https://www.amazon.com/gp/product/B07SBSZPSB/ref=ppx_yo_dt_b_asin_title_o04_s00?ie=UTF8&psc=1 Nail Clips I got: https://www.amazon.com/gp/product/B08D8HYHBV/ref=ppx_yo_dt_b_asin_title_o05_s00?ie=UTF8&psc=1
S**I
Kit Gel maravilhoso
O produto é muito bom, cores lindas, chegou super rápido, preço excelente. Gostaria de comprar mais um internacional, mas estou com medo pois estou com uma encomenda parada a 2 meses e não tem a quem recorrer.
ر**ا
راىع
يجنن جودته كويسة
J**E
Horrible 👎
بالمرة مش منيح It just never hardens i donno what is in there, not polygel for sure
G**A
Great kit, except for the lamp cable.
This Modelones kit is great! The polygel is great quality with a lovely range of colours. The top and base coats were great quality, too. The lamp wattage cured the nails very well, and the results looked very smooth and salon quality. Definitely recommend picking up this kit if you are looking into DIY polygel nails! Should be noted that the charging cable for the UV/LED lamp is an Asian adapter, so you will need a travel adapter if you live in Australia to use it.
G**Y
El truco está en la técnica
Nunca escribo reseñas pero estoy muy contenta con este kit. Todo me funcionó perfecto, y creo que es cuestión de técnica el que las uñas queden bonitas o no. Creo que a las que no les cura o no les seca el polygel es porque están usando mucho líquido del “slip solution” al aplicar el polygel, porque eso hice en la segunda mano y me tardo más en secar, pero solo eso. Solo en la primera uña del video use los moldes que vienen pero no me gustó mucho eso porque no se tiene tanto control sobre la cantidad que queda en las orillas de la uña y queda más grueso como se puede ver en el video que subí (el dedo de la izquierda lo hice con ese molde y el de la derecha es mi uña antes de hacer el retoque). Complementé este kit con un drill para hacer manicure ruso, limar las uñas, dar forma y quitar el Gelish o para hacer retoque de polygel que fue lo que yo hice, me hice retoque de un polygel que me habían hecho en el salón. Es la primera vez que me hago mis uñas en casa y me encantó el resultado, no se ven perfectas como de salón pero con la práctica confío en que me saldrán mejor cada vez. También recomiendo usar un aceite para cutículas al final (en la foto olvide usarlo y me lo puse hasta después), pero en mi caso me crece mucho la cutícula y se ve reseca y fea por eso tengo que estar usando aceites. He visto que también a algunas les da alergia, entonces si eso me pasa ya volveré a actualizar la reseña.
Trustpilot
2 days ago
1 week ago