Description
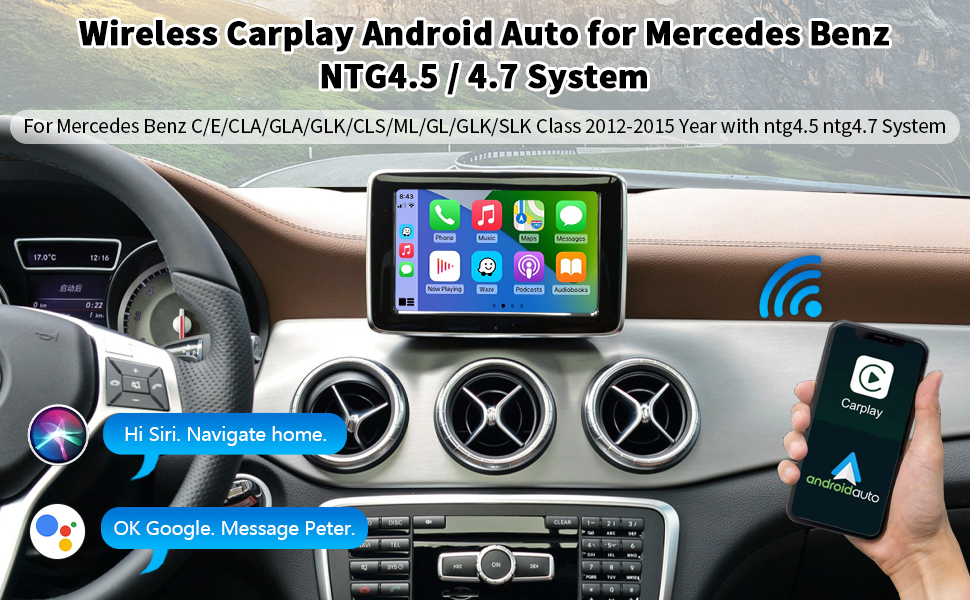
🚗 Upgrade Your Drive: Wireless CarPlay Meets Classic Mercedes Elegance
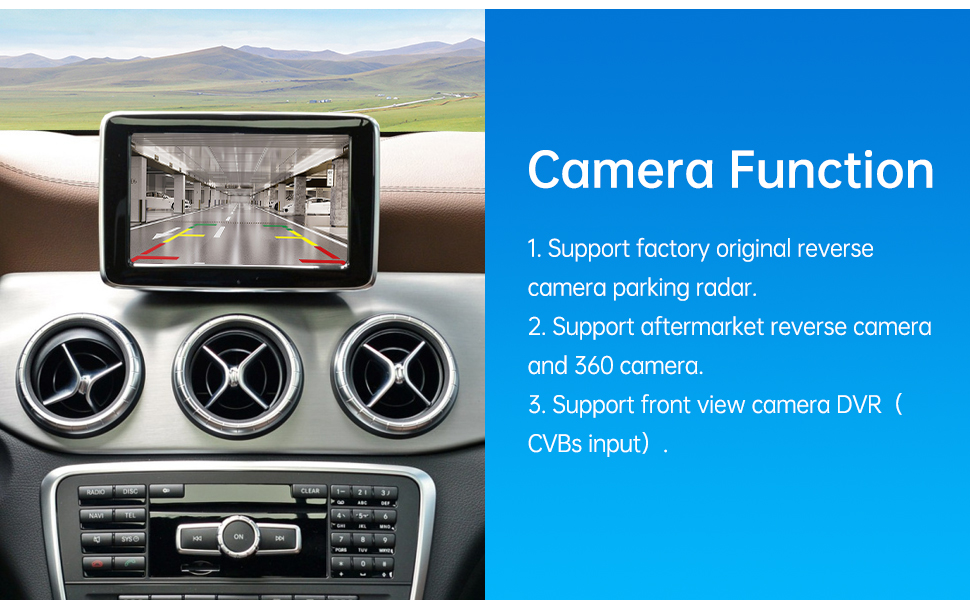
- EXPAND YOUR VISION - Supports factory and aftermarket backup cameras, 360° cameras, and parking radar for enhanced safety and convenience.
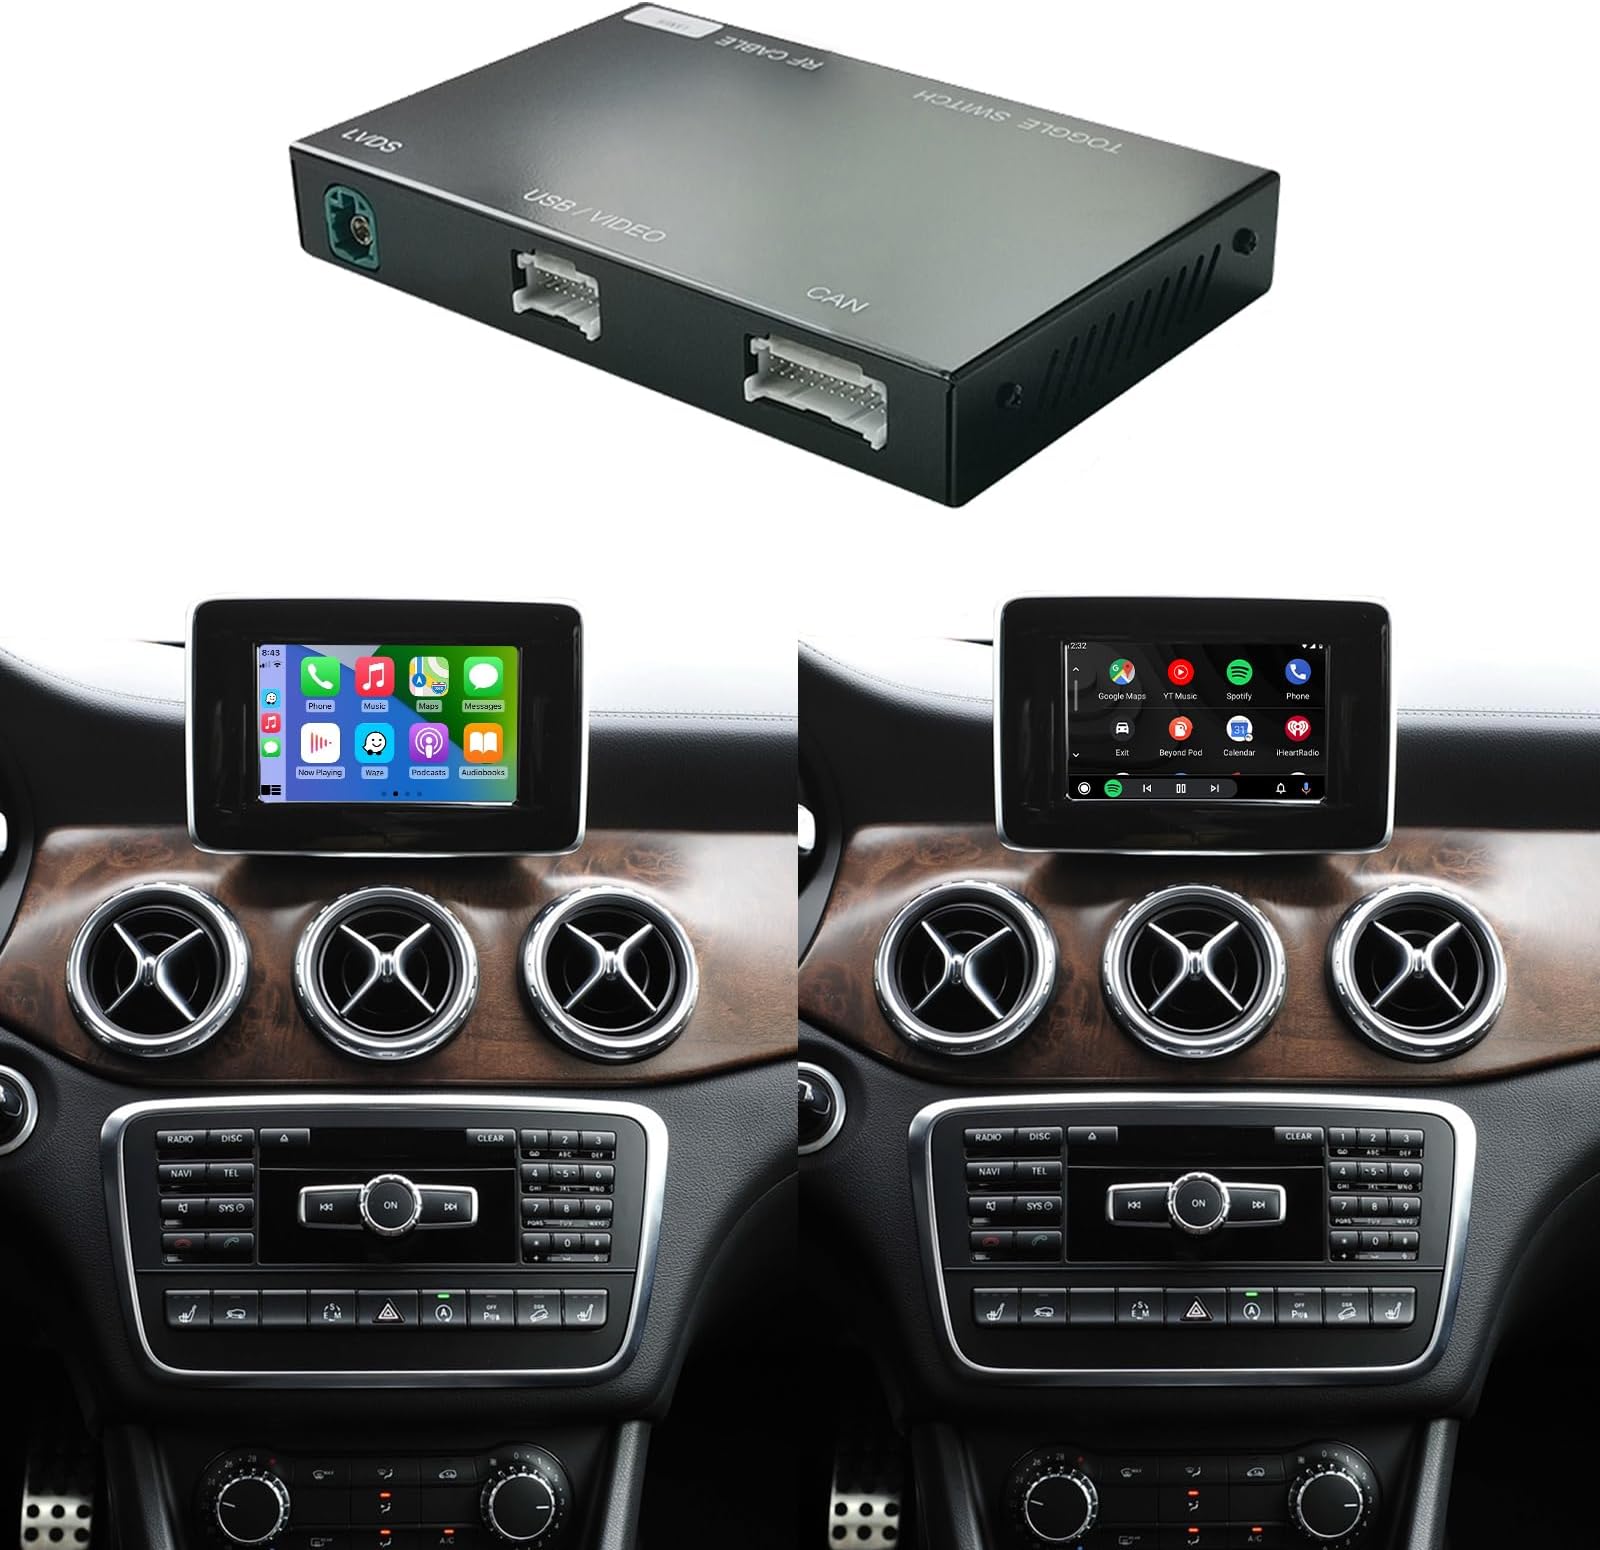
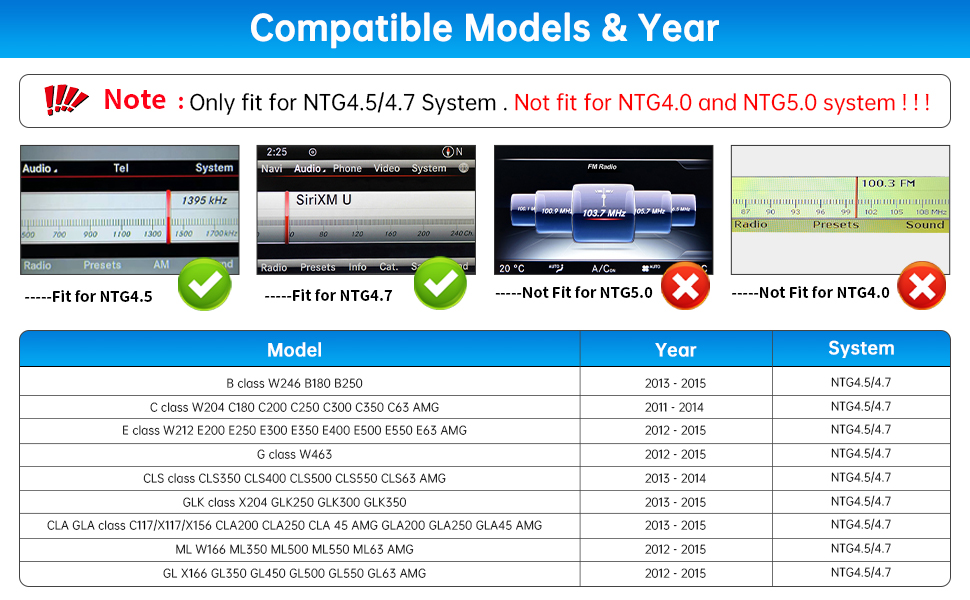
- PLUG PLAY OEM COMPATIBILITY - Designed exclusively for NTG4.5/4.7 systems (2012-2015), this decoder keeps your factory controls and steering wheel commands intact.
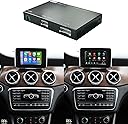
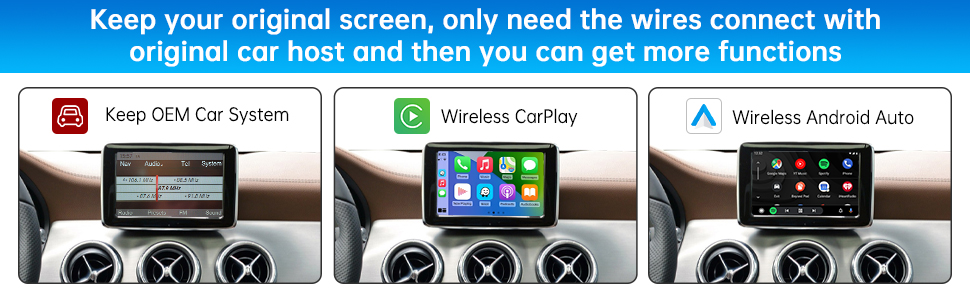
- EFFORTLESS WIRELESS CONNECTIVITY - Upgrade your Mercedes-Benz to wireless CarPlay & Android Auto for hands-free calls, music, and navigation without the clutter of cables.
- TRUE INTEGRATION NO SCREEN NEEDED - This decoder module connects seamlessly to your original CD host, preserving your dashboard’s sleek OEM look while adding smart features.
- DEDICATED SUPPORT EASY INSTALLATION - Step-by-step guidance and fast technical support ensure a smooth retrofit experience with AUX audio output compatibility.
The Road Top Wireless CarPlay Interface Decoder is a premium retrofit solution for Mercedes-Benz models (2012-2015) with NTG4.5/4.7 systems, enabling wireless CarPlay, Android Auto, and MirrorLink. It preserves full OEM control, supports backup and 360 cameras, and requires AUX audio output. This module enhances your in-car tech without replacing your factory screen, delivering a seamless, modern driving experience with reliable after-sales support.