


Buy anything from 5,000+ international stores. One checkout price. No surprise fees. Join 2M+ shoppers on Desertcart.
Desertcart purchases this item on your behalf and handles shipping, customs, and support to Kyrgyzstan.
๐ Elevate your IoT game with smart vision and sound sensing โ donโt get left behind!
The ESP32-CAM Arduino Kit is a versatile IoT camera module featuring a 2MP built-in camera, WiFi & Bluetooth 4.2 dual-mode connectivity, and integrated PIR and sound sensors. Designed for seamless Arduino IDE programming, it supports live streaming, face detection, and recognition, with images saved on a 128MB SD card. The kit includes essential accessories like a USB-to-serial cable and breadboards, making it an ideal starter for smart home, industrial monitoring, and wireless control projects.
| ASIN | B07ZF95CCP |
| Best Sellers Rank | #5,996 in Single Board Computers (Computers & Accessories) |
| Brand | ideaspark |
| CPU Model | Tegra |
| Connectivity Technology | Bluetooth, USB, Wi-Fi |
| Customer Reviews | 3.9 3.9 out of 5 stars (96) |
| Manufacturer | ideaspark |
| Memory Storage Capacity | 128 MB |
| Mfr Part Number | ESP32CAM |
| Model Number | ESP32CAM |
| Operating System | windows 2008 |
| Processor Brand | VIA |
| Processor Count | 2 |
| RAM Memory Installed | 4 GB |
| Total Usb Ports | 1 |
| UPC | 706597462572 706597462381 |
| Wireless Compability | Bluetooth, Infrared |
G**E
Great starter kit
What a great kit for me. It has what appears to be all the main ingredients, and will save me money also I will be able to use Some of the other items and more projects
B**N
ESP32-CAM board upload issues
Even though I bought this just for the sensors and breadboards, I'd still would like the board to work. I have other ESP32-CAM boards and they work fine. This one doesn't upload the program. I've followed the directions. I keep getting an error that the board isn't found. Maybe it is the USB to serial cable since I can't even get the serial monitor to run (port busy error). So three stars since an operating board isn't a big issue for me. UPDATE: It seems the USB to serial cable is defective or it has issues with Windows 10.
D**Z
Defective Camara
The product came defective from the supplier, the steps of the example provided by the supplier were followed and when uploading the program it gives the error 0x20002, which means that the camera ribbon cable or the camera is defective. Several tests were carried out to make sure that the supplied voltage was the necessary one and in the end everything has been a waste of time, not recommended at all, looking for another supplier.
C**N
Very good product
Easy to use. Found a good reference code and worked in no time. Not the best quality picture. But by far good enought for the price and for what I wanted to build.
R**E
nice kit
nice kit
G**S
It worked (after some effort)
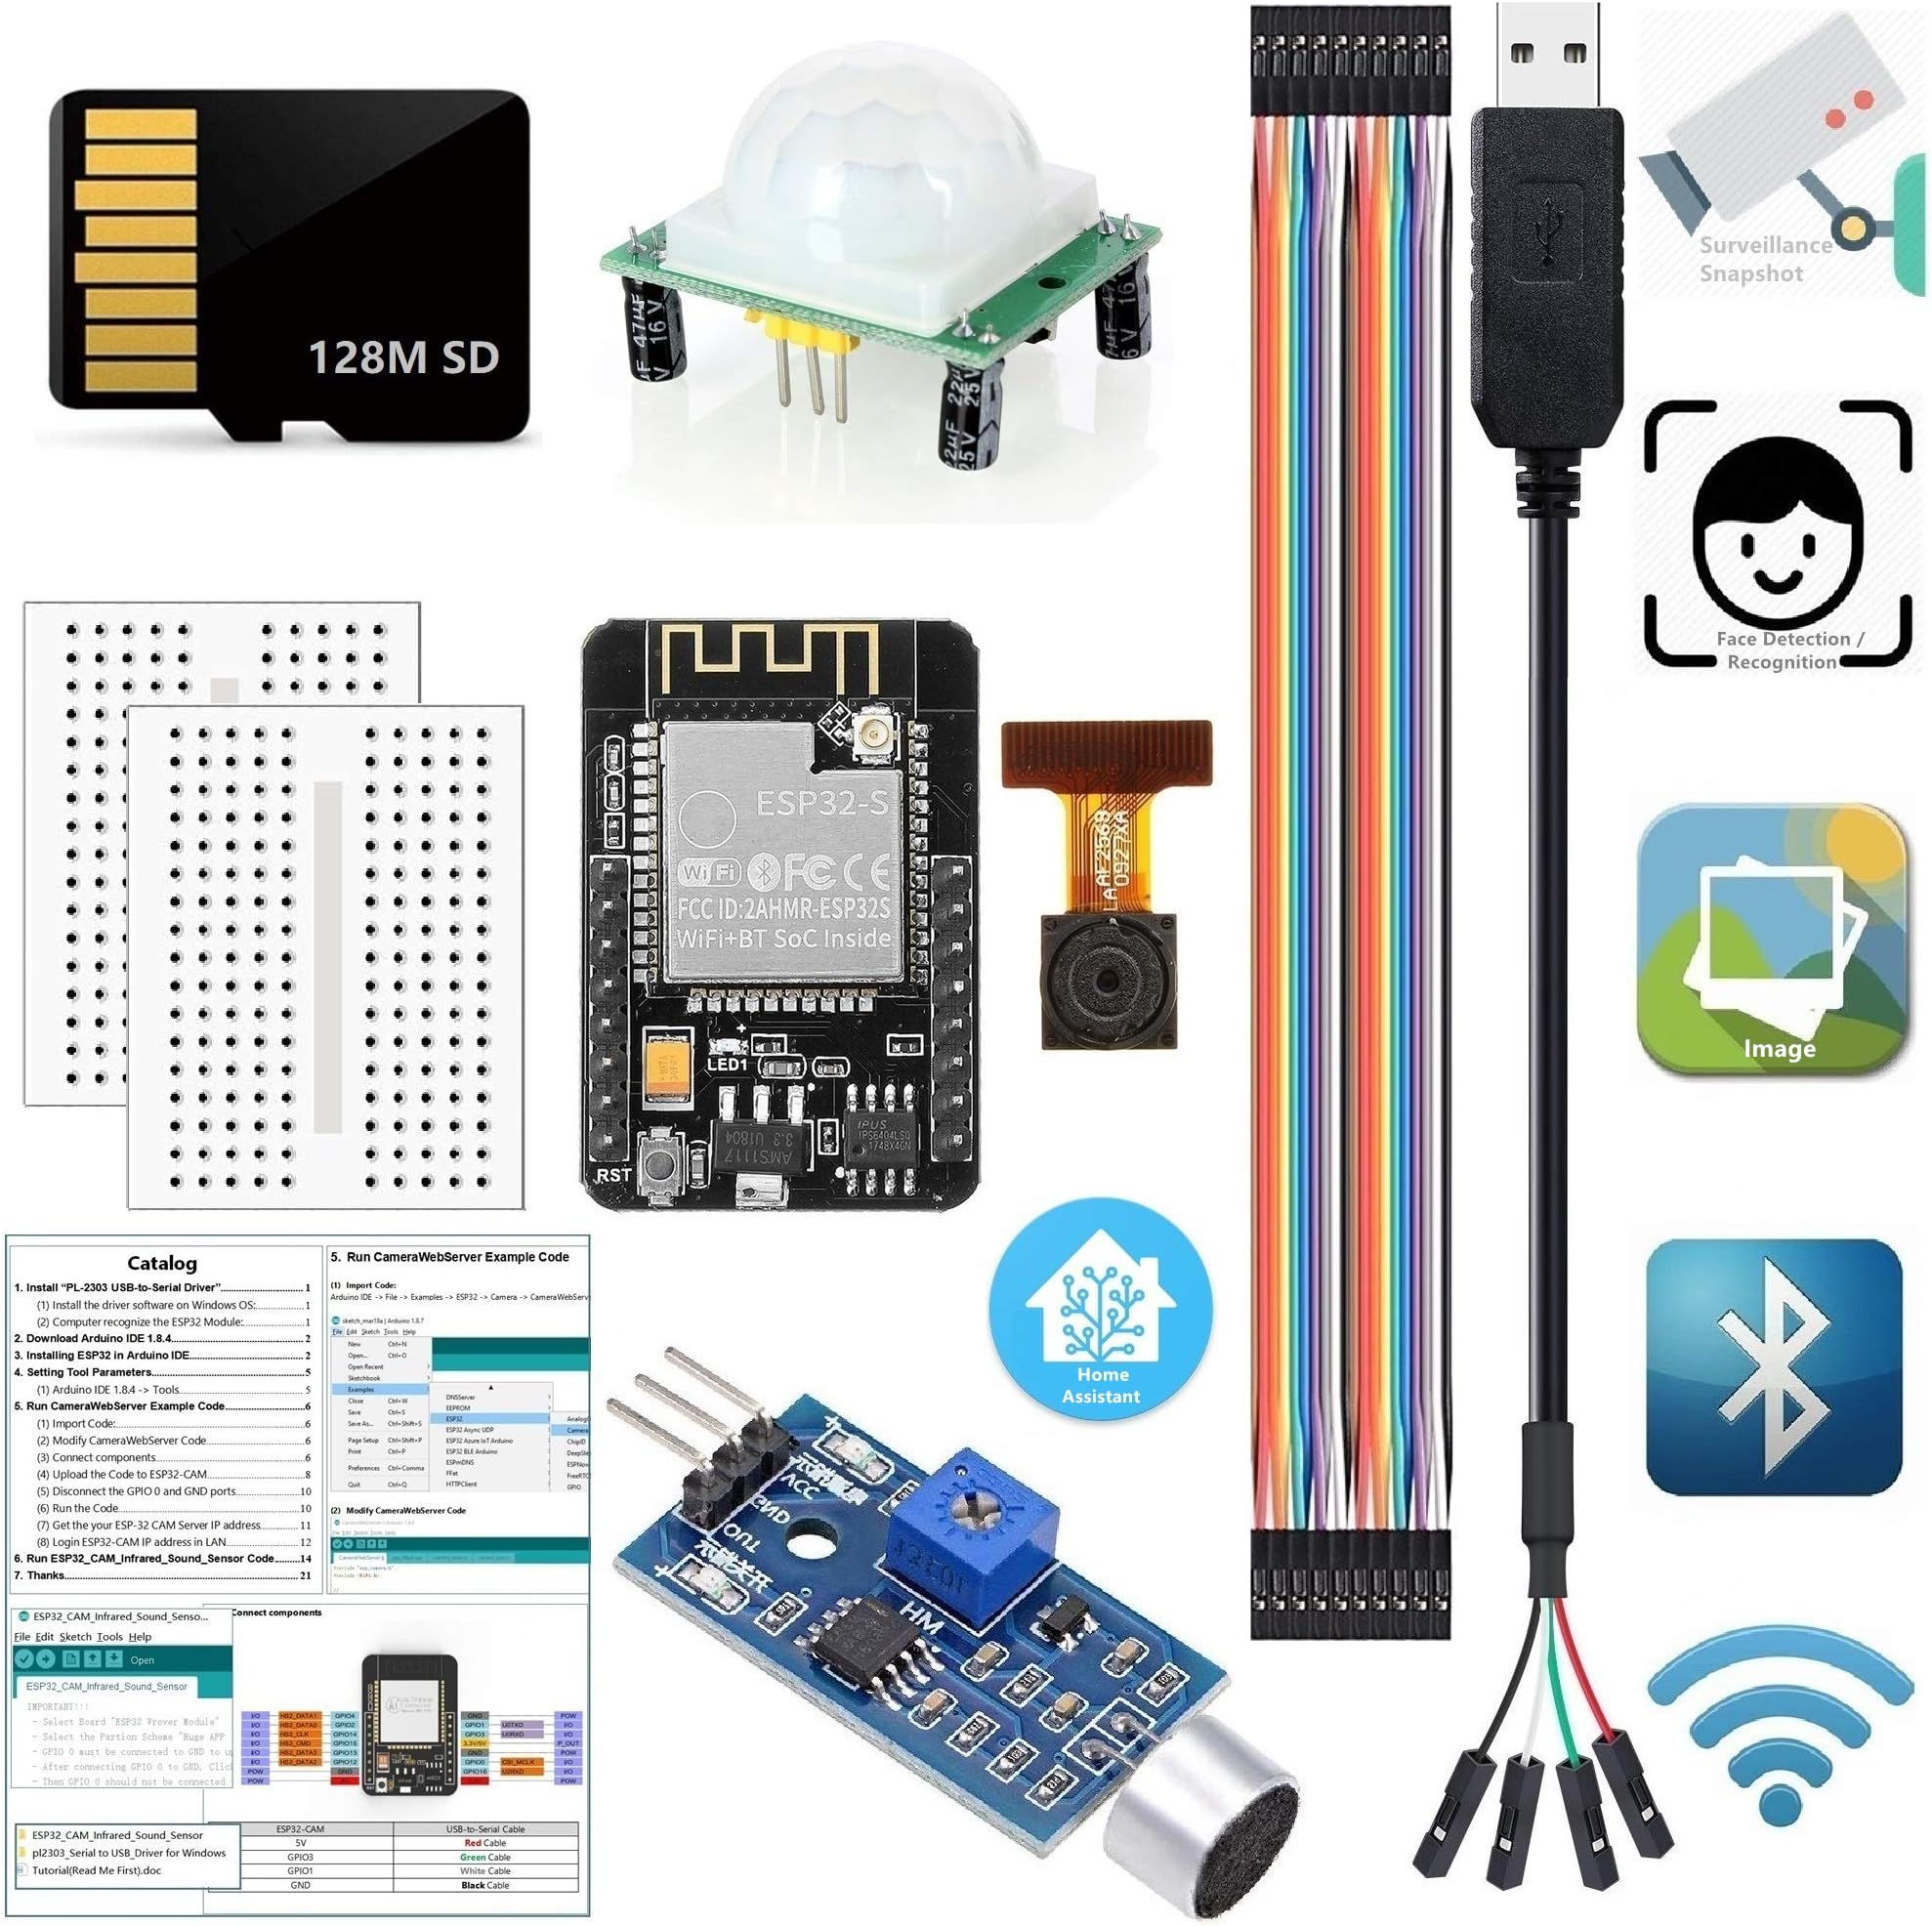
Go to the link on label inside the box. Takes you to a "GitHub" page. Download the "Guide Manual(Read Me First).doc" and the other two files (Green clone or download button). The guide manual has the 11 steps needed to get this working. They are more "reference" than "exact". If you are not comfortable with Arduino IDE process, you will struggle - I already had the IDE installed, and stuck with version 1.8.12 did not go back to 1.8.4 as they recommend - Step 1: I don't think the USB-To-Serial is needed (It got recognized on my Win 10 PC without it, that may be a PC specific need, it showed up in Device manager/ports). - I did need to add the "additional board manager URL's" in IDE/preferences - They did not have a Step 2 in the document - Step 3: I did not have to install the ESP8266Flasher.exe (The IDE handled the board nicely without it). - Step 4: Be careful here. The picture shows different versions of the components, which have different pinouts. - The DHT11 picture does not match the DHT11 provided, and the wiring in the picture does not match the DHT11 in the picture (I ended up using my own DHT11, that matched the picture, but adjusted the wiring to that version) - The OLED display in the picture has the Vcc/Vss pins in a different order than what was provided in my kit - The rest of the components wired up fine. Soldering the pins on the little boards was a pain - Steps 5/6: Setting up the accounts was fine, those website provide the instructions. Key is to get the API keys so you can have the SW interact with them - Step 7: The code uploaded fine when the esp8266-weather-station-master.zip library was imported. Just open the code from examples (I just used the basic WeatherStationDemo). Save as you own version, so you can make changes - It did not compile, there is an issue with the TimeClient.cpp file. I had to replace "return round(getCurrentEpoch() + 3600*myUtcOffset + 84600L)%85600L;" with "return round(getCurrentEpoch() + (3600*(long)myUtcOffset + 84600L)%85600L);" not sure if this is related to 1.8.4 vs 1.8.12 but myUtcOffset is a float not a long - If on the monitor you see repeated "HIGH" or "LOW" it means that it can't talk to the DHT11 (it can get stuck in an infinite loop). Check you cables, or disable the temp/humidity update call to see if you can get the rest to run - It does take a while to initialize the weather, so be patient Anyway, for $20 (pretty much the costs of the components), you can do quite a bit. It was my 1st experience with the ESP8266, it will not be the last
N**S
This package of products is not for the new user.
This package of products requires a specific tutorial that is only reveled after purchase. The quality of the tutorial is not for the new user. Where there should be links to a driver install, there is merely a description. Where there is a link, they don't work.
Z**E
missing SD card
there was no SD card in the box, everything else was in there but no SD card. also the link to the tutorial never worked and I sent a message to them with no answer.
C**E
J'adore les produits comme celui-ci ou tu fais un projet concret et que tu peux voir le fruit de ton travail !
D**S
The board is not working
I**R
The board is dead on arrival. Also the sensor had a component fall off due to poor soldering. The cost of me shipping this back to China is the same as what I paid for it, so I am out the money either way. Despite being offered a return, I will not be buying from this vendor again.
A**N
Board gets stuck in a boot loop when running the demo project using the camera. Flashes fine but the the cpu browns out and restarts when it tries to start the Wifi. Looks like they used cheap voltage regulators that can't handle the load of using the Wifi which is the point of the whole kit. Look for another vendor for the ESP32 cam.
E**A
Por falta de tiempo no he realizado el proyecto pero todo parece estar en orden. Gracias
Trustpilot
3 weeks ago
3 weeks ago